Kids love to play with clay. It gives them the freedom to build anything they want, squash it and start all over again to make something new. Plus, they love the way cool, soft clay feels in their hands. They’re allowed to get messy and let their imaginations soar.
In addition to being fun, there are several other benefits to clay-play as well, such as:
- Develops motor skills: Kids get to roll, squeeze, flatten, twist, pinch and punch clay. Creating with clay gives kids a whole-body experience where they use both large and fine motor skills.
- Builds thinking skills: Kids develop problem-solving skills when they think about what they want to build and how they are going to build it.
- Helps kids express their emotions: Playing with clay is therapeutic for both kids and adults. With clay, children get to express their emotions and turn their thoughts and feelings into tangible objects.
- Provides a multi-sensory experience: Playing with clay stimulates more than one of the senses. It allows children to touch, see and smell the clay. They can listen to clay, too, when they squish it between their fingers or tear it apart. We don’t recommend they taste clay, but polymer clay is non-toxic, so there’s no need to panic if they do. Sensory play is an important part of brain development because it encourages children to use their senses to problem-solve and create.
Kids can make a shape and continuously reshape the clay to their heart’s content. They can create their favorite cartoon characters or pretend they own a bakery — there is no limit to what a child can imagine and create with polymer clay.
Encourage your kids to put down their screens and enjoy hours of creativity with 10 fun clay craft ideas. These air-dry clay projects and polymer clay crafts for kids are ideal for preschool and elementary-age children and require minimal supervision.
What Our Polymer Clay Is Made Of
Our polymer clay is non-toxic and safe for children to use. However, we don’t recommend polymer clay for children under age eight, because the clay can stain surfaces so tables and work areas should be protected at all times.
So, what exactly is polymer clay? It’s basically a bendable plastic. More specifically, polymer clay is composed of polyvinyl chloride polymers, plasticizers and coloring agents. Our polymer clays can safely be baked in the oven between 250 and 285 degrees Fahrenheit, depending on the product. None of our products contain wheat, gluten, dairy, sulfur or latex.
Our Sculpey brand products are approved by the Art and Creative Materials Institute, which ensures only the highest-quality materials are used. Our children’s products also comply with the Consumer Product Safety Improvement Act.
To ensure greater safety, we recommend:
- Not overcooking clay
- Supervising children when they are using sharp clay-cutting tools
- Protecting the work surface with wax paper, aluminum foil or some other barrier
Besides being non-toxic, polymer clay is great for kids because it’s soft and easy to shape, and there are lots of bright, stimulating colors to choose from. Every child, no matter what their skill level is, can enjoy playing and exploring with polymer clay.
Clays and Tools for Young Crafters
Polymer clay, in general, is an excellent toy for kids. However, some types of polymer clay are better for detailed work like jewelry-making, rather than play. Before diving into your clay crafts, get prepared with recommended Sculpey® clays and tools to create countless projects at home or in the classroom:
- Sculpey Bake Shop: Sculpey Bake Shop is perhaps the best choice for young beginners. It is the least expensive Sculpey polymer clay available and stays soft until baked. It’s a great way to introduce kids to polymer clay, let them play and explore this medium.
- Original Sculpey: Original Sculpey comes in three classic clay colors – white, terra cotta and gray and has a ceramic feel. It is also inexpensive, soft and pliable, and Original Sculpey might be a fun choice for earthy projects or making simple shapes with kids.
- Sculpey III: Sculpey III is another outstanding choice for kids. It is soft, yet strong enough to hold detail. This brand of polymer clay is available in a variety of playful bright colors.
- Sculpey Bake Shop Light: Just as it sounds, Bake Shop Light clay is fluffy and pleasing to touch. It is airy and squishy, and kids can make their own colors by mixing different clays. It floats, too, so it’s the perfect choice for making boats, ducks or other bath-time toys.
- Bake Shop Glow-In-The-Dark: Kids will be so excited to shape creepy creatures, aliens from outer space or recreate a night sky with glow-in-the-dark Sculpey. Glow-in-the-dark Sculpey only needs a few minutes under a light to recharge. Kids can turn their whole room into a glow-in-the-dark wonderland in no time.
- Sculpey Air Dry Clay: Unlike our other polymer clay products, Sculpey Air dry clay does not require baking to harden. It might be the perfect choice for kids who want to make crafts from start to finish all on their own. It’s lightweight, durable and suitable for decorating with acrylic paint after it dries.
- Sculpey Non-Dry Clay: It never dries out and doesn’t require baking. Your child can have fun building and rebuilding different shapes and figures for hours. This clay is wax-based and sticks together, making it easy for children of all skill levels to create different easy clay figures.
- Sculpey Bake Shop Bendy Clay: Sculpey Bake and Bend lets kids make rubbery figures that won’t break after baking. This material is a good choice for children who want to create rubber dolls or other bendable toys.
- Sculpey Bake Shop Eraser Clay: Kids will be thrilled to design real erasers with Sculpey Amazing Eraser Clay. All they have to do is form a shape and bake to have a custom eraser they can use. They might be more excited about doing their homework, too!
- Oven-safe work mat: For polymer clay crafts, you can go from creating to baking in a snap using our innovative silicone Sculpey Tools™ Oven-Safe Work Mat.
- Kid-friendly tools: The Sculpey Bake Shop® Modeling Tools kit includes three essential plastic tools kids can use to safely cut, roll, texturize, shape and detail clay. Children can use pretty much anything to stamp clay with or to help them form or cut out shapes. However, we don’t recommend sharp or metal tools without supervision because of safety risks.
- Table covering: Before kids start any clay project, always protect their work surface with parchment paper or aluminum foil.
Fun Clay Crafts for Kids
There’s no limit to polymer clay activities kids can engage in. You can join them in their fun, too, and help them try out new ideas. For example, you can work with your child to create an educational clay project, like a model of the solar system or one that explains different animal species. Or you can work on holiday-themed projects together, to help create a unique gifts for friends and family!
Want to preserve memories? You can create pieces that feature handprints or make picture frames. Anything you can think of, you and your child can make it a reality with polymer clay.
Our squishy air-dry and polymer clays are perfect for small hands! Get inspired with 10 clay crafts for kids that can be adapted to fit lesson plans, individual interests and ability levels.
1. Snake Coil Pots
Kids love making super-easy coil pots! Young clayers enjoy rolling the clay into snake shapes and coiling colorful clay to build this serpentine bowl.
Roll a sheet of polymer clay and cut out a circle base. Roll two separate ropes of different colors. Twist the ropes together, then roll them into one cylinder of clay with a pointed “tail” end. Starting with the tail, wrap the snake around the base, build it vertically and add a hand-shaped snake head to finish.
Little kids who shape air-dry pots can add color to their dried projects with non-toxic paint.
2. Dinosaur Fossils
If you’re a teacher looking for easy clay crafts to make in the classroom, these realistic “fossils” are a hit with students! You’ll need:
- Plastic ferns and flowers
- Small plastic dinosaurs
- Sculpey Air-Dry™ Modeling Clay
- Acrylic paint
Roll a small ball of clay and flatten it into a rounded “rock” shape as your fossil base. Gently press plastic foliage into the clay surface, then imprint the dinosaur. After the project dries, water down stone-colored paint and brush the glaze over the entire fossil. Wipe some glaze from the surface with a paper towel, leaving the darkest color in the recesses for an aged look.
3. Flower Trinket Dishes
Botanical bowls make the perfect gift for teachers, mothers, grandmothers and loved ones. To make the dishes, roll a simple clay ball, smash your thumb in the center, then hand form the petaled bowl shape. Add a black center for a poppy or sunny yellow centers for peonies.
This craft is eye-catching and educational! Make clay time a color-wheel teaching moment — roll primary colors for red, blue or yellow flowers, or mix clays to make secondary colors for purple blossoms and green leaves. You can even mix glitter into the clay for a fairytale effect!
4. Succulent Pinch Pots
Adults love these tiny textured pots just as much as kids! Make a collection of mini-planters with your little ones in one afternoon using simple supplies:
- Small plastic cups or plant pots
- Sculpey Air-Dry™ Modeling Clay
- Sculpey Bake Shop® Modeling Tools — roller, knife and rounded indent tool
Roll a sheet of air-dry clay and use the plastic knife to cut pieces to surround each cup. Wrap and pinch the clay around cups, then smooth joints. Push the indent tool into the clay to create a dimpled pattern. Once dry, add artificial or real succulent plants.
5. Leaf Impression Keepsakes
Take your kids on a nature walk and help them pick out their favorite fallen leaves with raised veins. Children can learn about different leaf shapes and trees while turning nature into art!
Roll air-dry clay into a slab about a half an inch in thickness. Gently push leaves one at a time into the clay, then cut out organic shapes around each leaf and smooth the edges. Punch holes to turn them into ornaments or gently shape them into ring dishes. When dry, kids can paint the impressions to match the colors of the original leaves.

6. Fairy and Gnome Homes
Let your kids’ imaginations soar with a clay project guaranteed to encourage hours of play — adorable fairy houses! Because this project includes different materials pressed into the clay and can’t be baked, use air-dry clay for best results.
Shape a thick clay base for the house, either round or rectangular. Connect clay slabs to the base and each other as walls. Cut holes for windows and a door, add a roof and decorate! Kids can embed all kinds of elf-sized details into their houses:
- Sticks
- Beads
- Pasta
- Glitter
- Leaves
- Buttons
- Pebbles
- Seashells
- Dried beans
- Acorn caps
- Dried flowers
7. Rainbow Crayon Holders
Kids can’t get enough of this vibrant crayon caddy project for their art station or classroom desk! Form Sculpey Air-Dry™ Modeling Clay into a semicircular shape on a flat work surface. Roll the top flat to a 1-inch thickness. Stand up the project so the flat rainbow bottom rests on the table.
Push in a crayon along the curved top part of the rainbow to create evenly spaced holes. Reinsert and gently wiggle the crayon in the holes to expand them slightly for fit. After the clay drys, paint a rainbow on each side, insert your crayons and have fun coloring!
8. Cookie Cutter Ornaments
Bring the cozy feeling of cookie making to craft time by making embossed ornaments! Roll a large sheet of air-dry clay and texturize the surface with a variety of materials:
- Embed various patterns using Sculpey Tools™ Geometric and Nature Texture Sheets.
- Use rubber stamps to imprint designs, words and holiday-themed images on the clay.
- Press woven materials into the clay — an old cable knit wool sweater, basket, jute rug or doily.
Kids can cut out textured ornaments using plastic cookie cutters or, with supervision, our wide variety of Sculpey Tools™ Cutters. Poke holes at the top with straws, bake and add ribbon!
9. Marbleized Beads
Make kid-friendly marbled-bead accessories with Sculpey Bake Shop® polymer clay! Roll clay ropes in three different colors, then twist the ropes together into one clay cylinder. Roll the twisted clay cylinder into a smooth rope and slice even pieces for the beads. Roll and twist each piece again, then roll each piece into a ball to form beads.
Pierce bead holes using a toothpick. Ensure the holes are wide enough to accommodate the cording you plan to use. Bake beads according to package instructions and then string the cooled beads onto satin cords to make bracelets, necklaces and keychains.
10. Galaxy Pencil Cups
With adult supervision, young clayers can make out-of-this-world polymer clay pencil cups at home. Glowing containers corral pencils, pens, clay tools and paintbrushes in style! You’ll need:
- Sculpey Bake Shop® polymer clay
- Sculpey Tools™ Mini Metal Geometric Cutters
- Thick glass tumblers
- Glitter
- Roller
Twist long ropes of black, purple and blue clays together, then spiral the cylinder into a pinwheel. Sprinkle glitter, roll clay flat into a marbled sheet and wrap the tumbler in clay. Then roll a sheet of glow in the dark clay, cut out mini-stars and decorate. Bake per package instructions — because the temperature is low, the glass won’t crack.
11. Sculpey Bake Shop Transfer Magnets
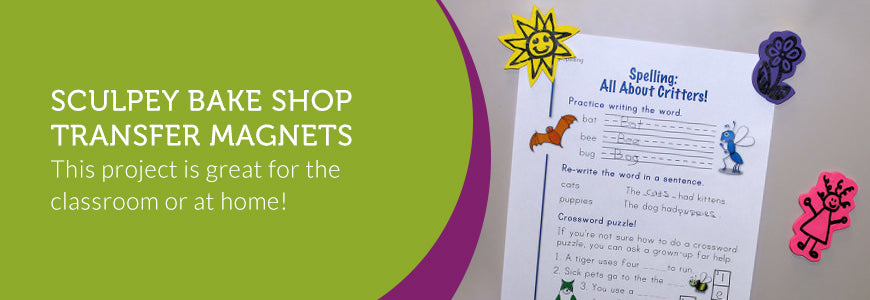
Kids will have a blast transferring their own hand-drawn images to clay and then turning them into magnets using Sculpey Bake Shop. They’ll be amazed by the process, and they can create entire magnetic worlds and characters to play with. It’s easy, and it makes hanging homework assignments on the fridge a lot more fun. This project is great for the classroom or at home. Here’s what you’ll need:
- Sculpey Bake Shop Variety Pack
- Sculpey Acrylic Roller
- Sculpey Modeling Tools, 4-pack
- Computer paper
- Access to a scanner and a laser printer
- 72 percent rubbing alcohol
- Cotton balls
- Plain white paper
- Magnets
- White glue
- Scissors
Here’s what you’ll do:
- Scan black-and-white drawings and print them out on a toner-based printer, like a laser printer.
- Pinch off a small portion of clay of your chosen color.
- Knead the clay until it is soft.
- Flatten the ball of clay and place it on a sheet of paper.
- Use the acrylic roller to flatten the ball to 1/4 to 1/8-inch thickness.
- Cut out the printed images, or transfers, leaving some white around the image.
- Place each image face-down onto a flattened piece of clay.
- Dampen a cotton ball with rubbing alcohol and sweep it across the transfer quickly.
- Make sure the entire transfer is covered with the alcohol. It should be wet enough to see the image through the paper, but not too wet.
- Allow the alcohol to evaporate for a couple of minutes until it looks dry again. Redampen.
- Wait until it’s almost dry again, then carefully peel the transfer off of the clay.
- Use the Sculpey knife tool to cut the images out of the clay.
- Preheat oven to 275 degrees F.
- Lay the images on a baking sheet.
- Bake according to package directions.
- Once the images are cooled, glue magnets to the backs.
12. Sculpey Keepsake Handprint Ornament
A Sculpey Keepsake Handprint Ornament is the perfect project for Mother’s Day, Father’s Day or any day of the year. A handprint ornament makes a wonderful gift, and it is also something your child can cherish for many years. All you need to get started is our Sculpey Keepsake Deluxe Handprint Kit. Once you have the kit, here is what you will do:
- Start with clean hands and a clean work surface. Use wax paper, foil, metal or glass to protect the work area.
- Preheat the oven to 275 degrees F.
- Knead the clay for two minutes.
- Form a smooth ball and place the ball in the middle of the ring.
- Flatten the ball until it fills the ring.
- Using the roller, roll the clay in the ring until it is even and smooth.
- Gently push the clay from the bottom sides until it comes out of the ring.
- Make sure your child’s hands are washed and dried.
- Leave room on the bottom or side of the clay to put your child’s name and date.
- Press your child’s hand firmly into the clay. You can use a foot for a footprint instead.
- Use the pointed end of the detail tool to make two holes at the top of the ornament for a ribbon.
- Use the detail tool to add your child’s name and date. You can also write the name and date with permanent marker after baking instead.
- Put the ornament on a baking sheet and bake for 30 minutes.
- After baking, allow the ornament to cool and then add the ribbon.
You can add all kinds of creative details when the ornament is finished baking and has cooled. For example, you can use acrylic paint to add more color or add glitter to make the ornament sparkle and shine.
13. Bake Shop Light Ice Cream Cone Pen
Get your child excited to write with a pen that looks like an ice cream cone. Just try not to make it too realistic, or they might be tempted to take a bite.
An ice cream cone pen is fun, easy and turns an ordinary old pen into a sweet treasure. Kids will love to add their own “toppings” or use their favorite flavors.
If your child doesn’t want an ice cream pen, that’s no problem, either. Lightweight clay makes it easy to turn a pen into anything your child wants, whether it be animal-shaped or decorated like a slice of pizza. With Pluffy, anything their heart desires is within their reach. Here’s what you’ll need to get started:
- Bake Shop Light multipacks in Pastel, Brights and Primary colors
- Sculpey Clay Conditioning Machine
- Sculpey Modeling Tools, 4-pack
- Bic pen
- 3.5-inch Circle Cutter
- Pliers
Here’s what you and your child can work on together:
- Remove the ink cartridge from the pen with pliers and set aside.
- Mix beige and brown in even parts to form a 1 to 1/8-inch ball.
- Shape into a thick log and press the pen through it.
- Form into a cone shape around the pen.
- Put the clay conditioning machine on setting number four.
- Mix beige and brown to create more light-brown clay.
- Pass the light brown mixture through the conditioning machine.
- Use the circle cutter to cut out a circle.
- Create a waffle pattern in the circle shape using a modeling tool.
- Fold the waffle-patterned piece around the cone shape.
- Preheat the oven to 275 degrees F.
- Place the cone on a baking sheet and bake according to package instructions.
- Allow cooling after baking.
- Cut small pieces of brown clay for chocolate chip pieces.
- Cut up tiny pieces of red clay for strawberry pieces.
- Bake the brown and red pieces according to package instructions, and let cool.
- Form two 1 1/8-inch balls of lime green and pink.
- Form a one-inch beige ball
- Stretch bottoms of both the pink and beige balls to create a dripping look.
- Flatten the bottom of the lime green ball.
- Center the lime green ball over the pen on top of the cone, and push through, followed by the pink ball and beige ball. Gently press together.
- Form a 1/4-inch red ball for the cherry.
- Press the cherry on top.
- Decorate the lime green ball with chocolate pieces and the pink ball with strawberry pieces.
- Bake according to the package instructions.
- Allow the cone to cool and reinsert the pen cartridge.
14. Bake Shop Light Pencil Cup
A Pencil Cup is super easy to make and is a great choice for the beginning clay-crafter. Kids can familiarize themselves with Pluffy when they make this pencil cup. Once they realize how fun and easy polymer clay is to use, they’ll want to move onto the next project. Maybe they’ll want to make an ice cream cone pen next to go with their new colorful pencil cup. Just make sure you’re around when it comes time to trim the clay with the craft knife. All you need to get started is:
- Pluffy Multipack — Tropical
- Paint can or soup can
- Craft knife
Here’s what you’ll do:
- Roll eight to 10 snakes of each color that are about five inches long and 1/4-inch thick.
- Arrange the colors around the can vertically, alternating colors.
- Press them gently into the can.
- Trim off excess clay with the craft knife.
- Preheat the oven to 275 degrees F.
- Bake the can according to package instructions.
- After the pencil cup is cool, help your child pick out favorite pens and pencils to fill it with.
15. Sculpey Treasure Box
Kids love special boxes to store their tiny treasures. Whether a child wants a box to hold jewelry or to hide magical stones they find on a nature hike, a box keeps beloved objects all in one place.
We are are going to show you how to make a Sculpey III Dino Treasure Keeper Box. This personalized box is perfect for both girls and boys who love dinosaurs and even features a window to peek in on the adorable clay dinosaur inside. You can easily customize the instructions to suit the tastes of your little clayer. If they wish to have a butterfly box instead, for example — no problem! Have fun, play around and enjoy this neat little treasure box. Here’s what you’ll need to get started:
- Sculpey III clays: Sky Blue, Granny Smith, Emerald, Tan, Turquoise, Elephant Gray, Red, Black, White
- Wooden window box
- Sky blue and tan acrylic paint
- Toothpick
- Paintbrush
- Craft knife
- Glue
Here’s how to prepare the box:
- Paint the inside of the box sky blue. It may need two coats.
- Paint the window insert a tan color.
- Allow both to dry completely before adding clay to the box.
Next, take these steps to make the dinosaur figure:
- Roll a dime-sized ball of Sky Blue clay for the body.
- Flatten the ball and form an oval shape.
- Make sure it fits into the window area nicely.
- Roll a small blue ball for the head.
- Use a craft knife to make a mouth.
- Attach the head to the body.
- Roll a small blue ball to form the tail.
- Flatten and shape into a triangle.
- Press the tail onto the body.
- Roll out a 1/8-inch diameter snake of Granny Smith clay.
- Slice the snake into 5 equal pieces.
- Form the pieces into triangles.
- Attach to the dinosaur’s back to create its spikes.
- Roll a 1/16-inch diameter snake of Turquoise clay.
- Cut into 5 equal pieces.
- Roll the pieces into small balls.
- Press the balls onto the dinosaur’s body for spots.
- Make a tiny white ball for the eye.
- Press the white ball onto the head.
- Add a tiny black piece of clay to the center of the eye.
- Set the dinosaur on a baking surface.
Now, prepare your child’s name for the box and other decorations:
- Roll out a 1/8-inch diameter snake of Tan clay.
- Cut pieces and form letters of the name you wish to create.
- Place the letters on the baking surface.
To make clouds for the box:
- Roll 8 small balls of white clay and flatten.
- Form into oblong shapes.
- Use a toothpick to add a textured look to the clouds.
- Place clouds on the baking surface.
To make birds:
- Roll out 1/16-inch diameter snake of Black clay.
- Cut into two 1/2-inch pieces.
- Form points on each end of each piece.
- Use the toothpick to bend the center of each piece.
- Place birds on the baking surface.
To make hills:
- Roll 8 balls of Granny Smith clay.
- Make different sizes for a variety of hills.
- Flatten and form into hill shapes.
- Press on the box to make adjustments to size and determine placement.
To make palm trees:
- Roll three 3/16-inch by 3/4-inch diameter snakes of Tan clay to form a tree trunk.
- Cut into three pieces to make three trees.
- Flatten and use the toothpick to carve lines and create a bark look.
- Roll 15 equal-sized ovals of Emerald Green clay for the treetops.
- Flatten green pieces.
- Use the toothpick to create a leaf pattern on each piece.
- Arrange each leaf on top of each tree with 5 leaves per tree.
To make decorative leaves:
- Roll 21 small balls of Emerald Green clay.
- Form into oblong shapes and flatten.
- Point each end.
- Press rounded ends of 3 leaves together.
- Use the toothpick to draw a line down each leaf.
To make the volcano:
- Roll a 1/2-inch wide ball of Elephant Grey clay.
- Form into a mountain shape with a flat top.
- Use the toothpick to create vertical lines down the mountain.
- Roll a 1/4-inch ball of Red clay.
- Form into an oblong shape.
- Press on top of the volcano and pull it down slightly to make it look like lava.
With all your pieces shaped and ready, it’s time to create the clay scene for the outside of your box and get ready for baking. Here’s how:
- Preheat the oven to 275 degrees F.
- Make a scene one-side-of-the-box at a time.
- Place each scene panel onto the baking surface.
- Bake the 4 scenes, plus the separate birds, name letters, dinosaur and clouds according to package instructions.
- Allow scene and pieces to cool before attaching to the box.
To finish the treasure box:
- Glue the dinosaur onto the window insert.
- Glue the letters on top of the front of the box.
- Glue the scene panels onto the lower side of the box.
- Glue the birds and clouds on the box where you wish.
- Allow everything to dry overnight.
Additional Kinds of Clay Projects to Try With Your Kids:
Here are just a few kids’ polymer clay ideas to help inspire fun clay creating with kids.
Toys:
- Dolls
- Figures
- Animals
- Fantastic creatures
- Tea set
- Cars, planes or boats
- Finger puppets
- Tic-tac-toe
- Magic wands
- Stick puppets
Holiday:
- Ornaments
- Figurines
- Dioramas
- Greeting cards
- Snowglobe figurines
- Halloween dragon claws
Nature:
- Leaf or flower imprints
- Flowerpots
- Windchimes
- Birdhouse
- Animal footprints
Decorative:
- Pencil holders
- Trays
- Mosaics
- Flowers or plants
- Magnets
- Pinch pots
- Mobiles
- Coasters
- Transform other items with clay
- Light switch cover
- Polymer clay scene jar
- Napkin rings
- Collages
- Pencil toppers
- Bookmarks
- Backpack charm
Keepsakes:
- Picture frames
- Jewelry or clay beads
- Handprint, fingerprint or footprint keepsakes
- Clay self-portrait
You can add sparkle, paint or other elements to projects, too. Some additional items you might use with polymer clay include:
- Popsicle sticks
- Glitter
- Magnets
- Rope
- String
- Jewels
- Pipe cleaners
- Acrylic paint
- Metallic paint pens
- Googly eyes
- Foil
A Few Quick Tips
Before you get started on one of the above projects or any polymer clay crafts for kids, we suggest keeping the following tips in mind.
- Don’t use too many colors: Try to stick with only a few colors at first. Young ones tend to mix lots of different colors, which produces a muddy color. So, keep it simple in the beginning.
- Keep polymer clay away from a heat source: Polymer clay will cure, or harden, at a low heat, so store projects or leftover clay away from heaters or windows.
- Protect work surfaces: Create a workspace by covering a surface with wax paper or aluminum foil to help protect furniture from polymer clay.
- Clean hands first and between colors: Always wash hands with soap and water and dry before working with clay. Wash or use baby wipes to clean hands when switching between clay colors.
- Prepare clay for crafting: It’s recommended to knead clay or use a clay conditioning machine or pasta machine before each project to make sure clay is soft, smooth and ready for crafting.
- Guide children through the process: Kids will be so excited to make a new craft with polymer clay, and they will look forward to working on a project with you. Guide them through different steps until they build their claying skills and confidence. Soon, they’ll be able to complete many projects on their own. However, they can explore and experiment with polymer clay anytime at any level.
- Follow baking instructions carefully: Make sure to follow package instructions exactly as they say because baking a project too long or for too little at the wrong temperature can ruin it. That’s the last thing we want to happen after all the fun you and your child had creating your masterpiece.
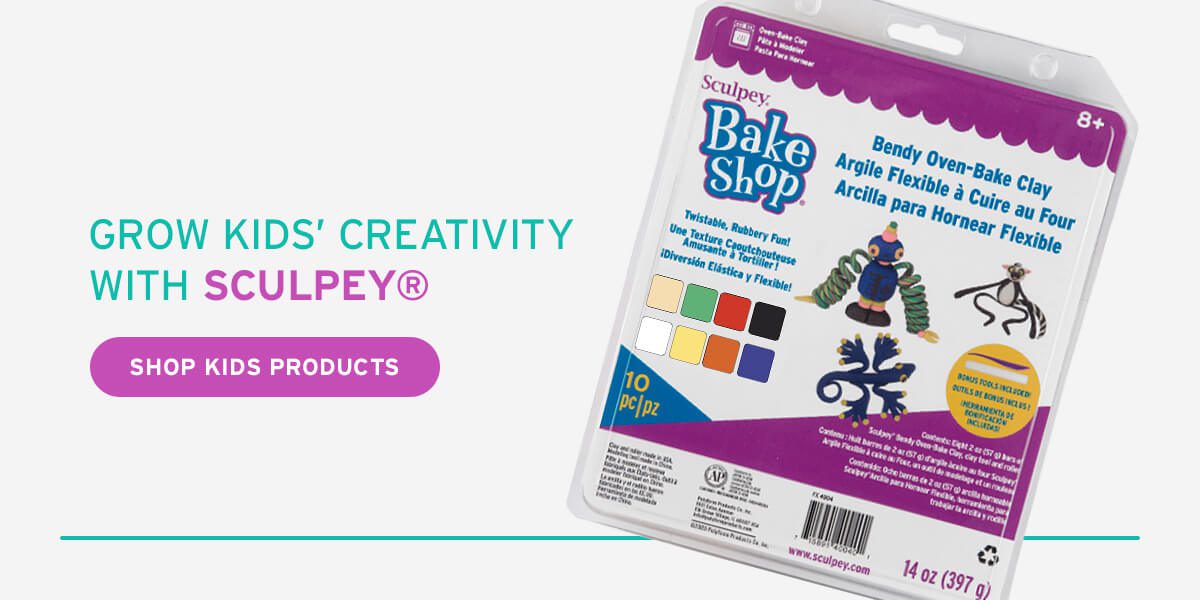
Grow Kids’ Creativity With Sculpey®
It’s no surprise parents, teachers and young creatives choose Sculpey® as their go-to craft resource! Shop our non-toxic clays, imaginative project kits and plastic tools that are safe and easy to use for kids at any skill level.
If you’re looking for even more kids’ project ideas, visit our Sculpey® Kids Page and find inspiring step-by-step crafts on our How-To page!