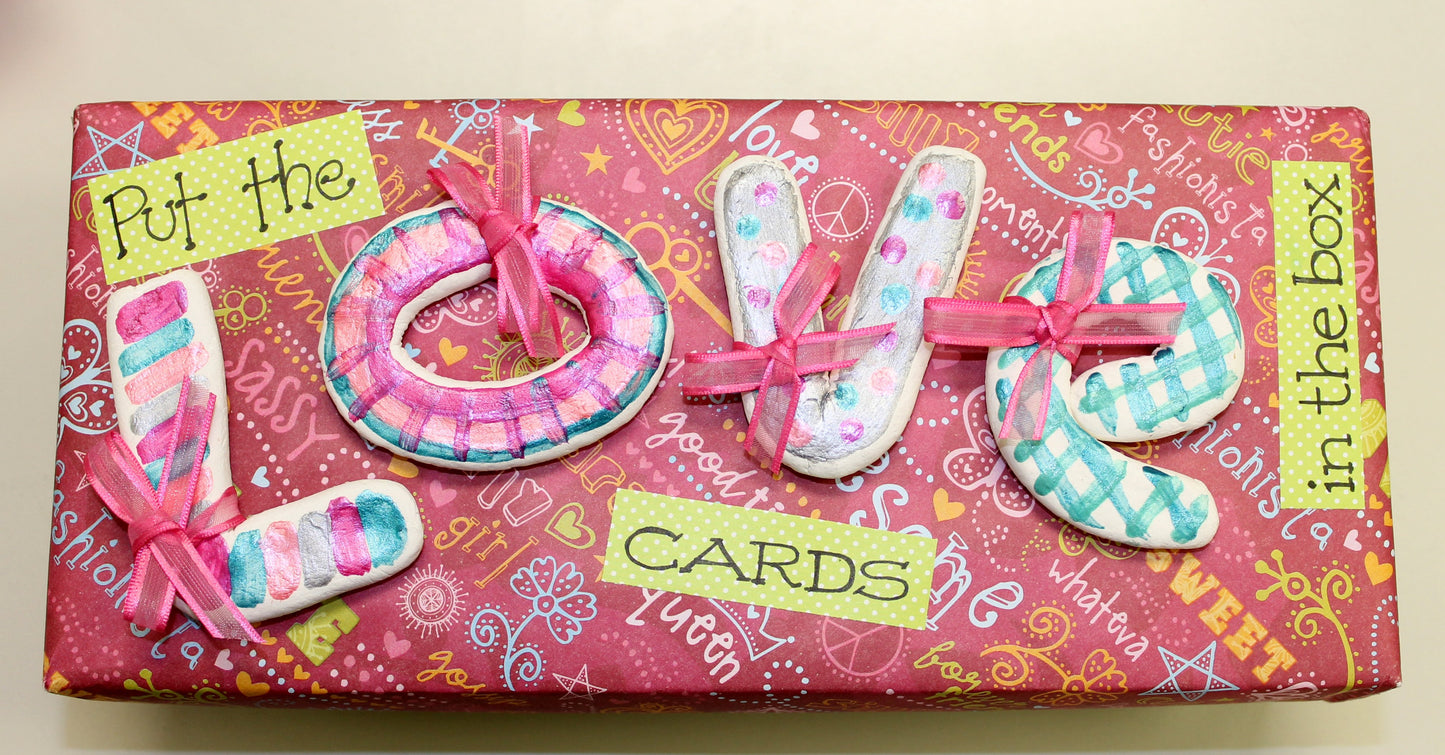
UltraLight® Valentine’s Day Card Box
UltraLight® Valentine’s Day Card Box
Read More
Make this adorable card box just in time for Valentine's Day! It's easy to customize to your favorite colors, and will be a hit in any classroom.
Read Less
ADDITIONAL SUPPLIES
3 Sheets of coordinating Scrapbook paper
Scrapbook roller adhesive
Shoebox
Various colors of Acrylic paint
Small paint brush
Scissors
Strong White Craft Glue
Ribbon|3 Sheets of coordinating Scrapbook paper
Scrapbook roller adhesive
Shoebox
Various colors of Acrylic paint
Small paint brush
Scissors
Strong White Craft Glue
Ribbon

Project Instructions
Getting Started: Polymer clay may stain. CLAY MAY DAMAGE UNPROTECTED FURNITURE OR FINISHED SURFACES. DO NOT USE polymer clay on unprotected surfaces. We recommend working on the Sculpey® Clay Mat, wax paper, metal baking sheet, or disposable foil. Start with clean hands and work surface area. Knead clay until soft and smooth. For best results, clean your hands in between colors. Shape clay, pressing pieces together firmly. Bake on oven-proof glass or metal surface at 275°F (130 °C) for 15 minutes per ¼" (6 mm) thickness. For best baking results, use an oven thermometer. DO NOT USE MICROWAVE OVEN. DO NOT EXCEED THE ABOVE TEMPERATURE OR RECOMMENDED BAKING TIME. Wash hands after use. Baking should be completed by an adult. Begin by preheating oven to 275 °F (130 °C). Test temperature with oven thermometer for perfectly cured clay. For best results, condition all clay by running it through the Clay Conditioning Machine for several passes on the widest setting. Fold the clay in half after each pass and insert the fold side into the rollers first.
Form the “LOVE” letters using Sculpey Ultralight: The letters used on this box are about 2” in height. For each letter tear off a small amount of Sculpey Ultralight, and form into a coil about 4” wide. Flatten the coil to about ¼” inches thick. Form the letters using the flattened coil. Repeat for each letter. Round cut edges for a smooth look. Bake according to directions above.

Cover your shoe box: You will need one sheet of scrapbook paper for the top of the box, and one piece for the bottom of the box. Adhere the scrapbook paper to the shoebox using tape.

Paint your letters: Once your LOVE letters have baked and cooled, decorate them with using acrylic paint. Any design or pattern works—be creative!

Add ribbon to your letters: Use the ribbon to make a bow on each of the letters. Secure ribbon with hot glue.

Attach the letters to the box: Using the White craft adhesive, glue each of the letters to the top of the box. Allow to dry.
Add some cute wording to your Valentine Box: Using small pieces of scrapbook paper, write a cute saying to include on your shoebox. We used “Put the cards in the box”, but you can write anything that makes you happy! Secure wording to box using tape or glue.

Getting Started: Polymer clay may stain. CLAY MAY DAMAGE UNPROTECTED FURNITURE OR FINISHED SURFACES. DO NOT USE polymer clay on unprotected surfaces. We recommend working on the Sculpey® Clay Mat, wax paper, metal baking sheet, or disposable foil. Start with clean hands and work surface area. Knead clay until soft and smooth. For best results, clean your hands in between colors. Shape clay, pressing pieces together firmly. Bake on oven-proof glass or metal surface at 275°F (130 °C) for 15 minutes per ¼" (6 mm) thickness. For best baking results, use an oven thermometer. DO NOT USE MICROWAVE OVEN. DO NOT EXCEED THE ABOVE TEMPERATURE OR RECOMMENDED BAKING TIME. Wash hands after use. Baking should be completed by an adult. Begin by preheating oven to 275 °F (130 °C). Test temperature with oven thermometer for perfectly cured clay. For best results, condition all clay by running it through the Clay Conditioning Machine for several passes on the widest setting. Fold the clay in half after each pass and insert the fold side into the rollers first.
Form the “LOVE” letters using Sculpey Ultralight: The letters used on this box are about 2” in height. For each letter tear off a small amount of Sculpey Ultralight, and form into a coil about 4” wide. Flatten the coil to about ¼” inches thick. Form the letters using the flattened coil. Repeat for each letter. Round cut edges for a smooth look. Bake according to directions above.

Cover your shoe box: You will need one sheet of scrapbook paper for the top of the box, and one piece for the bottom of the box. Adhere the scrapbook paper to the shoebox using tape.

Paint your letters: Once your LOVE letters have baked and cooled, decorate them with using acrylic paint. Any design or pattern works—be creative!

Add ribbon to your letters: Use the ribbon to make a bow on each of the letters. Secure ribbon with hot glue.

Attach the letters to the box: Using the White craft adhesive, glue each of the letters to the top of the box. Allow to dry.
Add some cute wording to your Valentine Box: Using small pieces of scrapbook paper, write a cute saying to include on your shoebox. We used “Put the cards in the box”, but you can write anything that makes you happy! Secure wording to box using tape or glue.


