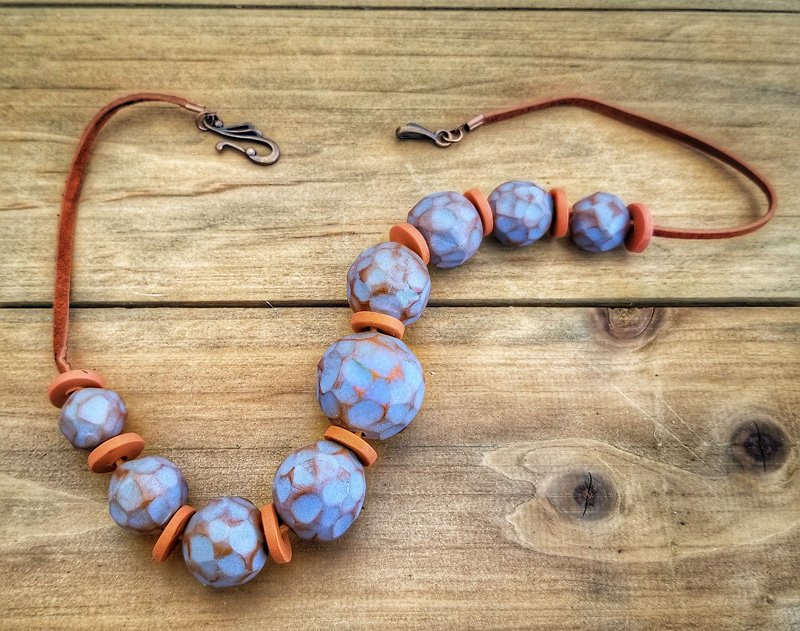
Souffle Rustic Faceted Bead Necklace
Souffle Rustic Faceted Bead Necklace
Read More
Souffle clay is so easy to carve! I do my carving BEFORE I bake which makes it even easier!
Design by syndee holt
Read Less
ADDITIONAL SUPPLIES
Have on hand: Pan Pastels (I’ve used Burnt Sienna); small foam wedge for applying the pastels; Golden Matte Glaze; brush for glaze; about 22 inches of leather cord; ring, pliers; drill to enlarge bead holes; antique gold cord crimps (2); 6mm antique gold jump rings (2); antique gold clasp;

Project Instructions
- Getting Started:
Start with clean hands, unwrap and knead clay until soft and smooth, or condition by running clay though a Pasta Machine. We recommend using a designated machine for clay purposes only. When working with multiple colors, clean hands with soap and water or baby wipes (we have found that baby wipes work best) before switching colors. Shape clay, pressing pieces firmly together. Wash hands after use.
- Baking:
Roll out a sheet of the conditioned Bluestone clay on the widest setting on the clay conditioning machine. Use the largest circle cutter to cut out the center bead. Gather the circle of clay into a rough ball and roll loosely in your cupped hands to create a round ball. Set aside. Repeat this process with the next four smaller cutters, creating two each of that size.

Now the fun part! One of the great parts about Souffle (I think) is that it “rests” quickly, so the ball will be easier to handle once they rest. Put a sheet of paper down on your work surface (to gather all the tiny pieces easier), use the end of the Super Slicer blade to cut small pieces of the bead off to create the carved facets. I work on one side and then turn to another side so I don’t get a “directional” thing going on. I focus on slicing in between two other previous slices. Repeat for all your beads.

Once the beads are completed, use the super sharp needle tools from the Sculpey Bead Baking Rack to make the first holes in the beads. Twist the needle gently through the bead, do NOT push! Once you feel that it is almost through the other side, turn the bead around the complete the hole from that side (this makes a cleaner hole). Leave the bead on the needle and repeat this process with the other beads.

Use the small foam wedge to gently brush the Burnt Sienna Pan Pastel on the seams of the facets. (TIP: If you get too much on, use a small piece of scotch tape to remove it). I find it easier to do this on the needle tools so that I’m not handling those beautiful facets! Put all the loaded needle tools on the baking rack and back according to the directions in Step 1.

While my faceted beads were baking, I decided to create some spacer beads for in between the beads. I just rolled out a small sheet of conditioned Souffle Cinnamon on the same setting we used before. Then I cut out several small circles using the circle cutter from the Mini Cutters Geometric set. Finally, I used the smallest Etch m’ Pearl to press out the middle of each circle (this will allow for the leather cord to thread through). Bake these according to the directions in Step 1. (NOTE: I baked these while I completed step 7- you can bake them at the same time as the beads if you have room in your oven)

While the Cinnamon spacer beads bake, increase the size of the holes in the fully baked and cooled faceted beads. I used the original hole as a guide hole for my larger drill bits. Souffle is so easy to drill, you should have no problem! I drilled one bead and checked to see if the leather cord I had selected would easily pass through it before I drilled all the beads (Hmm, seems I’ve FINALLY learned a lesson! Lol) I used this time to also brush a very light coat of diluted Matte lacquer on the faceted beads.

Once your spacer beads have baked and cooled, you can assemble your beads on the leather cord.

The final step is to attach your findings. I use these leather cord crimps to attach the findings. Just position the cord and use your jewelry pliers to firmly press down one side and then the other. No glue needed! Add your jump rings and clasp findings and your new necklace is ready to go!


