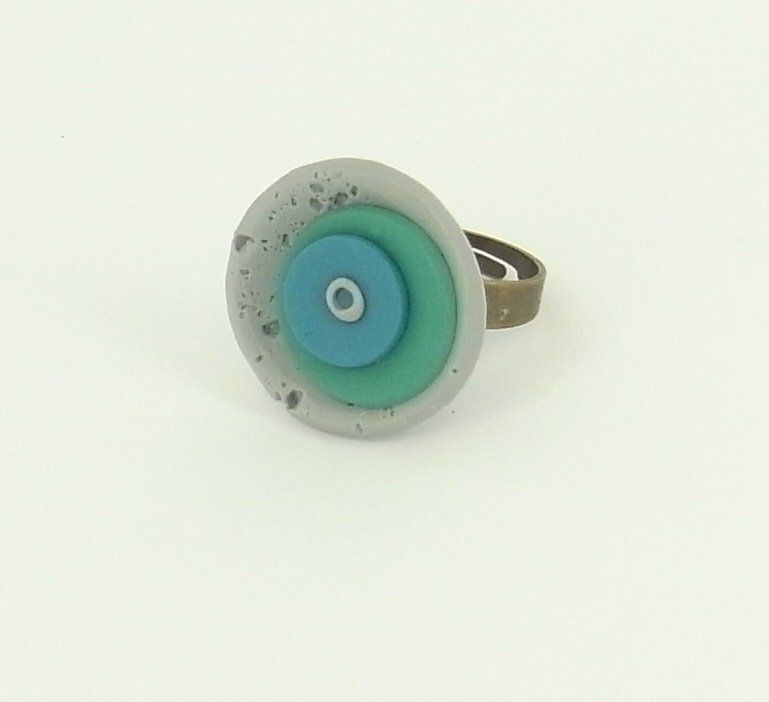
Sculpey Soufflé Layered Circles Ring
Sculpey Soufflé Layered Circles Ring
Read More
WOW--this dimensional ring is sure to get a lot of attention!
Read Less
ADDITIONAL SUPPLIES
• Adjustable ring finding with a flat pad on the top
• Coarse Sea Salt
• Bamboo Skewer
• Sculpey Style n Detail tool set|• Adjustable ring finding with a flat pad on the top
• Coarse Sea Salt
• Bamboo Skewer
• Sculpey Style n Detail tool set

Project Instructions
Getting Started
Polymer clay may stain. CLAY MAY DAMAGE UNPROTECTED FURNITURE OR FINISHED SURFACES. DO NOT USE polymer clay on unprotected surfaces. We recommend working on the Sculpey clay mat, wax paper, metal baking sheet, or disposable foil. Start with clean hands and work surface area. Knead clay until soft and smooth. For best results, clean your hands in between colors. Shape clay, pressing pieces together firmly. Bake on oven-proof glass or metal surface at 275°F (130 °C) for 30 minutes per ¼" (6 mm) thickness. For best baking results, use an oven thermometer. DO NOT USE MICROWAVE OVEN. DO NOT EXCEED THE ABOVE TEMPERATURE OR RECOMMENDED BAKING TIME. Wash hands after use. Baking should be completed by an adult.Begin by preheating oven to 275 °F (130 °C). Test temperature with oven thermometer for perfectly cured clay. For best results, condition all clay by running it through the Clay Conditioning Machine for several passes on the widest setting. Fold the clay in half after each pass and insert the fold side into the rollers first.
Polymer clay may stain. CLAY MAY DAMAGE UNPROTECTED FURNITURE OR FINISHED SURFACES. DO NOT USE polymer clay on unprotected surfaces. We recommend working on the Sculpey clay mat, wax paper, metal baking sheet, or disposable foil. Start with clean hands and work surface area. Knead clay until soft and smooth. For best results, clean your hands in between colors. Shape clay, pressing pieces together firmly. Bake on oven-proof glass or metal surface at 275°F (130 °C) for 30 minutes per ¼" (6 mm) thickness. For best baking results, use an oven thermometer. DO NOT USE MICROWAVE OVEN. DO NOT EXCEED THE ABOVE TEMPERATURE OR RECOMMENDED BAKING TIME. Wash hands after use. Baking should be completed by an adult.Begin by preheating oven to 275 °F (130 °C). Test temperature with oven thermometer for perfectly cured clay. For best results, condition all clay by running it through the Clay Conditioning Machine for several passes on the widest setting. Fold the clay in half after each pass and insert the fold side into the rollers first.
Condition the Concrete clay and roll out a sheet on a #2 setting on the clay conditioning machine. Sprinkle the surface with the coarse sea salt and use the acrylic roller to roll the salt into the surface of the clay. Cut out a 1” circle and place onto the Hollow Bead Maker so that the surface with the salt is down against the domed form. Bake on the Hollow bead Maker for 15 minutes and let cool completely. Once the piece has cooled soak it in warm water to remove the salt crystals and dry completely.

Condition the Jade and Sea Glass clay and roll one sheet of each on #2 setting on the clay conditioning machine. Cut a ¾” circle from the Jade clay and a ½” circle from the Sea Glass clay. Pick up the Jade circle and rub a tiny bit of Bake n’ Bond on the back position the circle into the inside of the dome so it is off center up along one of the outside edges of the Concrete dome. Pick up the Sea Glass circle and rub a tiny bit of Bake n’ Bond onto the back; position this circle on top of the Jade circle so it is more towards the center of the Concrete base. Pick up the medium style and detail tool and push the flat end part way into the middle of the Sea Glass circle. Roll a small ball of Concrete clay and place it into the hole you make with the skewer and use the smallest style and detail tool to make an indent. Roll a tiny ball of Sea Glass clay and place it into the dent in the Concrete clay; use the ball stylus to push an indentation into this ball of clay. Bake this piece for 15 minutes and let cool completely.

Roll a sheet of the Concrete clay on a #3 setting on the clay conditioning machine and drape it over the flat pad on the ring finding. Make sure you fold the clay over the edges so it wraps around underneath. Trim away the excess, bake for 10 minutes, and let cool completely.

Rub a tiny bit of Bake n’ Bond onto the surface of the pad of clay on the ring finding and add a small ball of the Concrete clay to the pad. Pick up the Concrete dome piece, rub a thin layer of Bake n’ Bond onto the underside, and press it onto the ball on the pad of the ring. Press it in as far as it can go and smooth the clay from the ball as best as you can. Note: Using the small ball of clay and Bake n’ Bond will help the dome make solid contact with the ring pad. Bake the piece for 20 minutes and let cool completely.


