

Sculpey Soufflé™ Wrap Bracelets
Sculpey Soufflé™ Wrap Bracelets
Designed by Amy Koranek
Read More
This is the first bracelet project in a three-part series to create a stacked bracelet look. You can make the other bracelets in the stack by going to the tutorials for Veined Beads Bracelet and Heishi Beads Bracelet.
COMPLETION TIME:
60 Minutes to make, bake, and assemble
Read Less
ADDITIONAL SUPPLIES
- Ruler
- Composite gold leaf
- Super glue
- Magnetic clasps - either flat wide or barrel shaped
- For barrel clasps you will need two 6mm gold tone jump rings instead of glue
- 6 mm Gold toned jump rings (2)
- Flat nose pliers
Project Instructions
- Getting Started:
Start with clean hands, unwrap and knead clay until soft and smooth, or condition by running clay though a Pasta Machine. We recommend using a designated machine for clay purposes only. When working with multiple colors, clean hands with soap and water or baby wipes (we have found that baby wipes work best) before switching colors. Shape clay, pressing pieces firmly together. Wash hands after use.
- Baking (also called Curing):
Using a pasta machine, sheet 1/2 bar Bluestone clay to a rectangular sheet at least 8” long on the thickest setting.

Trim away the scraps making a rectangle at least 8” long and 1.5” wide.

Composite gold leaf typically comes in flat sheets sandwiched between tissue paper. Open the leaf and lay the clay across the bottom edge of a tissue.

Lay the leaf across the clay and lay another tissue on top of the leaf. Use fingertips to lightly burnish the leaf through the tissue onto the clay.

Lift the tissue and make sure the leaf is well attached to the clay.

Carefully pull the excess leaf away.

Repeat Steps 4-7 to cover the rest of the clay strip with leaf. Carefully lift the clay from the tissue.

Here is my clay strip with leaf applied. It’s not perfect but that’s okay.

In order to crackle the leaf we need to spread it out. This can easily be achieved by manipulating the clay. Fold the clay strip in half with the raw clay on the inside and the leaf on the outside.

Crease the clay fold.

Press the clay, folded edge first, through the pasta machine on the thickest setting. Now the leaf has a beautiful crackle pattern.

Trim the clay to a strip that will fit into the end of a flat magnetic clasp. Also determine how long you want the bracelet to be. A standard women’s bracelet is 7”. I like my bracelets a little loose so I’m cutting my clay to 8”. My strip is 1-1/8” wide to match the space to glue it into the wide magnetic clasp ends. Bake the clay strip flat and allow to cool completely before handling.

Glue the end of the clay strip into a clasp. Glue the other end into the other half of the clasp.

Allow to dry completely before flexing into a bracelet by fastening the clasps.

The scraps of leafed clay can be used to make a skinny double wrap bracelet.
Wad the scraps up into a ball. Roll the ball smooth with your hands.

Roll the ball into a 1/4” rope.

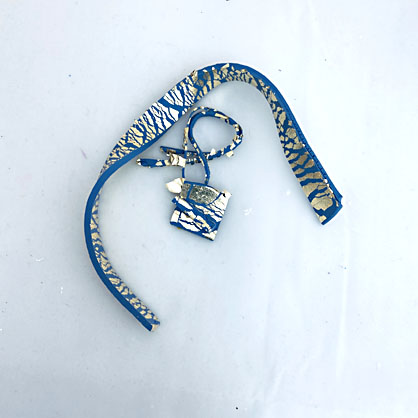
Roll the rope randomly in leaf. Roll the rope to stick the leaf securely to the clay and to lengthen the clay to about 12”.

Flatten the rope through the pasta machine on the thickest setting. To make a double wrap bracelet, the clay needs to be about 14-1/2” long. Trim the rope on both ends to 14-1/2”.

Poke a hole in the center of each end to accommodate the jump rings.

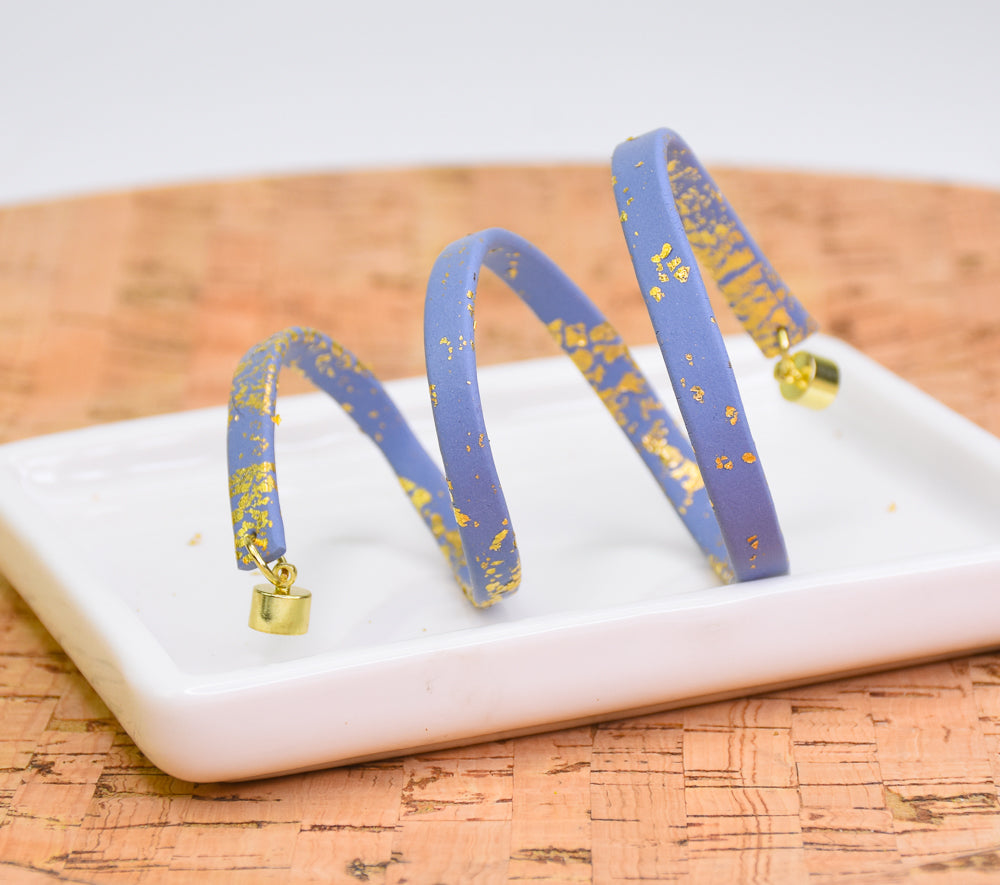
Coil the strip loosely standing on edge on a baking sheet. Bake following the baking instructions for Soufflé™.

Allow to cool completely before handling. Here’s a look at how the bracelet will be put together.

Use flat nose pliers to open and close jump rings attaching the magnetic barrel clasps to the bracelet ends.

Close the magnets as shown.

- Choosing a selection results in a full page refresh.
- Opens in a new window.