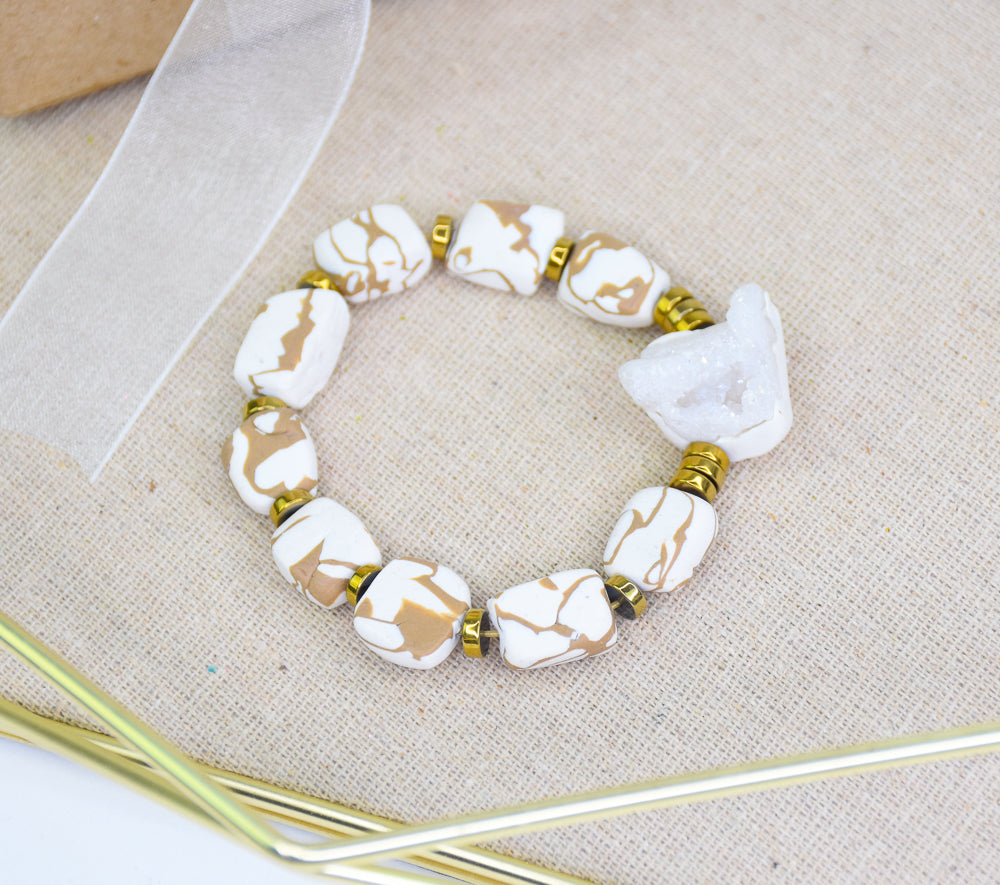

Sculpey Souffle™ Veined Beads Bracelet
Sculpey Souffle™ Veined Beads Bracelet
Designed by Amy Koranek
Read More
This is the second bracelet project in a three-part series to create a stacked bracelet look. You can make the other bracelets in the stack by going to the tutorials for Wrap Bracelets and Heishi Beads Bracelet. COMPLETION TIME:
60 Minutes to make, bake, and assemble
Read Less
ADDITIONAL SUPPLIES
- Druzy crystal
- 12” Stretchy bead cord
- Scissors
- Flat gold tone metal spacer beads (14)

Project Instructions
- Getting Started:
Start with clean hands, unwrap and knead clay until soft and smooth, or condition by running clay though a Pasta Machine. We recommend using a designated machine for clay purposes only. When working with multiple colors, clean hands with soap and water or baby wipes (we have found that baby wipes work best) before switching colors. Shape clay, pressing pieces firmly together. Wash hands after use.
- Baking (also called Curing):
The Druzy crystal I’m using has a hole in it but I don’t like the hole because it is off center. I’m going to apply clay to the back of my crystal so that I can poke the hole where I want it through the clay. Condition a small piece of Igloo that is about the size of the Druzy crystal.

Push the clay onto the flat side of the crystal and wrapping the clay around the edges enough to trap the crystal. If the clay is way too thick, you can carefully remove some with the Clay Blade.

Poke a hole through the clay backing with the Needle Tool. Bake the Druzy bead with the clay on it following the baking instructions for Soufflé™. Allow to cool completely before handling.

Chop 1/2 bar Igloo into course chunks.

Sheet 1/4 bar of Latte through the pasta machine to the sixth thickest setting. Drape a little sheet of the Latte over the cluster. The Latte drape only needs to be as large as the area of chunks, so trim it if necessary.

Use fingertips to push the Latte sheet down into the nooks and crannies. I found a stray chunk of Igloo so I just placed it on top.

Divide the clay slab into four equal sections with the Clay Blade.

Stack the four sections up as shown. Again, that little Igloo lump on the top was just a stray I found. It isn’t necessary for the process.

Flatten the stack and compress the sides with your hands. Force the clays to fill in empty spaces creating a tight little loaf that’s approximately 2” x 1.5”.

Divide the loaf into eight equal pieces with the Clay Blade.

From the sides the pieces will look veiny.

Use fingertips to shape the pieces into random shapes like smooth stones.

Poke holes in each one. Bake following the baking instructions for Soufflé™. Allow to cool completely before handling.

String onto stretchy bead cord using metal spacer beads as shown.

Tie a knot to finish the stringing.

- Choosing a selection results in a full page refresh.
- Opens in a new window.