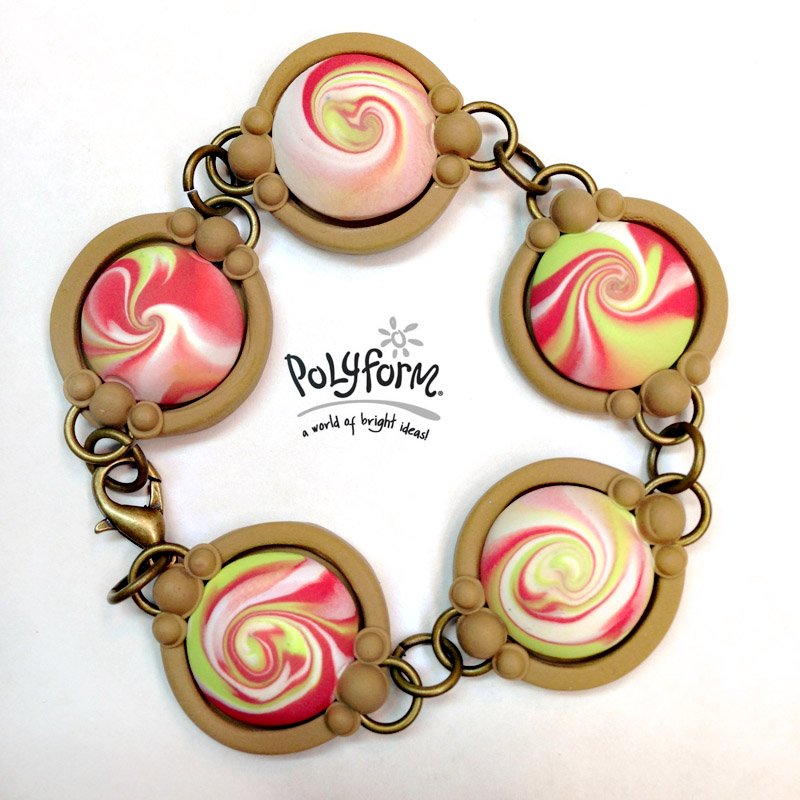
Sculpey Soufflé Spumoni Swirl Bracelet
Sculpey Soufflé Spumoni Swirl Bracelet
Read More
This is a beautiful bracelet to make that uses our Cabochon mold and Sculpey Soufflé clay!
Read Less
ADDITIONAL SUPPLIES
Corn starch, Paint brush, Antique gold jump rings 8mm (16), Antique gold lobster clasp, Sculpey Glossy Glaze, Paint brush, Jewelry pliers|Corn starch, Paint brush, Antique gold jump rings 8mm (16), Antique gold lobster clasp, Sculpey Glossy Glaze, Paint brush, Jewelry pliers

Project Instructions
Getting Started:Polymer clay may stain. CLAY MAY DAMAGE UNPROTECTED FURNITURE OR FINISHED SURFACES. DO NOT USE polymer clay on unprotected surfaces. We recommend working on the Sculpey® Work ‘n Bake Clay Mat, wax paper, metal baking sheet, or disposable foil. Start with clean hands and work surface area. Knead clay until soft and smooth. For best results, clean your hands in between colors. Shape clay, pressing pieces together firmly. Bake on oven-proof glass or metal surface at 275°F (130 °C) for 30 minutes per ¼" (6 mm) thickness. For best baking results, use an oven thermometer. DO NOT USE MICROWAVE OVEN. DO NOT EXCEED THE ABOVE TEMPERATURE OR RECOMMENDED BAKING TIME. Wash hands after use. Baking should be completed by an adult. Begin by preheating oven to 275 °F (130 °C). Test temperature with oven thermometer for perfectly cured clay. For best results, condition all clay by running it through the Clay Conditioning Machine for several passes on the widest setting. Fold the clay in half after each pass and insert the fold side into the rollers first.
Condition equal amounts of Mai Tai, Pistachio, and Igloo. I used 1/8 block of each color. Form them into equal size logs and stack together sides touching.

Twist the colors together and roll to smooth.

Fold the the log in half and repeat Step 2. Repeat this process once more to multiply the stripes

Cut off a piece that will fill the smallest round well on the Cabochon Mold. Roll the clay into a ball. Position the ball in front of you with the swirled pattern on top.

Place the Lentil Bead Maker from the Bead Making Kit over the ball in the center. Grasp the sides of the Lentil Bead Maker in your fingertips and move the Bead Maker around over the clay ball in a counter-clockwise motion.

If desired, you can prep the Silicone Cabochon mold with corn starch to prevent the clay from sticking to the mold. Brush in a small amount of corn starch and brush back out as much as you can see. There will still be a microscopic layer of corn starch that will keep the clay from sticking. Press your preferred side of the lentil bead face down in the smallest round cabochon mold.

Place a small amount of Bake ’N Bond in the center of the bezel shape. Place the swirled cabochon in the center of the bezel. The Bake ’N Bond will allow you to lay the cabochon in the bezel without applying pressure that may squish the cabochon shape.


Shave excess clay off of the back with the super slicer. Remove the swirled piece by flexing the mold. Set aside.

Prep the Bezel mold as in step 8. Press a ball of Latte into the smallest round bezel mold. Make sure to press the clay firmly all the way around the outside edge of the bezel to make sure the clay gets down into the frame area. Shave off the excess clay from the back of the bezel shape. Remove the clay from the bezel mold by gently flexing the mold.

On either side of the cabochon, place a jump ring with the seam toward the cabochon. Gently seat the jump ring in the bezel edge.

Place small pearls on each side of the medium pearls using the small Etch ’N Pearl tool.

You can see the colors swirling together through the clear bead maker. Continue making rotating motions until the clay is swirled as desired. Make smaller and smaller rotations until the clay ball becomes a lentil shape under the Lentil Bead Maker. Remove the Lentil Bead Maker. There should be a beautiful swirl on both sides of the lentil

Sandwich each jump ring into place by pressing a medium sized pearl created using the medium Etch ’N Pearl tool.

Repeat to make five bezel and cabochon pieces for a 7.5†bracelet. Bake according to the above instructions. When the pieces are completely cool, hook them all together by attaching a jump ring between each of the clay pieces. Add a jump ring to one end. Add a jump ring and a lobster claw to the other end. If desired, add a thin layer of Sculpey Glossy Glaze. Allow to dry completely and enjoy!


