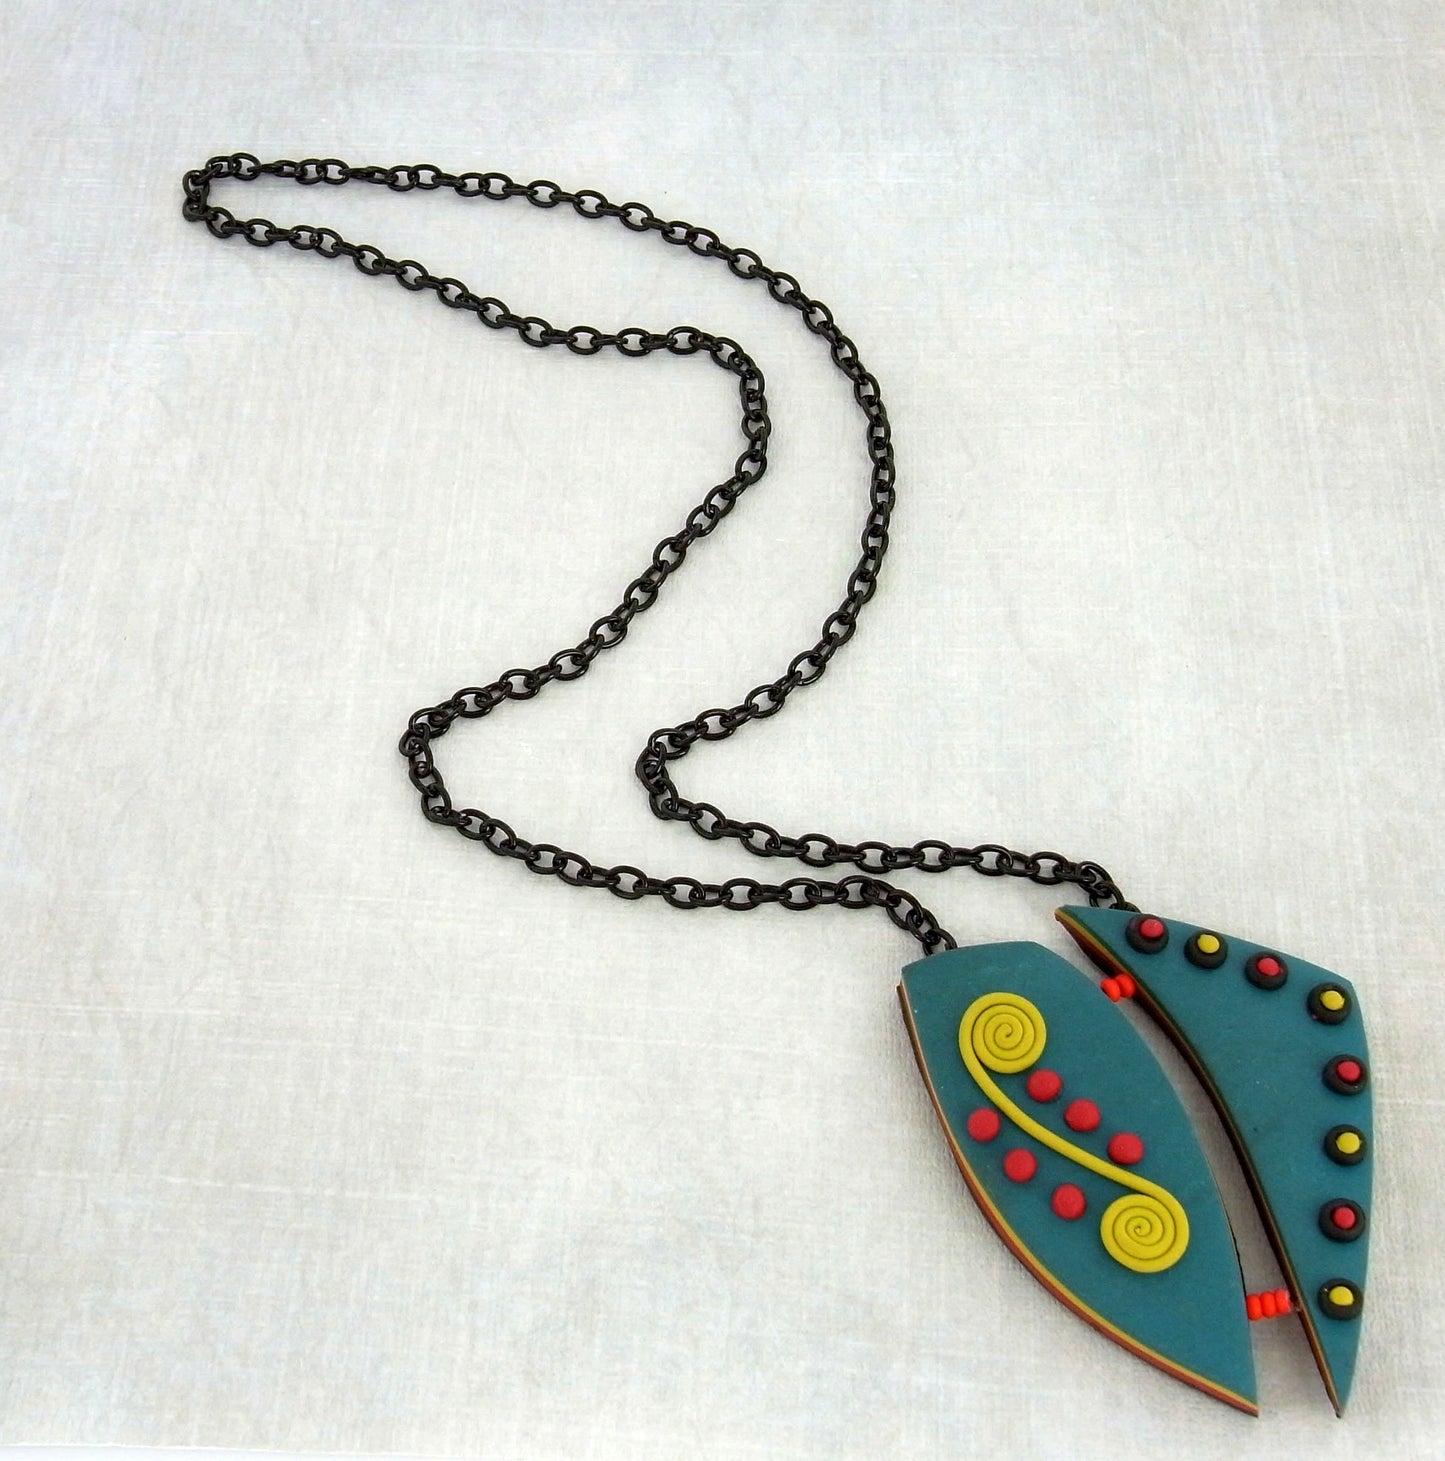
Sculpey Soufflé Retro Pendant
Sculpey Soufflé Retro Pendant
Read More
The jewel tone colors of Sculpey Souffle combine to create a retro color combination for this quick and easy pendant.
Read Less
ADDITIONAL SUPPLIES
2 black eye pins, about 16 inches of black chain, Basic jewelry tools – small needle nose pliers and wire cutters, 6 red “E” sized beads, clear fast-drying glue, small smooth ceramic tile or piece of glass|2 black eye pins, about 16 inches of black chain, Basic jewelry tools – small needle nose pliers and wire cutters, 6 red “E” sized beads, clear fast-drying glue, small smooth ceramic tile or piece of glass

Project Instructions
Getting Started Polymer clay may stain. CLAY MAY DAMAGE UNPROTECTED FURNITURE OR FINISHED SURFACES. DO NOT USE polymer clay on unprotected surfaces. We recommend working on the Sculpey clay mat, wax paper, metal baking sheet, or disposable foil. Start with clean hands and work surface area. Knead clay until soft and smooth. For best results, clean your hands in between colors. Shape clay, pressing pieces together firmly. Bake on oven-proof glass or metal surface at 275°F (130 °C) for 15 minutes per ¼" (6 mm) thickness. For best baking results, use an oven thermometer. DO NOT USE MICROWAVE OVEN. DO NOT EXCEED THE ABOVE TEMPERATURE OR RECOMMENDED BAKING TIME. Wash hands after use. Baking should be completed by an adult.Begin by preheating oven to 275 °F (130 °C). Test temperature with oven thermometer for perfectly cured clay. For best results, condition all clay by running it through the Clay Conditioning Machine for several passes on the widest setting. Fold the clay in half after each pass and insert the fold side into the rollers first.
Cut the Jade package of clay into slices that are just slightly thicker than the #1 (widest) setting on the Sculpey Clay Conditioning Machine. Roll 2/3 of the pieces through the machine and combine them together to make one sheet of clay. Set the Sculpey Clay Conditioning Machine on #3 and roll the clay through again. Set aside. Repeat for each of the other colors and stack the sheets of clay on top of each other: Poppy Seed, Cherry Pie, Key Lime and Jade on top.
Bend the Super Slicer blade and cut out a rough triangle shape with the edges of each side curving out. The top portion should be about 3 inches wide. Cut the triangle into 2 pieces, again curving the blade to cut from just left of center top to the bottom point. This will create the two pieces of the pendant. NOTE: you should have all the other colors stacked up under this top Jade layer!


Extrude or roll a very thin coil of the Key Lime clay that is about 4 inches in length. Gently coil each end in opposite direction and position on the smaller half of the pendant. Carefully lift each coil and add a small dab of the Sculpey Bake and Bend to the back of each coil.

Roll out a small piece of the Cherry Pie clay on the #1 setting on the Sculpey Clay Conditioning Machine. Place this piece on the small tile or piece of glass and press lightly onto the tile. Moisten the ball end of the medium ball tool by dipping into a small water cap of water and press firmly into the sheet of clay. Repeat 6 times. Peel up the sheet of clay and the “pearls†should remain on the tile. Use the pointed end of the Etch and Pearl to clean up the edges of each “pearlâ€. Slide the Super Slicer blade under each “pearl†and positon it on the pendant on either side of the coiled clay as shown. Set aside.


Roll out a small piece of the Poppy Seed clay on the #1 setting and punch out 3 large “pearls†as described in step 5 (except use the large Etch and Pearl tool). Use the medium ball tool to gently press into the top of each of the pearls. Punch 4 each small “pearls†out of sheets of #1 Cherry Pie and Key Lime to nestle into the Poppy Seed “pearlsâ€. Position these completed combos along the outside edge of the second piece of the pendant. Once you have the placement for each piece established, gently lift each piece and add a small drop of Sculpey Bake and Bond to the back and return to position.


Bake the two completed pieces in a pre-heated oven according to the clay package directions. Allow to cool. Use the Sculpey Needle Tool to press easily into the bottom edges of the pendants about ¼ inch deep. Clip off a small length of the eye pin wire and add a drop of Instant Glue and press into one of the holes using your needle nose pliers. Add three “E†beads. Add a drop of instant glue to the remaining end of the wire and press into the other side of the pendant after using the needle tool to make a hole.

Repeat step 7 towards the top of the pendant, only using 2 beads this time.

Drill a ¼ inch deep hole in the top of each pendant piece about 3/8 inch from the left edge of each piece. Trim the eye pins to ¼ inch, add a drop of Instant Glue and use the pliers to push the wire into the holes. Allow the glue to dry, add the selected length of chain and you are DONE!


