Skip to product information
1 of 1

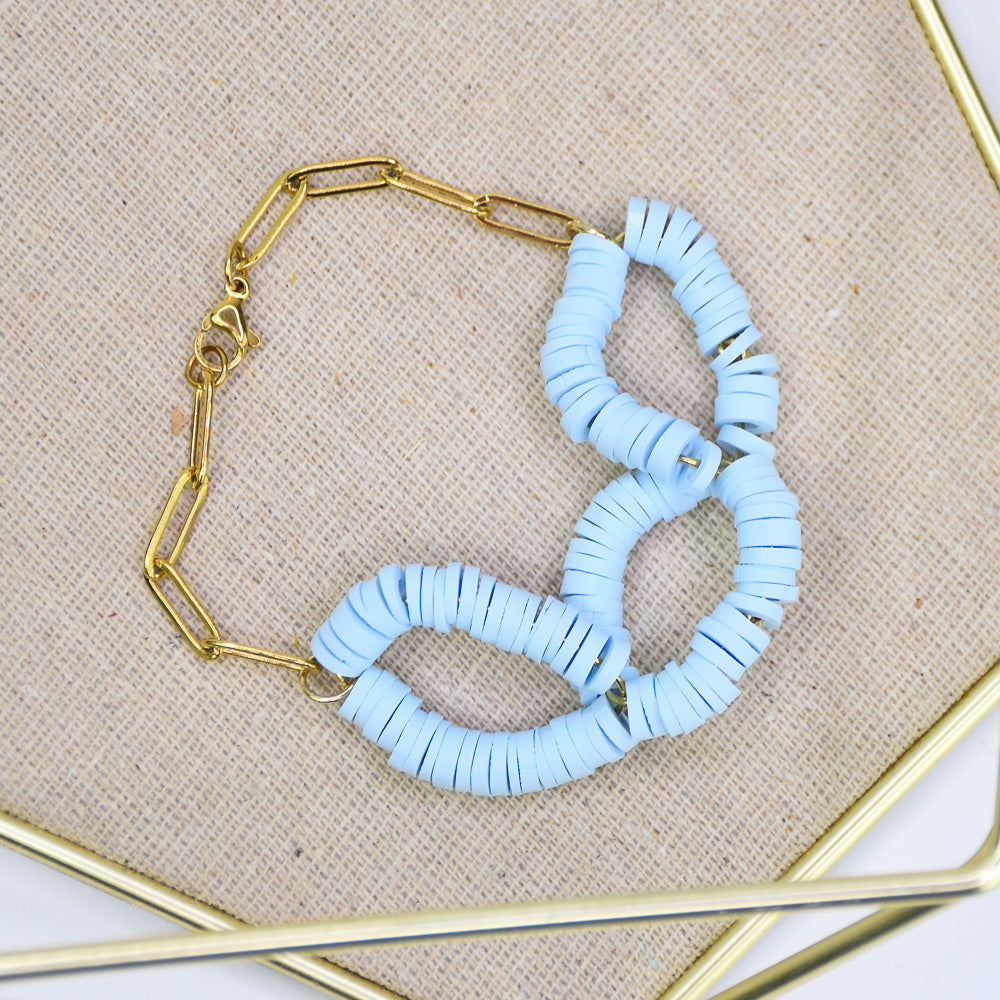
Sculpey Soufflé™ Paperclip Style Heishi Bracelet

Sculpey Soufflé™ Paperclip Style Heishi Bracelet

Designed by Abigail Shaeffer
Read More
This fun and easy bracelet project combines colorful polymer clay with a paperclip chain to create a trendy heishi bead style accessory. Lightweight and customizable, it’s perfect for adding a playful pop to your everyday look. Great for beginners and a fun way to experiment with color and texture! TIME TO COMPLETION: A little over an hour
Read Less
ADDITIONAL SUPPLIES
  • Tile or baking sheet
  • Aluminum foil
  • (2) US 4 (2.75mm) double pointed knitting needles or bamboo/metal skewers
  • Pliers (Flathead, Needle nose, Wire cutters)
  • Gold chain link
  • 24 gauge wrapping wire
  • (2) 5mm jump rings
  • (2) 6mm jump rings
  • (1) Lobster clasp
View full details
Project Instructions

Step 1

Getting Started:

Please make sure your work area is covered and you are not working on an unprotected work surface. We recommend working on the Sculpey Oven Safe Work Mat, wax paper, metal baking sheet or disposable foil. Uncured clay may damage unprotected furniture or finished spaces. Be sure to cover your area accordingly.

Always start with clean hands and wear lint free clothing to avoid pieces of lint falling into your clay. Unwrap and knead the clay until soft and smooth or you can condition your clay by running through a pasta machine. We recommend using a machine that is
designated specifically for clay use only. When working with multiple colors, be sure to clear your hands with soap and water or use baby wipes before switching colors.

Baking (also called curing):

Begin by preheating your oven to 275*F (130*C). After you are done creating, for best results bake/cure clay on an oven-safe surface such as metal, aluminum foil, tile, an index card or the Sculpey Clay Mat at 30 minutes per ¼” (6mm) thickness (according to package directions). For best baking results, use an over thermometer. DO NOT USE A MICROWAVE OVEN. DO NOT EXCEED THE ABOVE TEMPERATURES OR RECOMMENDED BAKING TIME.

Step 2

Roll clay out on setting 3 on pasta machine. Place knitting needle on clay and cut clay to fit length of knitting needle. You will need approximately 7 inches of clay to
create this bracelet.

Step 2

Step 3

Wrap clay over knitting needle. Trim off excess clay. Repeat with second knitting
needle.


Step 3

Step 4

Roll the clay until it’s smooth and even.


Step 4

Step 5

Remove your baking tray and follow the steps in Step 1 above to bake your clay.

Step 5

Step 6

Remove clay from knitting needle while twisting both the clay and the needle. Cut slices with clay blades to create heishi beads in varying width.


Step 6

Step 7

Measure wrapping wire 3.5 inches long and cut with wire cutters. Repeat twice (need
total of 3 pieces).


Step 7

Step 8

String heishi beads on wire and bend wire in half.


Step 8

Step 9

Use flathead pliers to twist wire and cut excess.


Step 9

Step 10

Weave ends back through the first few heishi beads to secure link.


Step 10

Step 11

Make second link, repeating step 8, then string the wire of the second link through
the completed first link. Twist wire on second link and cut excess wire. Repeat
with third link.


Step 11

Step 12

Cut two chains to fit wrist, allowing space for heishi links.


Step 12
Step 12

Step 13

Open a jump ring and place one end of the heishi bead links and chain link in it.
Close jump ring. Repeat for other side of the heishi bead link.


Step 13

Step 14

Open a jump ring and place one end of the gold chain link and one end of the jump
ring chain in it and close jump ring.


Step 14

Step 15

Open a jump ring and place the chain link on the other side of the bracelet and a
lobster clasp in it and close jump ring.

Your bracelet 1s complete!


Step 15

Step 16

Here is a look at my completed bracelet!

Step 16