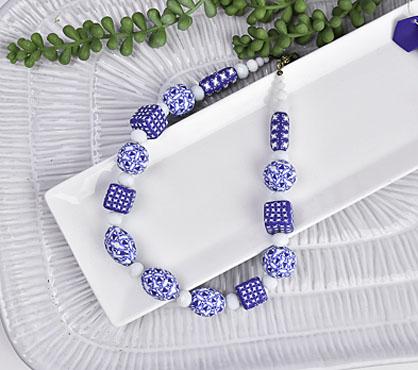
Sculpey Soufflé™ Midnight Blue & Igloo Canework Beads
Sculpey Soufflé™ Midnight Blue & Igloo Canework Beads
Designed by Teresa Pandora Salgado
Read More
Read Less
Sculpey Soufflé™ Midnight Blue & Igloo creates a classic color combo for us in a spectacular looking millefiori cane that is easier than it seems with these step-by-step instructions.
TIME TO COMPLETION: 90 minutes
ADDITIONAL SUPPLIES
- Jewelry Pliers
- Bead pin or hanger wire
- SquareBenders
- SquarePairs
- EasyClips
- Supplies:
- 3 mm to 10 mm Beads
- Stringing Wire
- Crimp Beads
- Crimp Covers
- Clasp
Project Instructions
- Getting Started:
Start with clean hands, unwrap and knead clay until soft and smooth, or condition by running clay though a Pasta Machine. We recommend using a designated machine for clay purposes only. When working with multiple colors, clean hands with soap and water or baby wipes (we have found that baby wipes work best) before switching colors. Shape clay, pressing pieces firmly together. Wash hands after use.
- Baking:
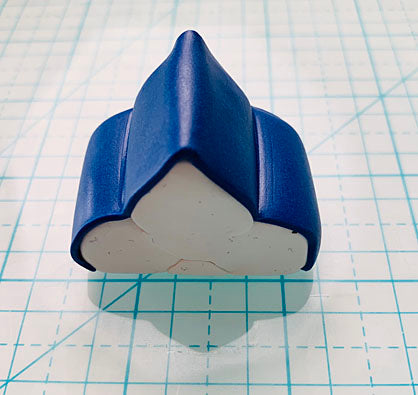
Condition Souffle Igloo. Make a 3x4” sheet and Roll sheet into a 1/2” log. Cut into 4 pieces. Place 2 logs side by side. Fill the two triangular voids with triangles made from the third log. Shape the last log into a soft triangle and place on top as shown.


Condition Souffle Midnight Blue. Place a #3 sheet over the Igloo stack. Settle the sheet into the crevices with a small square rod. I used my 1/4” SquareBender. Trim.
Add a #3 sheet of Igloo over the Midnight Blue sheet. Add another sheet of Midnight Blue. Fill triangular voids with Midnight Blue and compress into a triangle.


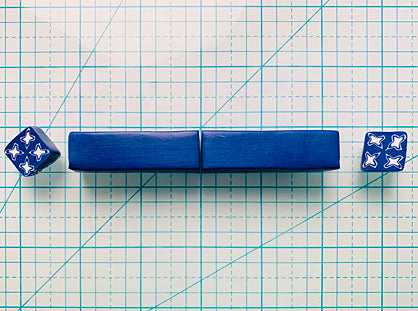
Reduce the triangle to double its length. Cut in half and combine as shown. Reduce to 4” usable inches. Trim off ends.


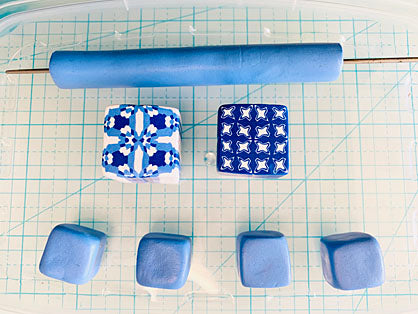
Combine the 4 pieces to create a new square. Reduce to 4” of usable cane. Reduce again to double its length. Combine and reduce until your desired scale is reached. Set aside.

Blend scrap to create a light blue. Make a vaguely triangular 4” long stack with varied logs of Midnight Blue, Igloo and light blue. Sharpen into a triangular cane 4” long. Cut into 3 equal pieces. Put them together. (I cut off a piece to show you how I did mine.)


Cut the stack in half and reduce to twice its length. Force the resulting shape into a square. I used SquarePairs, which I invented for this purpose. Reduce to 4 times its length, cut into 4 pieces and recombine. Set cane aside.


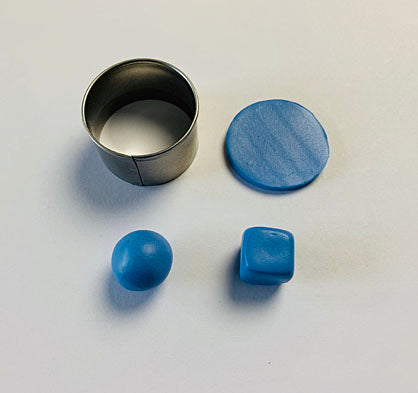
Roll out a #1 sheet of clay for your bead cores. Any clay will do. Cut circles of clay with a 1.25” cutter. I used one from my Sculpey Round Graduated Cutter Set. Roll each circle into a ball. Shape each ball into a square. If you want to make tube beads, create a short plug of any clay, pierce through with a bead pin or a piece of hanger wire, and roll to the desired size. I made both square and tube cores.
To make tube beads, apply cane slices to the core and cut to desired length.

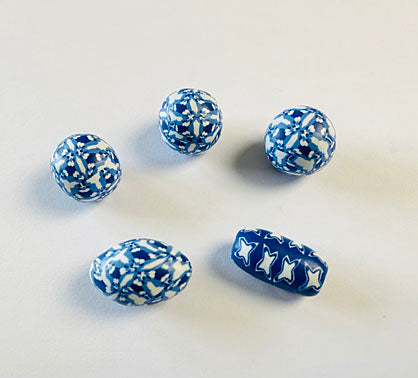
Reduce the two canes to fit the sides of your cubes. Apply a cane slice to each of the 6 sides. Leave the square or roll into a round or football shape. Use the needle tool from the Sculpey Clay Tool Starter Set (or your favorite needle tool) to pierce the beads for stringing after baking and cooling.

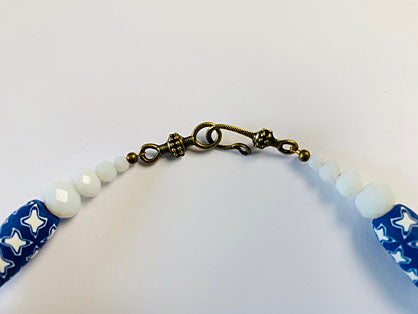
Attach a tight clip to the end of your beading wire. (I use EasyClips.) Assemble your necklace just the way you like, taking your time and rearranging as needed. Add clasp, crimp bead and crimp cover to each end. Tip: I crimp directly onto my chosen clasp, rather than using jump rings or split rings.