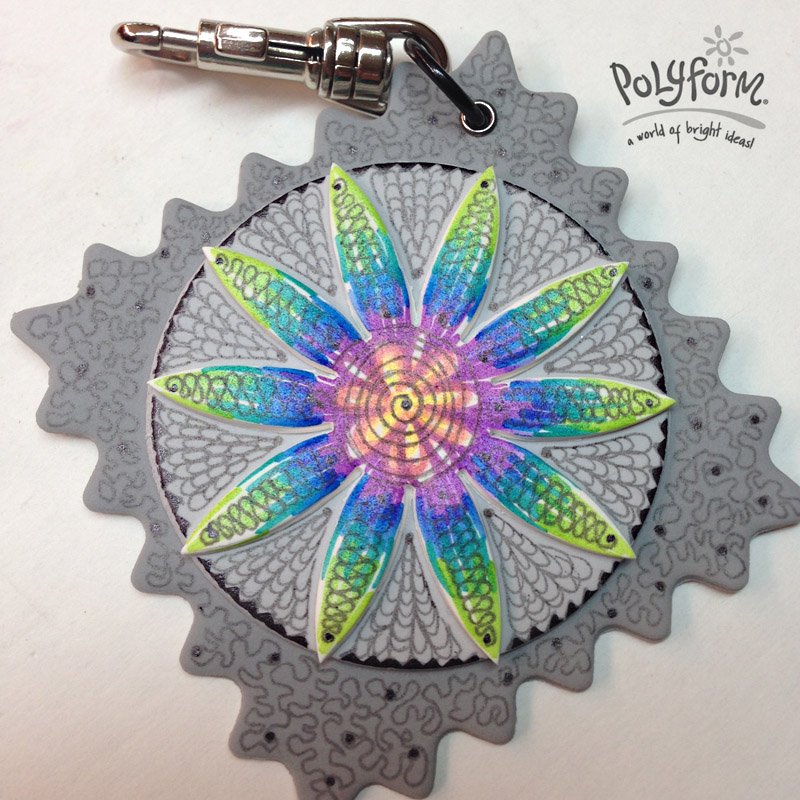
Sculpey Souffle Luggage Tag
Sculpey Souffle Luggage Tag
Read More
Designed by Amy Koranek
I had so much fun making these tags. Every time I made one I had an idea for the next one. I love the freedom of doodling and scribbling and the way my mind wanders when I’m doodling and scribbling. How about you, ready to do a little doodling? I’ve given instructions here to make a tag just like mine but I bet you’ll have more fun if you cut loose and do your own thing.
Read Less
ADDITIONAL SUPPLIES
Chameleon Color Tones Pens, Various cookie cutters 1.5” - 3”, 3/16” Pin drill, 3/16” grommet, Grommet set, Hammer

Project Instructions
Getting Started:Polymer clay may stain. CLAY MAY DAMAGE UNPROTECTED FURNITURE OR FINISHED SURFACES. DO NOT USE polymer clay on unprotected surfaces. We recommend working on the Sculpey® Work ‘n Bake Clay Mat, wax paper, metal baking sheet, or disposable foil. Start with clean hands and work surface area. Knead clay until soft and smooth. For best results, clean your hands in between colors. Shape clay, pressing pieces together firmly. Bake on oven-proof glass or metal surface at 275°F (130 °C) for 30 minutes per ¼" (6 mm) thickness. For best baking results, use an oven thermometer. DO NOT USE MICROWAVE OVEN. DO NOT EXCEED THE ABOVE TEMPERATURE OR RECOMMENDED BAKING TIME. Wash hands after use. Baking should be completed by an adult. Begin by preheating oven to 275 °F (130 °C). Test temperature with oven thermometer for perfectly cured clay. For best results, condition all clay by running it through the Clay Conditioning Machine for several passes on the widest setting. Fold the clay in half after each pass and insert the fold side into the rollers first.
1.Mix 1/4 block Igloo with 1/4 block Concrete to make a medium gray color. Sheet Igloo, Concrete, and medium gray through the clay conditioning machine on the thickest setting to condition. Once the clays are conditioned, reduce the setting on the machine to the second thickest setting and press the clay through again. Then reduce to the third thickest setting and press the clay through. From the sheets of clay cut various shapes using cookie cutters. Layer the cut shapes together as shown. Press the layers together so they stick. Bake as directed above to cure
Select a baked tag with Igloo on top, then medium gray, then Concrete on the bottom. Start in the center of the Igloo and using the Summer Sun with the bullet point, freehand a little flower in the center.

Next, trace the little yellow flower with the Seville Orange bullet point making the petals a little larger than the yellow ones. Repeat making the petals even larger with the Crimson Red bullet point.


Repeat one more time with the Purple Grape bullet point. While still using the Purple Grape bullet point, make radiating lines out from the flower petals about 1/4” long but keep them uneven so they look loose and not too disciplined.


With the Royal Blue bullet point, add another layer of little lines radiating out from the flower.

Add another layer of lines with the Aqua Marine bullet point.Finally finish of with little lines in Spring Meadow also using the bullet point.


Make a swirling curicue in the center of the flower with the .6mm detail pen. Make a series of squiggles down each petal with the .6mm detail pen as well. Using the .4mm pen, make a network of fish scale designs.

Around the edges the fish scales make a pattern of triangles.

Finally on the outer edges just go crazy scribbling. When I do this pattern I try to see if I can go all the way around a design with a single line that never ends and comes all the way back to where I started. Highlight areas of the scribbles with little dots.


Use a pin drill to make a hole in the outer area of the tag. Insert a grommet and set the grommet with the setting tool. Add a large jump ring and a hanger and enjoy!


