Skip to product information
1 of 1

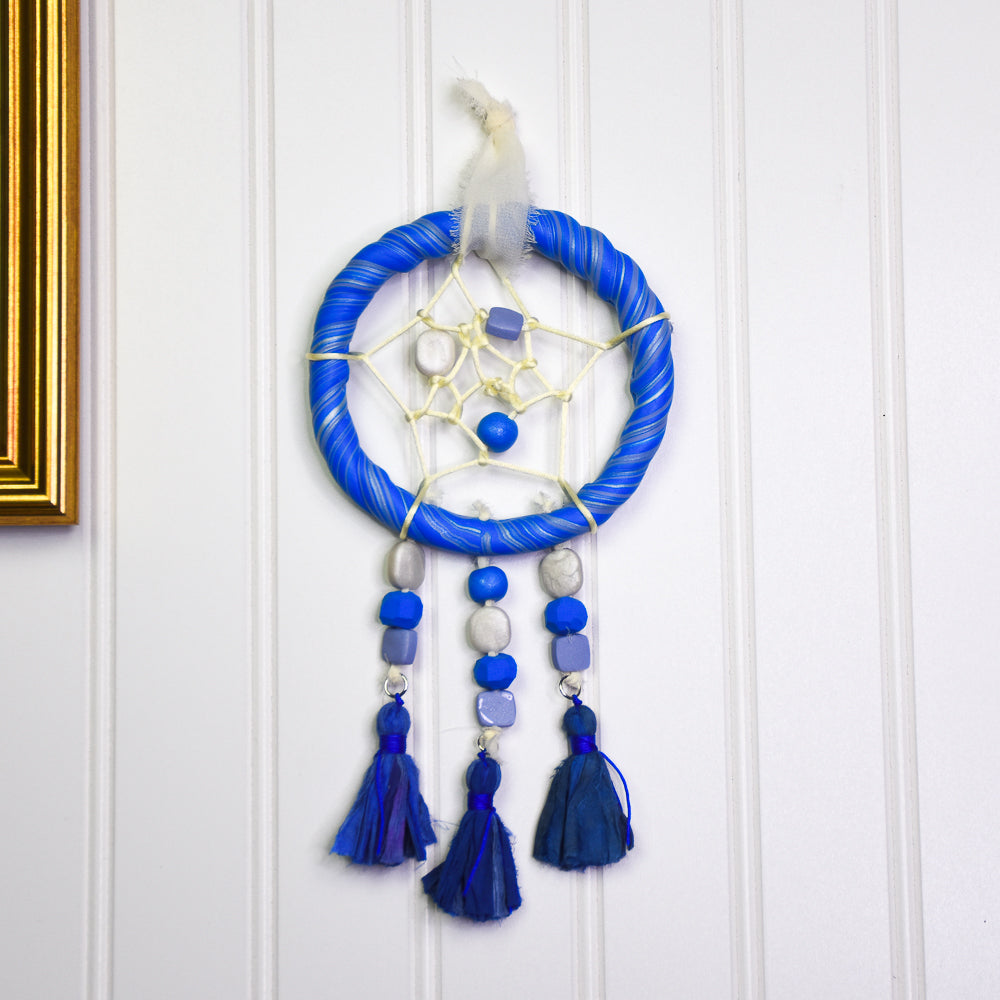
Sculpey Soufflé™ Cobalt Dreamcatcher

Sculpey Soufflé™ Cobalt Dreamcatcher

Designed by Abigail Shaeffer
Read More
This dreamcatcher is woven in a natural-tone palette of Cobalt, Pearl, and Thistle, combining deep, muted, and soft tones for a serene effect. The layered webbing creates a delicate, dimensional pattern that draws the eye inward. Hanging strands mirror the colors of the web, adding movement and cohesion to the design. Its balanced mix of bold and gentle hues makes it a charming accent for any space. Perfect for adding a touch of whimsy and color, this dreamcatcher is both decorative and delightful. Time to complete: Sculpting takes approximately 40 minutes, 30 minutes of baking, and 45 minutes for assembly.
Read Less
ADDITIONAL SUPPLIES
  • Aluminum Foil
  • Exacto Knife
  • Oval Cutter (½ inch)
  • Square Cutter (½ inch)
  • Drill with small bit
  • Ruler and Scissors
  • Chiffon Ribbon (19 inches)
  • Ivory Cording (50 inches)
  • (3) Tassels
  • Hot Glue Gun
View full details
Project Instructions

Step 1

Getting Started:

Please make sure your work area is covered and you are not working on an unprotected surface. We recommend working on the Sculpey® Oven Safe Work Mat, wax paper, metal baking sheet, or disposable foil. Uncured clay may damage unprotected furniture or finished surfaces. Be sure to cover your crafting area appropriately.

Start with clean hands, unwrap and knead clay until soft and smooth, or condition by running clay though a Pasta Machine. We recommend using a designated machine for clay purposes only. When working with multiple colors, clean hands with soap and
water or baby wipes (we have found that baby wipes work best) before switching
colors. Shape clay, pressing pieces firmly together.  Wash hands after use.

Baking (also called Curing):

Begin by preheating oven to 275 °F (130 °C). After you are done creating; for best results bake clay on an oven-proof surface such as metal, aluminum foil, an index card
or the Sculpey® Oven Safe Work Mat at 275°F (130 °C) for 30 minutes per ¼"
(6 mm) of thickness according to package directions. Oven safe glass or ceramic
surfaces are also acceptable for baking; however please note that the baking
times may take longer as the glass or ceramic surfaces take longer to heat up. For best baking results, use an oven thermometer. DO NOT USE MICROWAVEOVEN. DO NOT EXCEED THE ABOVE TEMPERATURE OR RECOMMENDED BAKING TIME.

Step 2

Set aside roughly two grape-sized amounts from each color, then mix the remaining Souffle Cobalt, Souffle Thistle, and Premo Pearl.

Step 2

Step 3

Marble the colors by twisting the strands together and rolling into single strand to create a rope 12 inches long.

Step 3

Step 4

Twist the clay rope, shaping it into a raised, dimensional pattern.


Step 4

Step 5

Connect ends and roll gently to blend seams. Diameter is about 4 inches.


Step 5

Step 6

Turn the bottom of dreamcatcher up and add three holes about ½ an inch apart at the bottom of the dreamcatcher.


Step 6

Step 7

Turn the bottom of the dreamcatcher inwards so the holes will face down when hanging. Reshape into a circle.

Step 7

Step 8

Roll Premo Pearl to about 3 mm thickness and cut (4) beads using the oval cutter.


Step 8

Step 9

Use the needle tool to add holes through each of the beads.


Step 9

Step 10

Roll (3) Souffle Cobalt balls, about the size of a marble.


Step 10

Step 11

Repeat Step 9 with the Souffle Cobalt balls.


Step 11

Step 12

Mix 1 part Premo Pearl with 3 parts Souffle Thistle.

Step 12

Step 13

Roll mixed clay to about 3 mm thickness and cut (4) square beads using the square cutter.


Step 13

Step 14

Repeat Step 9 with the mixed clay squares.


Step 14

Step 15

Mix equal parts Souffle Cobalt and Premo Pearl.


Step 15

Step 16

Roll (2) balls with the mixed clay.


Step 16

Step 17

Repeat Step 9 with the mixed clay balls.

Bake/cure the clay according to Step 1.

Step 17

Step 18

Create faceted beads with the mixed Cobalt and Pearl balls by cutting angles into the middle of the bead with the Exacto or craft knife


Step 18

Step 19

Cut angles into the top and bottom of the bead.


Step 19

Step 20

Tie a knot at the top of the dreamcatcher with the ivory cording. Add a small dab of hot glue to secure the knot in place.


Step 20

Step 21

Pull the cording behind the dreamcatcher and bring around to the front. Keep the cording tight as it will try to move around as you work.


Step 21

Step 22

Turn the dreamcatcher over, then bring the cording over the cord you wrapped in the previous step.


Step 22

Step 23

Repeat Steps 21-22, evenly spacing the points where you wrap the cording around the dreamcatcher.


Step 23

Step 24

Add hot glue to the remaining four points.


Step 24

Step 25

Use a drill to enlarge the holes in the beads, if needed. String a square bead onto the ivory cord and pass the cord through the cord directly above.


Step 25

Step 26

Pull the cord over and pass it through the cord holding the bead.


Step 26

Step 27

Form the next point by bringing the cord over the cord above, then passing it through. String a round bead onto the cord and repeat Step 26.

Step 27

Step 28

Create a point as directed in the first part of Step 27, then add an oval bead to the cord and repeat Step 26.


Step 28

Step 29

Create a third layer of webbing, then loop the cord through the inner cord directly opposite.


Step 29

Step 30

Flip the dreamcatcher over and knot it on the back. Tip: Add a small dab of hot glue to secure.


Step 30

Step 31

Cut a piece of chiffon ribbon 4.75 inches long, then cut in half lengthwise. Keep both pieces.


Step 31

Step 32

Cut another piece of chiffon ribbon 6 inches long, then cut in half lengthwise. Keep one piece.


Step 32

Step 33

Tie a tassel to one end of each 4.75-inch-long chiffon, and one piece of the 6-inch-long chiffon.


Step 33

Step 34

Add a square bead, a faceted bead, an oval bead, and a round bead to the 6-inch-long chiffon.


Step 34

Step 35

For the 4.75-inch-long chiffon, add a square bead, faceted bead, and oval bead to each ribbon.


Step 35

Step 36

Pull the long-beaded ribbon up through the bottom of the dreamcatcher in the middle hole and knot.
Repeat with smaller chiffon ribbon.


Step 36

Step 37

Use remaining chiffon (about 8 inches) to create the hanging loop. Knot around the top of the dreamcatcher.

Here's a look at my completed dreamcatcher!


Step 37