Skip to product information
1 of 1

Sculpey Soufflé™ Keepsake Box

Sculpey Soufflé™ Keepsake Box

Designed by Amy Koranek
Read More
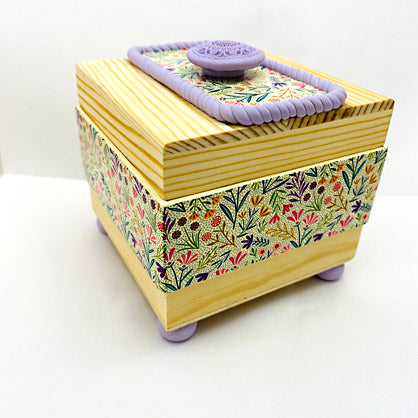
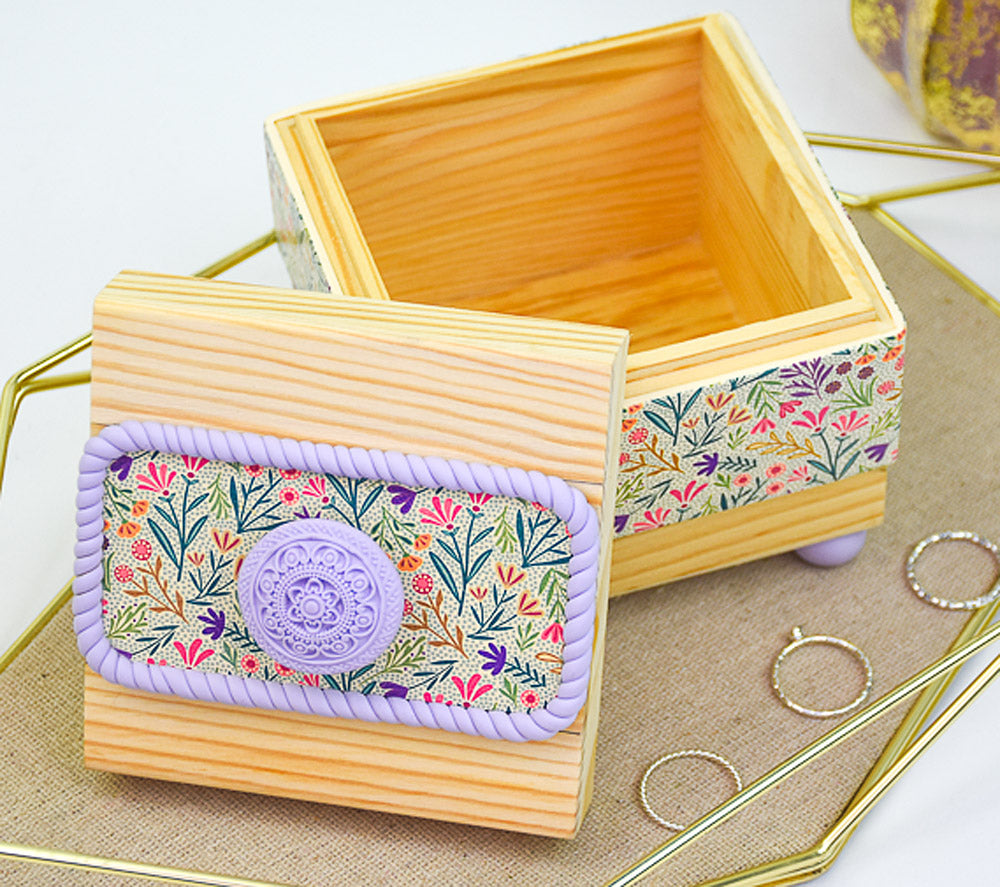
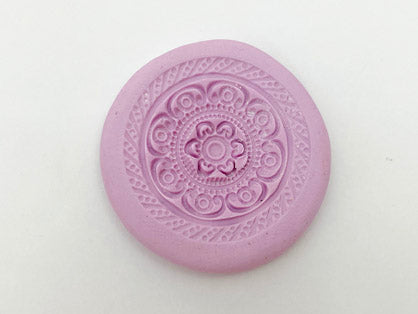
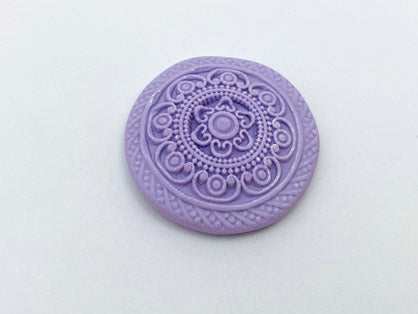
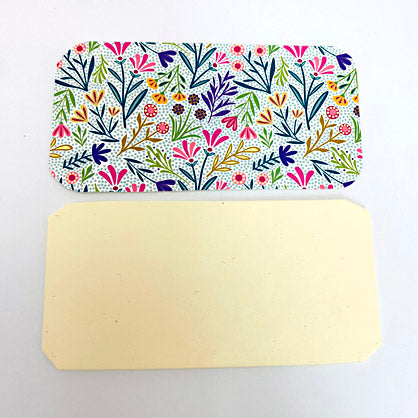
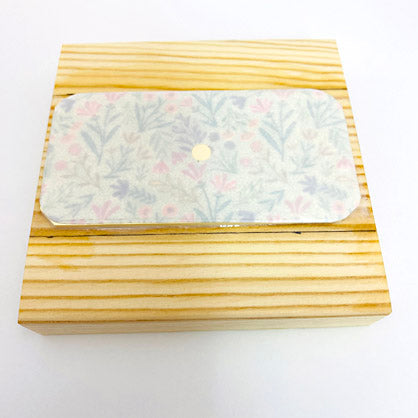
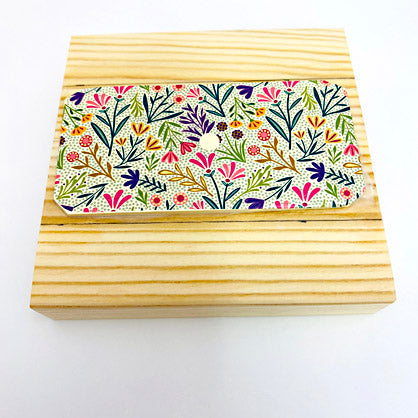
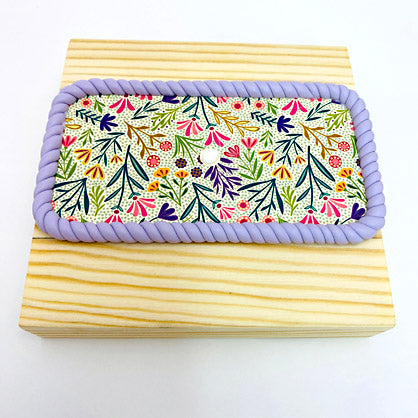
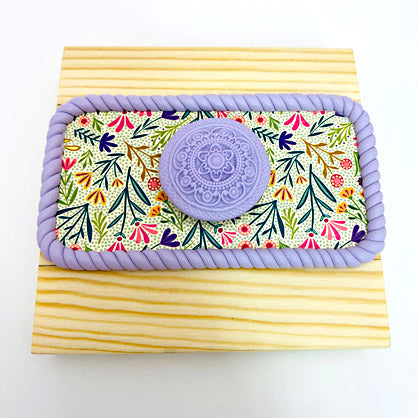
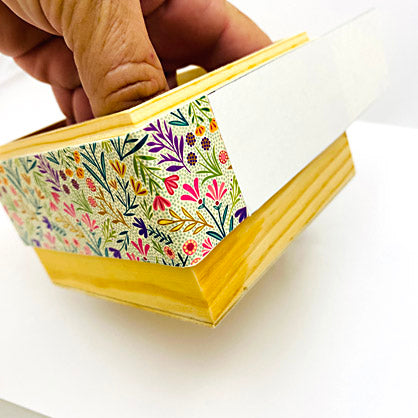
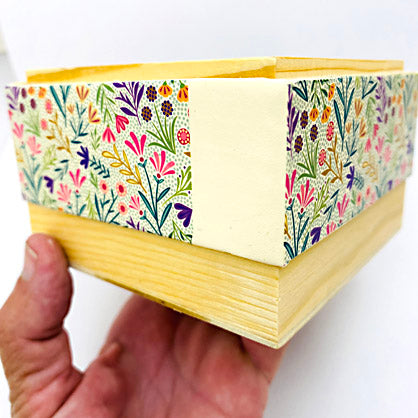
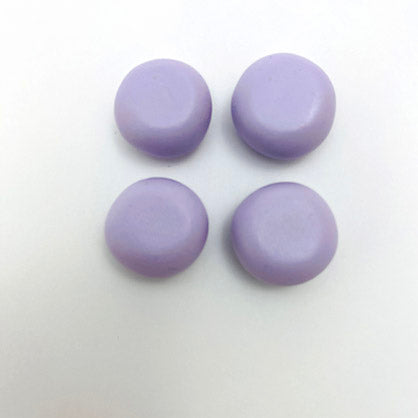
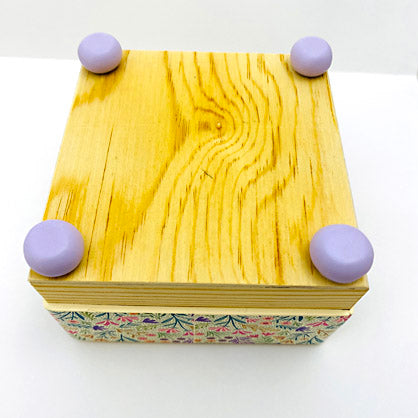
This tutorial includes instruction for making a mold from a metal button so that you can use the mold and duplicate the shape over and over. In this case, the duplicate of the button becomes a unique box top knob. We will also use transfers to create this unique box with decorative patterns. COMPLETION TIME: 2.5 Hours to make, bake, and assemble
Read Less
ADDITIONAL SUPPLIES
  • Large metal button
  • Corn starch
  • Paintbrush
  • Pencil
  • Ruler
  • Scissors
  • Sandpaper
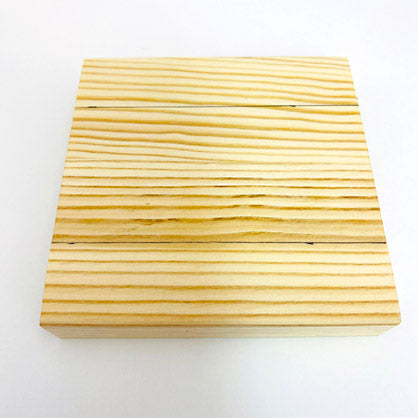
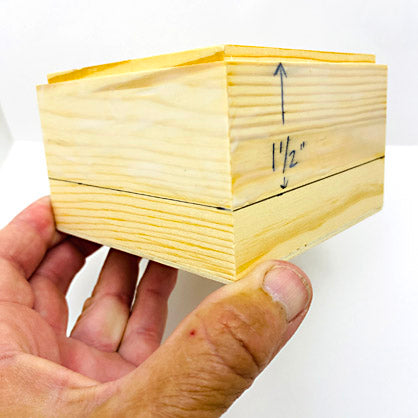
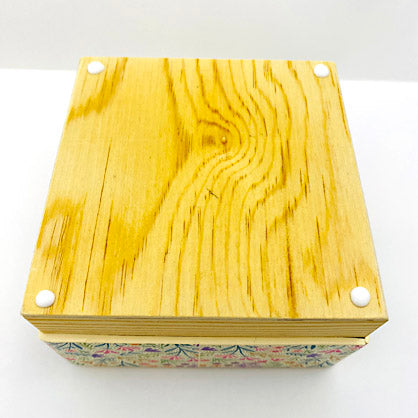
  • Wood box approximately 4” X 4” X 3” with lid
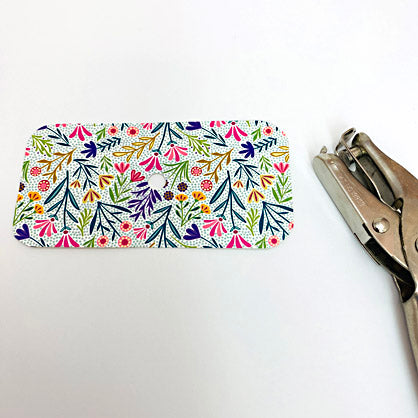
  • Paper punch
  • Tray to hold water
  • Sponge
  • Paper towel
View full details
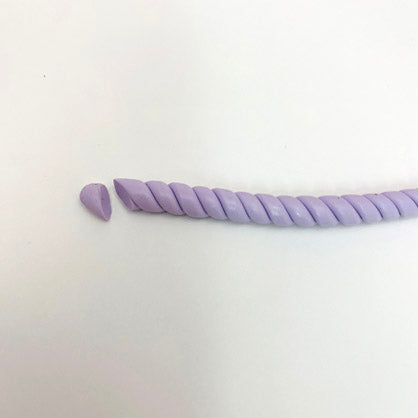
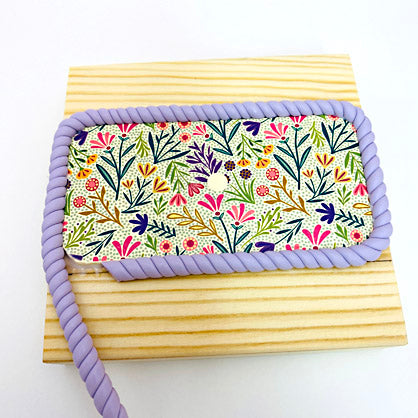
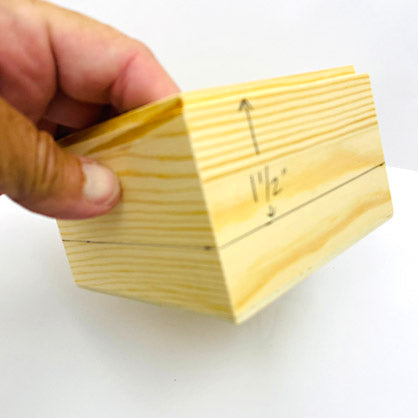
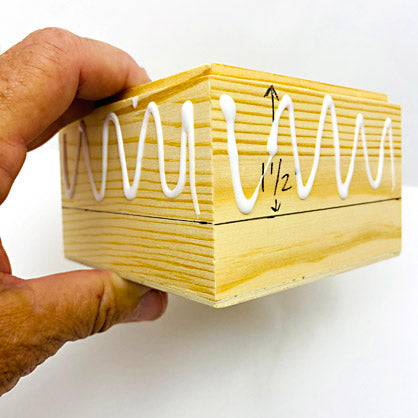
Project Instructions
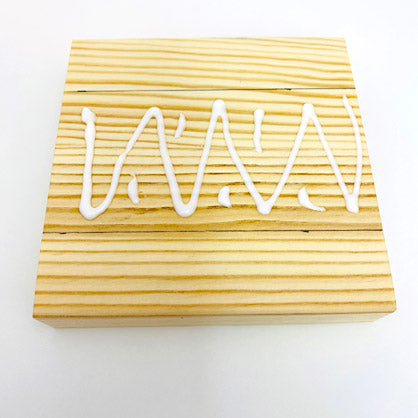
Step 1

Getting Started:

Please make sure your work area is covered and you are not working on an unprotected surface. We recommend working on the Sculpey® Oven
Safe Work Mat, wax paper, metal baking sheet, or disposable foil. Uncured
clay may damage unprotected furniture or finished surfaces.
Be sure to
cover your crafting area appropriately.

Start with clean hands, unwrap and knead clay until soft and smooth, or condition by running clay though a Pasta Machine. We recommend using a designated machine for clay purposes only. When working with multiple colors, clean hands with soap and water or baby wipes (we have found that baby wipes work best) before switching colors. Shape clay, pressing pieces firmly together.  Wash hands
after use.

Baking (also called Curing):

Begin by preheating oven to 275 °F (130 °C). After you are done creating; for best results bake clay on an oven-proof surface such as metal, aluminum foil, an index card or the Sculpey® Oven Safe Work Mat at 275°F (130 °C) for 30 minutes per ¼" (6 mm) of thickness according to package directions. Oven safe glass or ceramic
surfaces are also acceptable for baking; however please note that the baking
times may take longer as the glass or ceramic surfaces take longer to heat up. For
best baking results, use an oven thermometer. DO NOT USE MICROWAVE OVEN. DO NOT EXCEED THE ABOVE TEMPERATURE OR RECOMMENDED BAKING TIME.

Step 2

First lets start by creating the mold for the box top knob. Select a metal button that is at least 1” in diameter.

Step 3

Condition a small amount of Mold Maker - about twice as much molding material as the size of the original metal button. Make a little patty. Swipe corn starch across the face of the Mold Maker patty. Swipe corn starch across the surface of the metal button. Brush away excess corn starch from both the patty and the button with a paintbrush. You don’t need to be able to see the corn starch on the surface.

Push the button, decorative side down, into the Mold Maker patty.

Carefully remove the button from the Mold Maker. A tip is to use the Needle Tool by running it through the button shank to help lift the button out.

You can also bake the metal button in the mold if you prefer. Then
remove it by gently flexing the mold after it is baked and cooled.

Bake the Mold Maker mold following the baking instructions.

Allow to cool completely before using the mold.

Step 4

Make a small Lavender ball just large enough to fill the mold.

Swipe the mold with more corn starch and brush excess away with the
paintbrush.

Push the ball of Lavender into the mold.

Carefully flex the mold to release the Lavender shape. Set the raw
molded piece aside until the box top is ready for it.

Step 5

Let’s prepare the box itself to receive clay. You may want to pre-bake the wood box to release wood sap. Place the raw box in a 275F preheated oven and bake it for 30 minutes. Remove from the oven and allow to cool completely before handling. When it’s cool, any visible sap can be sanded or scraped away.

Mark the box top down the middle with pencil and ruler with an area 1-3/4” wide.

Step 6

Squirt a bead of Oven Bake Clay Adhesive (OBCA) in the area of the lid
where the clay will go.

Spread the OBCA with fingertips to make a thin even layer in just this area. OBCA is the perfect adhesive between raw oven bake clay and porous surfaces like wood.

Step 7

Prepare a sheet of Ivory Soufflé™ 3-1/2” x 1-1/2” through the pasta
machine on the 2nd thickest setting or use an Acrylic Clay Roller making it a
little less than 1/8” thick. Round the corners.

Cut out a matching sized piece of transfer from the Modern Floral sheet
and round the corners to match the clay.

Step 8

Mark the center of the back of the transfer piece with pencil and
ruler.

Punch a hole in the exact center of the transfer with a paper punch.
This hole will allow the clay to make direct contact with the clay knob.

Step 9

Mount the Ivory sheet to the top of the box. Burnish the clay down with
fingertips and the roller.

Place the trimmed out transfer piece, pattern side down, on the Ivory
clay. Burnish it down with fingertips.

Dip a sponge in water and moisten the paper side of the transfer with
water for at least 30 seconds. Test for adhesion by lifting just the corner.

Step 10

When the transfer has attached to the clay, you can lift the backing
paper off. Blot the transfer dry carefully with paper towel and allow to dry
completely.

Step 11

From 1/4 bar of Lavender, roll a thin rope, about 1/8” thick. Fold the rope in half and twist it together.

Step 12

Trim the end at an angle with a Clay Blade.

Step 13

Wrap the rope around the outside edges of the patterned lid panel. Make sure the rope is sticking to the edges of the patterned clay.

Step 14

Trim the long end of the rope at the same angle as the starting end and
press the ends of the rope together to make a continuous looking trim.

Step 15

Place a dot of OCBA in the punched hole in the center of the patterned
lid.

Add a 3/4” domed piece of Lavender clay to the hole in the patterned
transfer area.

Step 16

Add the raw molded piece to the domed clay using gentle pressure that doesn’t deform it. You can also use a dot of OCBA to help secure the knob to the post if you like.

The lid can be baked now following the baking instructions for Soufflé™.

Allow to cool completely before handling.

Step 17

Use pencil and ruler on the box bottom to mark a line 1-1/2” down from the edge all the way around.

Step 18

Add a bead of OBCA all the way around in the 1-1/2” area.

Step 19

Use fingertips to spread the OBCA into a thin layer all the way around.

Step 20

Make four Ivory sheets -using the pasta machine on the 2nd thickest
setting or using an Acrylic Clay Roller- that match the sides of the box
dimensions. These sheets should be 1-1/2” tall and a little less than 1/8”
thick.

Step 21

Mount the four sheets to the sides of the box in the marked 1-1/2” areas.

Smooth the seams with fingertips.

Step 22

From the transfer sheets, cut four 1/2” tall pieces the full width of the sheet. This will be slightly wider than the box dimensions but it is easy to wrap the transfers sheets around corners.

Place a transfer sheet -pattern side down- on the clay and burnish it down with fingertips. Bend it crisply around the corner as shown.

Step 23

Dip the sponge in water and apply it to the back of the transfer sheet for at least 30 seconds all over to dampen the white paper.

Test for adhesion by lifting just the corner.

When the transfer has attached to the clay, you can lift the backing paper off. Blot the transfer dry carefully with paper towel and allow to dry
completely.

Step 24

Keep adding sections of the transfer paper until the box is patterned in the clay areas all the way around. You may need to cut a small scrap to fill in the last small area. Blot the transfers dry carefully with paper towel and allow to dry completely.

Step 25

Turn the box bottom upside down.

Add a dot of OCBA at each corner.

Step 26

Create four 3/4” balls of Lavender. Flatten them slightly. These will be the box feet.

Step 27

Push the feet to the dots of OCBA. Use a flat Blade or ruler to make sure the feet are level across from each other.

Bake the box bottom following the baking instructions in Step 1 above.

Step 28

Allow to cool completely before placing the lid and bottom together.