Skip to product information
1 of 1

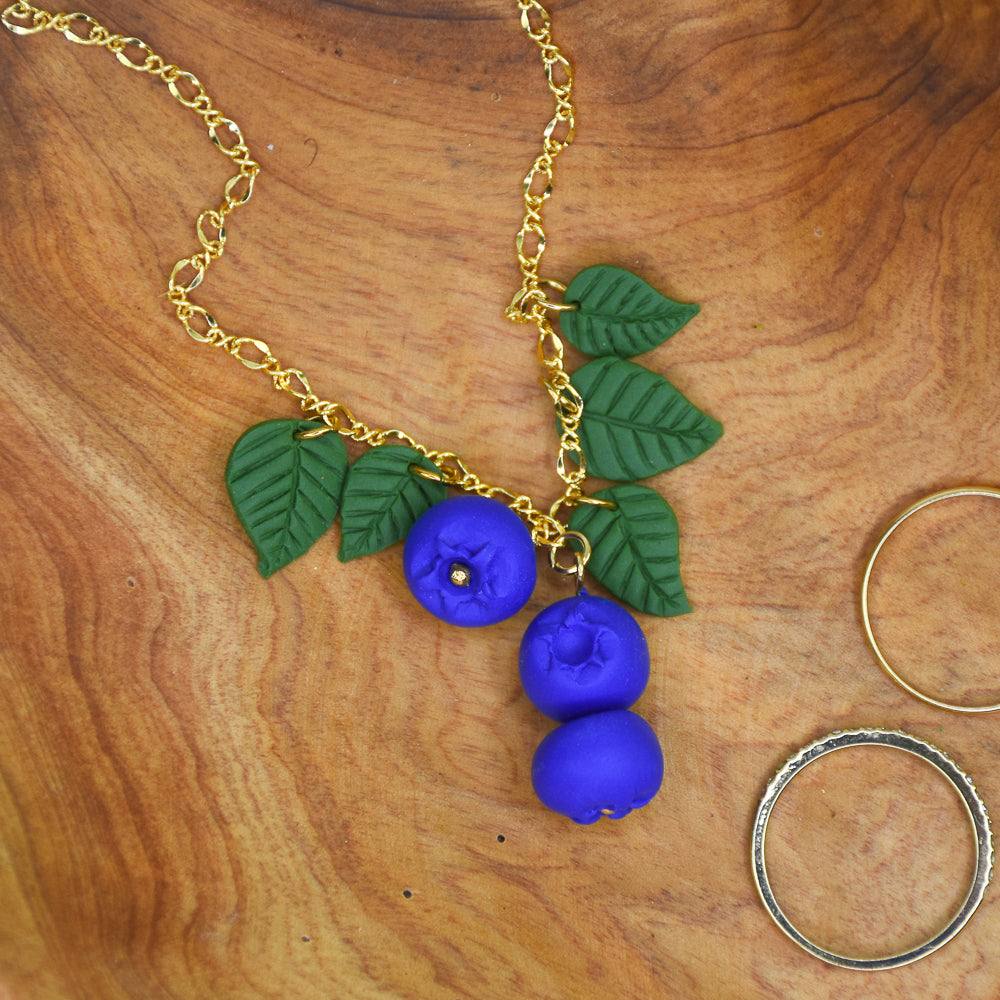
Sculpey Soufflé™ and Sculpey Premo™ Sculpted Blueberry Charm Pendant

Sculpey Soufflé™ and Sculpey Premo™ Sculpted Blueberry Charm Pendant

Designed by Amy Koranek
ADDITIONAL SUPPLIES
  • Tile
  • Exacto knife
  • Pliers (flathead/needle nose, wire cutters)
  • 1-Step Looper
  • (2) Gold ball pins
  • (1) Gold chain
  • (1) Lobster clasp
  • Small-sized ball tool
  • (4) 4 mm gold jump rings
  • (5) 6 mm gold jump rings
View full details
Project Instructions

Step 1

Getting Started:

Please make sure your work area is covered and you are not working on an unprotected work surface. We recommend working on the Sculpey Oven Safe Work Mat, wax paper, metal baking sheet or disposable foil. Uncured clay may damage unprotected furniture or finished spaces. Be sure to cover your area accordingly.

Always start with clean hands and wear lint free clothing to avoid pieces of lint falling into your clay. Unwrap and knead the clay until soft and smooth or you can condition your clay by running through a pasta machine. We recommend using a machine that is designated specifically for clay use only. When working with multiple colors, be sure to clear your hands with soap and water or use baby wipes before switching colors.

Baking (also called curing):

Begin by preheating your oven to 275*F (130*C). After you are done creating, for best results bake/cure clay on an oven-safe surface such as metal, aluminum foil, tile, an index card or the Sculpey Clay Mat at 30 minutes per ¼” (6mm) thickness (according to package directions). For best baking results, use an
oven thermometer. DO NOT USE A MICROWAVE OVEN. DO NOT EXCEED THE ABOVE TEMPERATURES OR RECOMMENDED BAKING TIME.

Step 2

Mix 1:1 ratio of Midnight Mulberry and Premo Cobalt and a small amount of Premo White.


Step 2

Step 3

Divide evenly into (3) sections and roll into balls.
Tip: Rolling in your hands is easier to get an even roundness than rolling on the tile.


Step 3

Step 4

Place the balls on the tile and slightly press down to flatten the bottom.


Step 4

Step 6

Press the ball tool into the center of the star to make a dent. It should fit just right in the middle. Repeat with other two blueberries.


Step 6

Step 7

Insert a ball pin through the top of one blueberry.
Then insert a second ball pin through the remaining two blueberries, angling one to create variation.


Step 7

Step 8

Mix 1.5 parts Racing Green to 1 part Spanish Olive to create the leaf color.

Step 8

Step 9

Use the acrylic roller to about 1/8-inch thickness then use an Exacto-type knife to cut (5) leaf shapes, ranging in size from half of a blueberry to slightly larger than one.


Step 9

Step 10

Add holes at the top and detail to leaves using needle tool.


Step 10

Step 11

Bake according to Step 1.


Step 11

Step 12

Gather your hardware and clay components. Use a 1-step looper tool to cut and loop the wire in a single step.


Step 12
Step 12

Step 13

Open a 4 mm jump ring using the flathead and needle nose pliers and loop one end of the chain through it. Close jump ring.


Step 13

Step 14

Open a 4 mm jump ring using the flathead and needle nose pliers and loop one end of the chain and the lobster clasp through it.
Close jump ring.


Step 14

Step 15

Find the center of the chain, open a 4 mm jump ring using flathead and needle nose pliers, loop the double-blueberry pin then close the jump ring. Add the second blueberry a couple links from the first blueberry pin.


Step 15

Step 16

Skip a few links from the first blueberry and attach the second blueberry pin to the chain with a 4 mm jump ring. Then, skip one link from a blueberry, open a 6 mm jump ring, add a leaf, and close the ring.
Repeat with the remaining leaves.


Step 16

Step 17

Here is a look at my completed pendant.

Step 17