Skip to product information
1 of 1

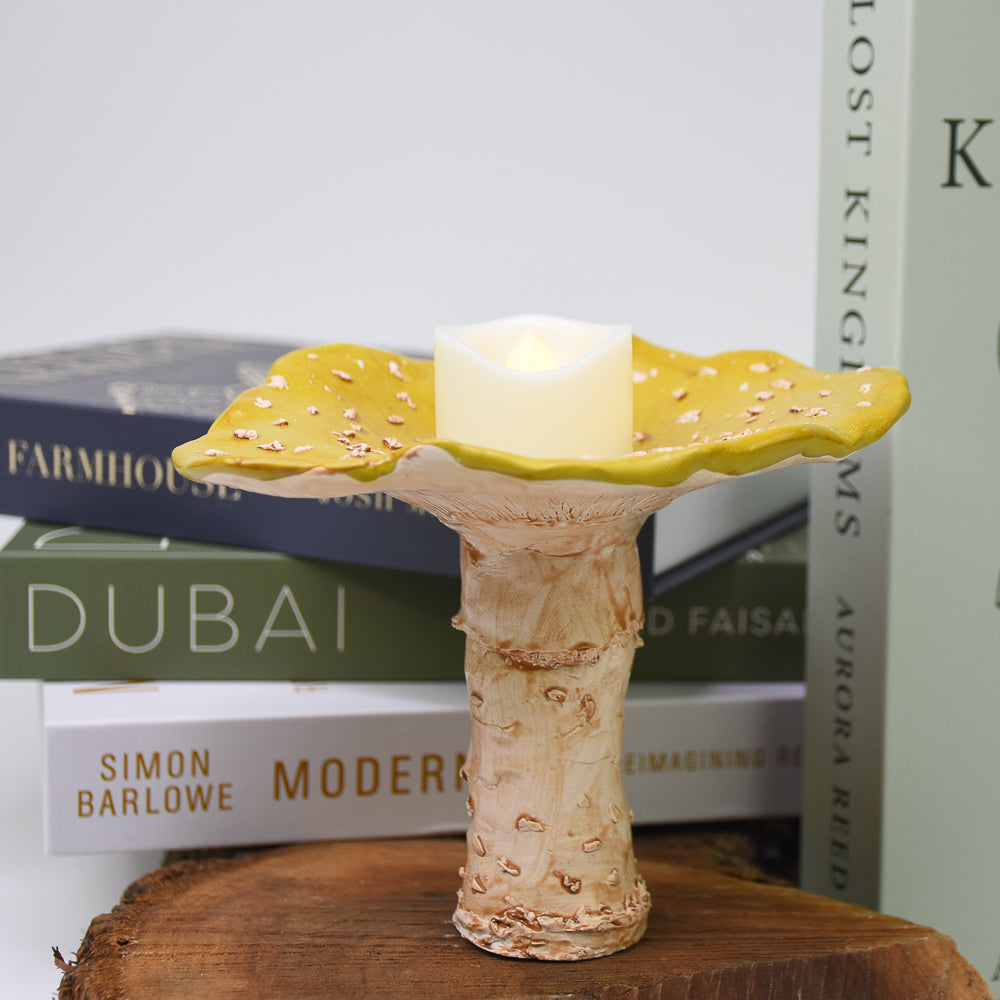
Sculpey Soufflé™ Mushroom Votive Holder

Sculpey Soufflé™ Mushroom Votive Holder

Designed by Abigail Shaeffer
Read More
Carefully sculpted to capture the natural details of a mushroom cap and stem, this large, realistic mushroom votive is a showstopper. Its size is perfect for holding a votive candle holder or use nestle it amongst your houseplants, adding a charming and whimsical touch to any space. Tip: You can add texture like gills to the underside of the mushroom, like I did, but it doesn’t show at all so I skipped adding it into the instructions. TIME TO COMPLETION: About 3 hours
Read Less
ADDITIONAL SUPPLIES
  • ·         Pasta machine
  • ·         Tile or baking sheet
  • ·         Aluminum Foil
  • ·         Small Ramekin or Condiment Dish
  • ·         Exacto Knife
  • ·         Votive Candle
  • ·         Brown Acrylic Paint
  • ·         Paintbrush
  • ·         Toothbrush
View full details
Project Instructions

Step 1

Getting Started:

Please make sure your work area is covered and you are not working on an unprotected surface. We recommend working on the Sculpey® Oven Safe Work Mat, wax paper, metal baking sheet, or disposable foil. Uncured clay may damage unprotected furniture or finished surfaces. Be sure to cover your crafting area appropriately.

Start with clean hands,
unwrap and knead clay until soft and smooth, or condition by running clay
though a Pasta Machine. We recommend using a designated machine for clay
purposes only. When working with multiple colors, clean hands with soap and
water or baby wipes (we have found that baby wipes work best) before switching
colors. Shape clay, pressing pieces firmly together.  Wash hands after
use.

Baking (also called
Curing):

Begin by preheating
oven to 275 °F (130 °C). After you are done creating; for best results
bake clay on an oven-proof surface such as metal, aluminum foil, an index card
or the Sculpey® Oven Safe Work Mat at 275°F (130 °C) for 30 minutes per ¼"
(6 mm) of thickness according to package directions. Oven safe glass or ceramic
surfaces are also acceptable for baking; however please note that the baking

times may take longer as the glass or ceramic surfaces take longer to heat
up. For best baking results, use an oven thermometer. DO NOT USE MICROWAVE
OVEN. DO NOT EXCEED THE ABOVE TEMPERATURE OR RECOMMENDED BAKING TIME.

Step 2

Mix 2.5 oz (about 1¼ bars) of Soufflé Igloo, ⅓ bar of Soufflé Ivory, and ¼ bar of Soufflé Almond Rose, reserving a small pinch of the Almond Rose for later.


Step 2

Step 3

Combine Soufflé Cadmium Yellow with Premo Cowboy, using an amount equivalent to two pea-sized portions.


Reserve a little Cadmium Yellow for later. Mix well.


Step 3

Step 4

Add a pea-sized amount of Souffle Poppyseed to the chartreuse mixed color and mix well.


Step 4

Step 5

Roll out chartreuse mixed color about 3 mm thickness and 5 inches in diameter. Lay a disk of the light tan (about ¼ of the total amount) on top, about 2mm thickness, and about 4.5 inches in diameter.


Step 5

Step 6

Cut most of the excess, leaving only a small amount of the chartreuse showing.


Step 6

Step 7

Fold the chartreuse color over the edges, highlighting the natural, flowing edges.


Step 7

Step 8

Mix a pinch of Souffle Cadmium Yellow to about ⅕ bar of Souffle Igloo.


Step 8

Step 9

Use a toothbrush to create small and large flecks by brushing the mixed ivory color directly over the mushroom cap.


Step 9

Step 10

Set the mushroom cap into a bakeable ramekin or bakeable condiment dish, letting the clay settle naturally. You may need to gently press it down to create a level area for the votive candle.

Bake according to Step 1.

Step 10

Step 11

With remaining ivory mixed color, roll most of the clay into a long log about 4 inches tall
and 1.5 inches thick, saving about a walnut-sized portion.

Step 11

Step 12

Apply a generous amount of Sculpey Oven Bake Adhesive to the underside of the mushroom cap.


Step 12

Step 13

Place some of the ivory-colored clay onto the underside of the mushroom cap, then add the log of ivory clay for the stem.


Step 13

Step 14

Place the stem upside down onto the mushroom cap. Use texture tools, such as a ball tool, to gently smooth and blend the clay.


Step 14

Step 15

Use remaining ivory mixed color to create a strip of clay, about ½ inch wide and long enough to wrap around the top of the stem under the mushroom cap.


Step 15

Step 16

Wrap the strip around the mushroom stem, cutting off any excess clay. Leave the edge of the clay strip intentionally rough.


Step 16

Step 17

Mix 1 part Almond Rose to 4 parts Igloo.


Step 17

Step 18

Combine the mixed color with Sculpey Oven Bake Adhesive.


Step 18

Step 19

Use crafting knife to scrape small pieces around base of mushroom stem.

Step 19

Step 20

Use crafting knife to add small bits all over the stem.

Bake according to Step 1.

Step 20

Step 21

Mix equal parts brown acrylic paint and Sculpey gloss glaze.


Step 21

Step 22

Paint brown glaze all over mushroom cap and stem.


Step 22

Step 23

Here is a couple of looks at my completed project.

Step 23
Step 23