Skip to product information
1 of 1

Sculpey Soufflé™ Desert Cameo Earrings

Sculpey Soufflé™ Desert Cameo Earrings

Read More
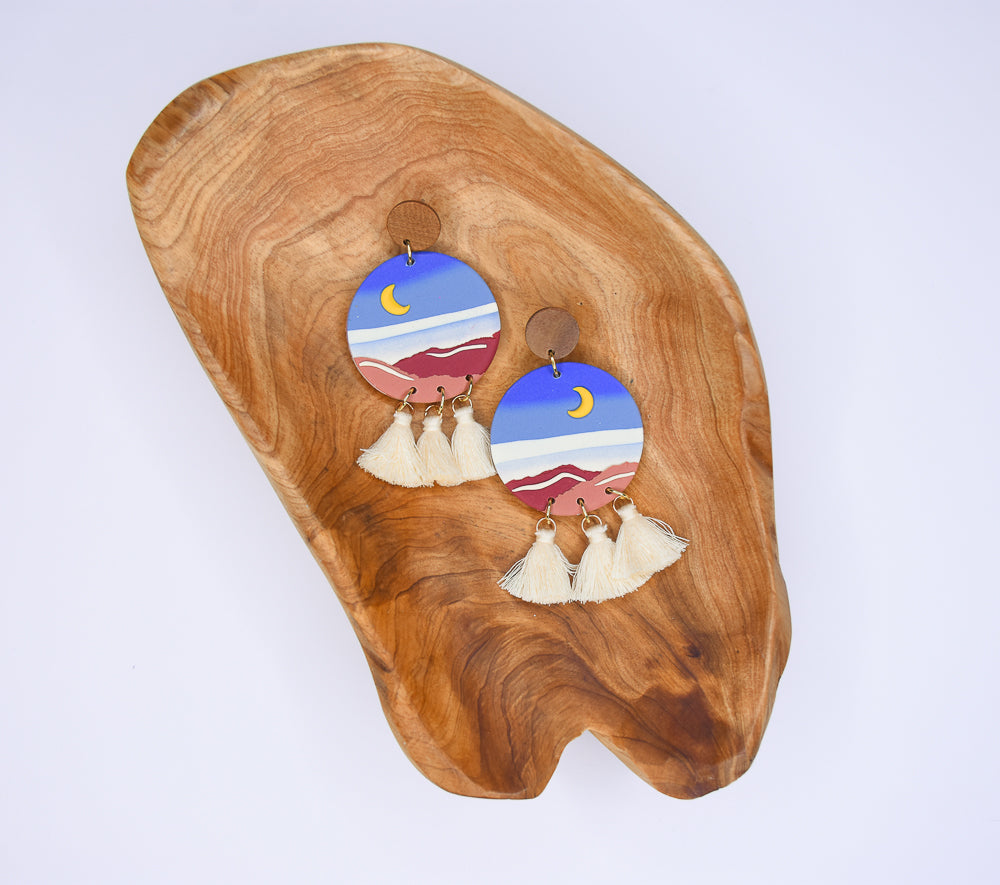
Create this lovely desert night scene earrings with a couple of clever layers of colors and some added details. Why not make a pendant to match as well? This design can be worn with your casual clothing as well as with office wear.
Read Less
ADDITIONAL SUPPLIES
  • 6 mm Gold tone jump rings (8)
  • Small natural tassels (6)
  • Flat nose pliers
  • Wood discs with post built in (2)
View full details
Project Instructions

Step 1

Getting Started:
Please make sure your work area is covered and you are not working on an unprotected surface. We recommend working on the Sculpey® Oven-Safe Work Mat, wax paper, metal baking sheet, or disposable foil. Uncured clay may damage unprotected furniture or finished surfaces. Be sure to cover your crafting area appropriately.


Start with clean hands, unwrap and knead clay until soft and smooth, or condition by running clay though a Pasta Machine. We recommend using a designated machine for clay purposes only. When working with multiple colors, clean hands with soap and water or baby wipes (we have found that baby wipes work best) before switching colors. Shape clay, pressing pieces firmly together. Wash hands after use.


Baking (also called Curing):
Begin by preheating oven to 275 °F (130 °C). After you are done creating; for best results bake/cure clay on an oven-proof surface such metal, aluminum foil, an index card or the Sculpey® Clay Mat at 275°F (130 °C) for 30 minutes per 1/4" (6 mm) thickness according to package directions. Oven safe glass or ceramic surfaces are also acceptable for baking/curing; however please note that the baking/curing times may take longer as the glass or ceramic surfaces take longer to heat up. For best baking results, use an oven thermometer. DO NOT USE MICROWAVE OVEN. DO NOT EXCEED THE ABOVE TEMPERATURE OR RECOMMENDED BAKING TIME.

Step 2

Roll Cornflower, Bluestone, and Ivory into little logs 2” long and 1/4” thick.
Push the logs together tightly.

Step 3

Flatten the logs with the Roller so that they stick to each other.

Step 4

Pushing the short end into the pasta machine first so that the stripes are perpendicular to the rollers, sheet the striped clay on the thickest setting.

Step 5

Repeat a pattern of folding the striped sheet, matching like color to like color, and pressing it through the machine on the thickest setting, fold first, to blend the colors.
You don’t need a perfect blend, just a pretty sky like blend will work.

Step 6

Add a few little strips of Ivory to the lower blue areas.

Step 7

Press the sheet through the pasta machine again to blend in the Ivory.

Step 8

Press the sheet through, without folding it, on the second thickest setting to thin it and make it longer.

Step 9

Make sure you have a long enough sheet that will accommodate two of the second largest circles. Even if the circle runs off the bottom of the sheet, that is okay because we will add a bottom layer of the landscape colors later.

Step 10

Cut out two of the second largest circles from the Graduated Circle Cutters.
NOTE: I cut my circles from the back of my blended sheet because I liked the back side better.
If the bottom edge is jagged, cut it clean with a Clay Blade.

Step 11

Sheet Sedona or Cabernet to the same thickness as the circles.
Add a little patch of one of these colors as needed to the bottom of the circle.

Step 12

Sheet Cabernet as thinly as you can with either the Clay Roller or the pasta machine - this sheet is from the 6th thickest setting on my machine.
Tear the clay into little strips with your fingertips. This will give a really natural look to your landscape.

Step 13

Tear several strips of Cabernet. This is way more than we will need but will give a variety a choices to pick from for the landscape.

Step 14

Lay a piece of the Cabernet across the bottom. You can feel free to audition as many of these pieces as you like to get the look you like.

Step 15

Repeat Steps 12-14 with Sedona clay and audition Sedona strips in front of the Cabernet.

Step 16

Once you like the landscape, press the sheets to the background.
Cut out the same size circles again, removing the excess clay round the edges.

Step 17

Add tiny ropes of Ivory to the upper portions of the landscapes where they might catch light from the little moons.
Add tiny crescents of Yellow Ochre in the sky for moons. I made one of mine waxing crescent and one waning crescent. These are just slivers of clay that I pinched the end of to hand make the moons.

Step 18

Layout the earring design as shown.

Step 19

Poke holes in the clay to provide holes needed after baking for assembly. You can use the Needle Tool or the Blunt Point Tool for piercing holes.
Bake the landscapes following the baking instructions for Sculpey Soufflé™.
Allow to cool completely before handling.

Step 20

Use flat nose pliers to assemble the pieces with jump rings as shown.

707-21

Repeat assembly for both earrings.