

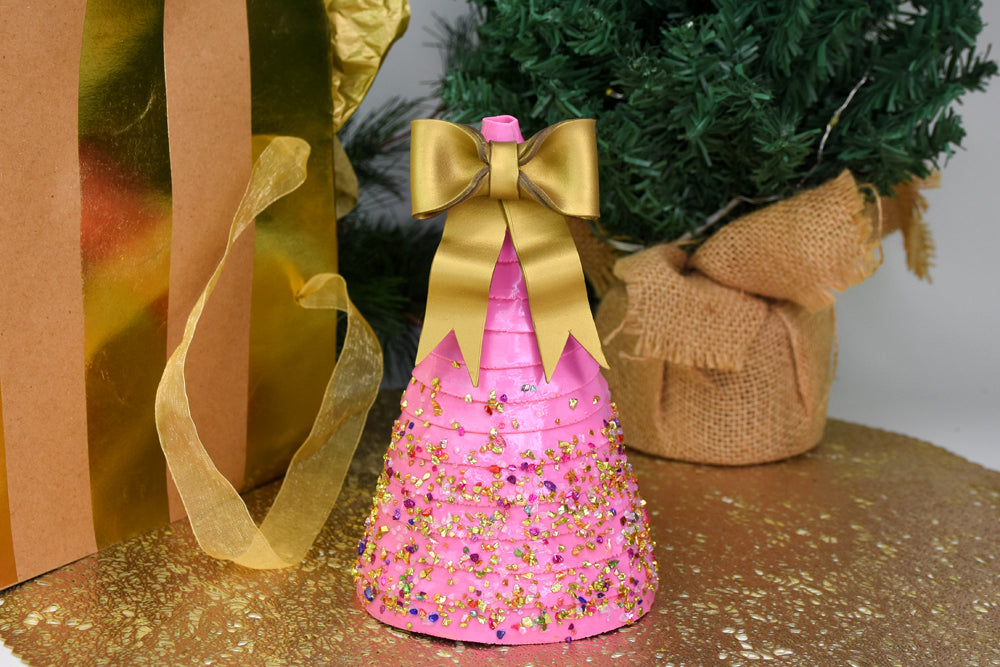
Sculpey Premo™ & Sculpey Soufflé™ Pink Christmas Tree Table Decor
Sculpey Premo™ & Sculpey Soufflé™ Pink Christmas Tree Table Decor
Read More
Glam up your holiday decorations with this delightful sparkling pink and gold holiday tabletop tree. Why not make several and use them as place setting decorations?
TIME TO COMPLETION: About 90 minutes
Read Less
ADDITIONAL SUPPLIES
- Your choice of glitter flakes or rhinestones
- Aluminum Foil
- Clear Instant Glue
- Tissue blade, clay blade or other long sharp blade
Project Instructions
Step 1
Step 2

Step 3

Step 4

Step 5

Step 6

Step 7

Step 8
