
Skip to product information
1 of 1

Sculpey Premo™ Nordic-Inspired Bag Charm

Sculpey Premo™ Nordic-Inspired Bag Charm

Designed by Abigail Shaeffer
Read More
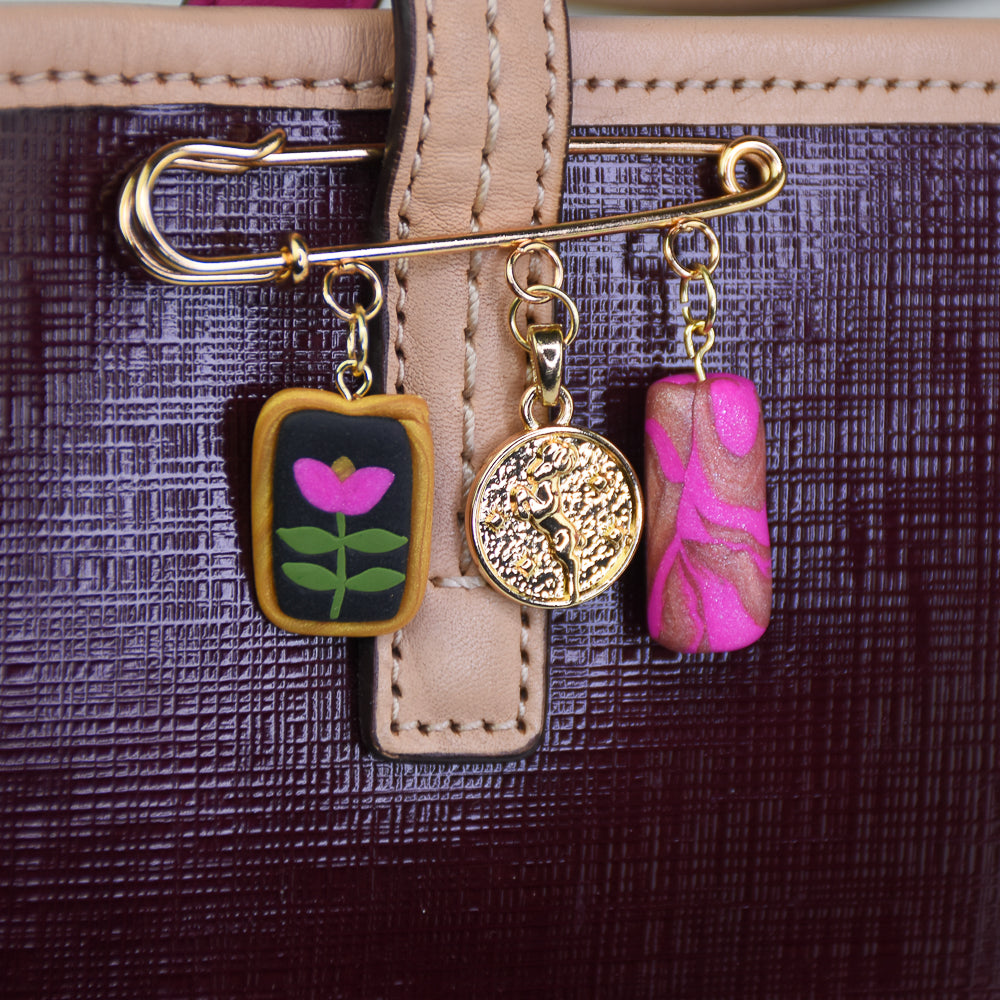
This Nordic-inspired bag charm features a trio of unique accents hanging from a sturdy safety pin. One charm, a sleek cylinder in Orchid Metallic and Rose Gold, and another, a delicate Nordic-style flower, showcase the versatility of polymer clay. Together, they create a playful yet elegant mix—perfect for adding personality and subtle sparkle to any bag. TIME TO COMPLETION: Sculpting takes approximately 40 minutes, 30 minutes of baking, and 5 minutes for assembly.
Read Less
ADDITIONAL SUPPLIES
  • Pasta machine
  • Tile or baking sheet
  • Aluminum Foil
  • Rectangle Cutter (½ inch)
  • Exacto Knife
  •  Safety Pin Clip
  • Charm
  • (2) Eye Pins
  • (3) 6mm Gold Jump Rings
  • Jewelry Pliers (round nose/flathead/wire cutters)
View full details
Project Instructions

Step 1

Getting Started:

Please make sure your work area is covered and you are not working on an unprotected surface. We recommend working on the Sculpey® Oven Safe Work Mat, wax paper, metal baking sheet, or disposable foil. Uncured clay may damage unprotected furniture or finished surfaces. Be sure to cover your crafting area appropriately.

Start with clean hands, unwrap and knead clay until soft and smooth, or condition by running clay though a Pasta Machine. We recommend using a designated machine for clay purposes only. When working with multiple colors, clean hands with soap and
water or baby wipes (we have found that baby wipes work best) before switching
colors. Shape clay, pressing pieces firmly together.  Wash hands after use.

Baking (also called Curing):

Begin by preheating oven to 275 °F (130 °C). After you are done creating; for best results bake clay on an oven-proof surface such as metal, aluminum foil, an index card
or the Sculpey® Oven Safe Work Mat at 275°F (130 °C) for 30 minutes per ¼"
(6 mm) of thickness according to package directions. Oven safe glass or ceramic
surfaces are also acceptable for baking; however please note that the baking
times may take longer as the glass or ceramic surfaces take longer to heat up. For best baking results, use an oven thermometer. DO NOT USE MICROWAVE OVEN. DO NOT EXCEED THE ABOVE TEMPERATURE OR RECOMMENDED BAKING TIME.

Step 2

Roll Souffle Poppyseed through pasta machine on setting 2 and cut out one rectangle shape using the cutter. Remove excess.


Step 2

Step 3

Roll out a thin log of Premo Spanish Olive, about ¼ long, for the flower stem.


Step 3

Step 4

Place the stem on the Poppyseed base as shown in photo.


Step 4

Step 5

Roll Premo Spanish Olive through pasta machine on setting 7 (very thin) and cut out (4) leaf shapes.


Step 5

Step 6

Place the leaves on the stem.


Step 6

Step 7

Pinch off a very small amount of Premo Orchid Metallic and roll it into two rice-grain shapes.


Step 7

Step 8

Use your finger to gently flatten.


Step 8

Step 9

Pinch off a very small amount of Premo 18K Gold and roll it into a rice-grain shape.


Step 9

Step 10

Gently place the Premo 18K Gold shape onto the clay base and press down.

Step 10

Step 11

Place the two rice-grain shapes of Premo Orchid Metallic angled over the Premo 18K Gold piece and gently press down.


Step 11

Step 12

Use the acrylic roller to gently flatten the flower into the clay base.


Step 12

Step 13

Roll out a thin log of Premo 18K Gold, about 1.5 inches long.


Step 13

Step 14

Wrap the log around the rectangle charm and cut off any excess.


Step 14

Step 15

Cut eye pin to short length and insert through the top of the rectangle charm.


Step 15

Step 16

Roll equal amounts of Premo Orchid Metallic and Premo Rose Gold (about the volume of a marble each) into elongated logs.


Step 16

Step 17

Twist logs together. Fold in half and twist again. Repeat a third time if necessary.

Step 17

Step 18

Roll into a cylinder about ⅝ inch long, cut eye pin to length, and insert through the top of the charm.

Bake according to the directions in Step 1 above and allow to cool.


Step 18

Step 19

Open a 6 mm jump ring using needle nose and flathead pliers, loop a charm through, and close jump ring. Repeat with other charms.


Step 19
Step 19

Step 20

Here is a look at my completed project!

Step 20