

Sculpey Premo™ Forest Green and Gold Leaf Embellished Vase
Sculpey Premo™ Forest Green and Gold Leaf Embellished Vase
Designed by syndee holt
Read More
Read Less
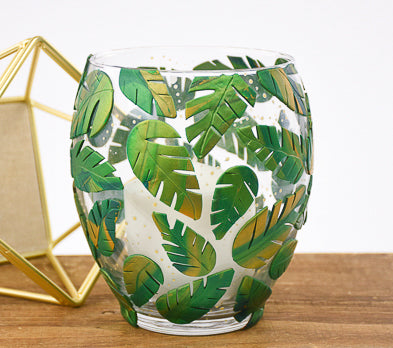
Marbled Forest Green and Gold Premo clays are the stars of this gorgeous vase that is quick and easy to make. Add some trailing golden dots with Gold Liquid Sculpey®.
TIME TO COMPLETION: 1 hour including baking
ADDITIONAL SUPPLIES
- Glass jar about 6-7 inches high
- Paper towel
Project Instructions
- Getting Started:
Start with clean hands, unwrap and knead clay until soft and smooth, or condition by running clay though a Pasta Machine. We recommend using a designated machine for clay purposes only. When working with multiple colors, clean hands with soap and water or baby wipes (we have found that baby wipes work best) before switching colors. Shape clay, pressing pieces firmly together. Wash hands after use.
- Baking:
Roll a coil of Forest Green that is about 1/2 inch diameter by 4 inches. Roll a coil of the Gold clay that is about 1/4 inch diameter and same length. Twist the two coils together.
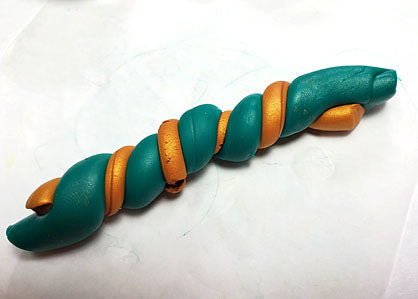
Flatten the twisted coil with your hand and run through the Clay Conditioning Machine (Pasta machine) on the widest setting.

Continue to fold and roll until the colors marble together to your liking. I find that by not folding neatly, I get nicer marbling. Sheet the clay out on the middle setting for a thinner sheet that is still easy to handle.

Cut out some leaves using the 3 largest of the teardrop cutters. Fold up the remaining clay, sheet it again and repeat! You may need to repeat steps 1-4 twice.

Use the smallest of the Dual Ended Tools to draw the center vein down a leaf. I like to allow the line to curve slightly.

Use the Clay Blade to make slices on either side of the center vein.

Gently pick up each finished leaf by the two ends and gently stretch it a little to open the slits some more as you apply it to the glass. Apply your leaves facing in all directions. I even put trimmed some to fit along the top and bottom edges.

Once you are satisfied with your leaves. Make a small puddle of Gold Liquid Sculpey (LS) on your wipeable work surface. Dip the small Dual Ended tool into the puddle.

Add curving lines of dots between the leaves. As you continue to dot with the tool, without dipping the tool again, the dots will get smaller in diameter, which just adds to the effect!

Bake your vase according to the directions in Step 1 above. Allow the vase to cool completely in the oven before removing.

- Choosing a selection results in a full page refresh.
- Opens in a new window.