Skip to product information
1 of 1

Sculpey Premo™ Art Deco Wall Planter

Sculpey Premo™ Art Deco Wall Planter

Designed by Amy Koranek
Read More
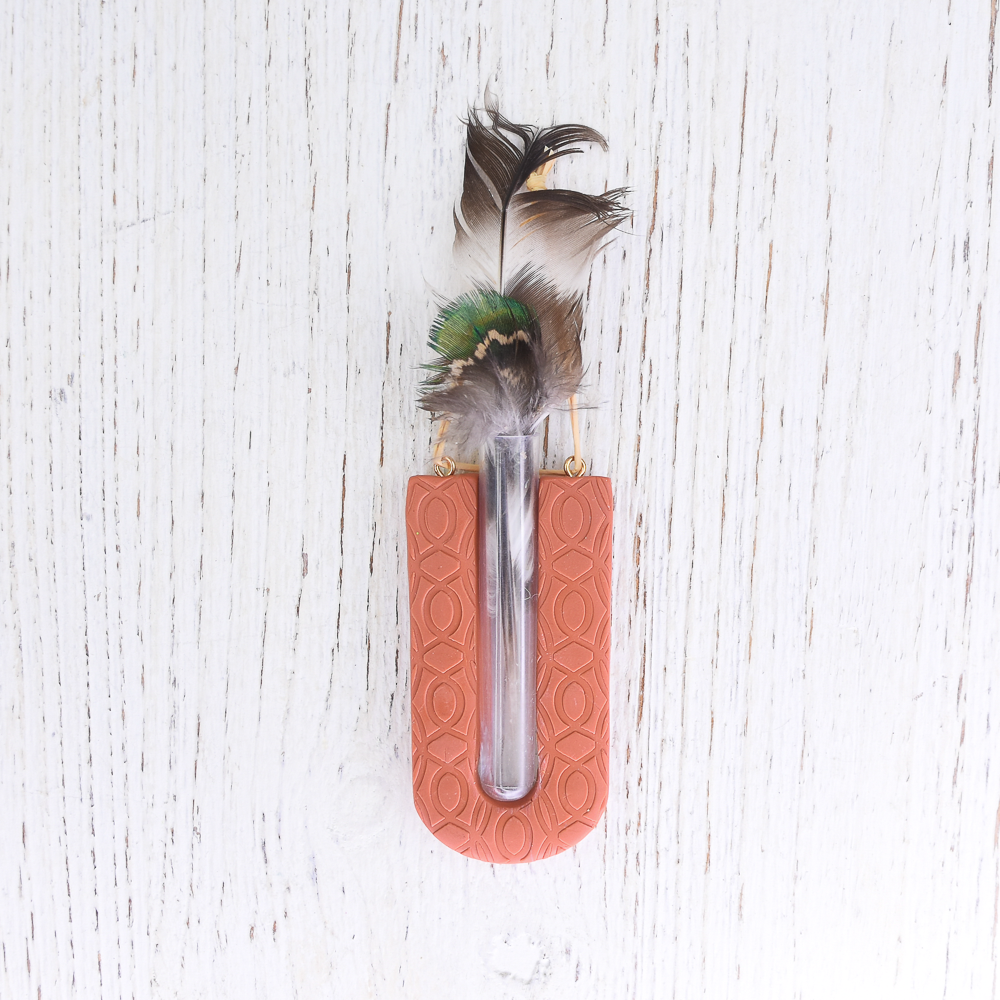
Show off your green thumb with a plant cutting in this clever wall hanger. No green thumb? Fill the tube with some gorgeous feathers or dried plants. TIME TO COMPLETION: 60 Minutes to make and bake
Read Less
ADDITIONAL SUPPLIES
  • Screw in eye hooks (2)
  • 12” Coordinating cord, ribbon, or twine
  • 3” Small clear bead tube
  • Instant drying glue
View full details
Project Instructions

Step 1

Getting Started:

Please make sure your work area is covered and you are not working on an unprotected surface. We recommend working on the Sculpey® Oven-Safe Work Mat, wax paper, metal baking sheet, or disposable foil. Uncured clay may damage unprotected furniture or finished surfaces. Be sure to cover your crafting area appropriately.

Start with clean hands, unwrap and knead clay until soft and smooth, or condition by running clay though a Pasta Machine. We recommend using a designated machine for clay purposes only. When working with multiple colors, clean hands with soap and water or baby wipes (we have found that baby wipes work best) before switching colors. Shape clay, pressing pieces firmly together. Wash hands after use.

Baking (also called Curing):

Begin by preheating oven to 275 °F (130 °C). After you are done creating; for best results bake/cure clay on an oven-proof surface such metal, aluminum foil, an index card or the Sculpey® Clay Mat at 275°F (130 °C) for 30 minutes per 1/4" (6
mm) thickness according to package directions. Oven safe glass or ceramic
surfaces are also acceptable for baking/curing; however please note that the
baking/curing times may take longer as the glass or ceramic surfaces take
longer to heat up. For best baking results, use an oven thermometer. DO NOT USE
MICROWAVE OVEN. DO NOT EXCEED THE ABOVE TEMPERATURE OR RECOMMENDED BAKING TIME.

Step 2

The size of my wall planter is designed to hold an empty plastic bead tube that I’m
using for the vessel. Depending on what kind of tube you have, you may need to
adjust the size accordingly. You can use a bead tube or a test tube or a water
vial that comes on the stems of roses.

Sheet or roll a bar of Terra Cotta to 1/8” thick with the Acrylic Clay Roller or through the pasta machine on the thickest setting. You will want the sheet to be about 5” wide.

Step 3

Cut three pieces each 1-1/2” x 3-1/4”.

Step 4

Stack the pieces up and roll over them to seal them together and press out air
bubbles with the Acrylic Clay roller. The bead tube that I’m using is shown by
the side of the clay slab to show the proportion. The tube is about 1/3 the
width of the slab. If you are using a different size tube, you may need to
adjust the size of the clay. The thickness of the clay slab is almost as thick
as the tube.

Step 5

Score two lines down the clay slab as shown where the tube will go.

Step 6

Use the 1/2” circle cutter to remove the area at the bottom of the scored lines. This
will be where the bottom of the tube sits.

Step 7

Position the Art Deco Stencil over the clay slab. Line up the pattern in the stencil to be symmetrical with the design.

Roll the stencil with the Acrylic Clay Roller to impress the image into the clay.

Step 8

Carefully lift the stencil to reveal the pattern.

Step 9

Remove the clay from the center along the scored lines connecting the circle cut out
at the bottom. Test how the tube fits into this space and adjust accordingly so
it sits nicely.

Step 10

Use the 2” Circle Cutter to score a line in the bottom of the planter.

Step 11

Cut the bottom of the planter along the scored line. Smooth all the edges of the
planter with fingertips.

Step 12

Screw an eye hook into each side of the planter.

Remove the plastic tube for baking.

Step 13

Bake the planter following the baking instructions for Sculpey Premo™.

Allow to cool completely before handling.

Add a cord to hang the planter with.

Glue the tube in permanently with instant drying glue.