

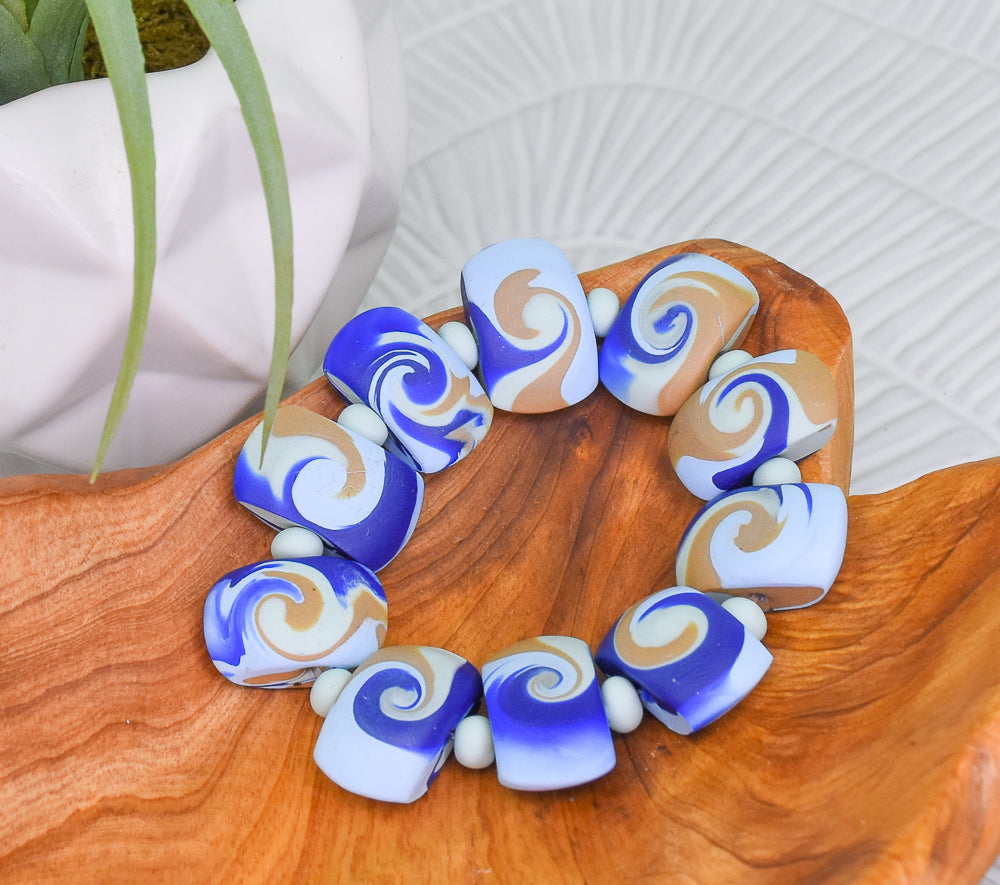
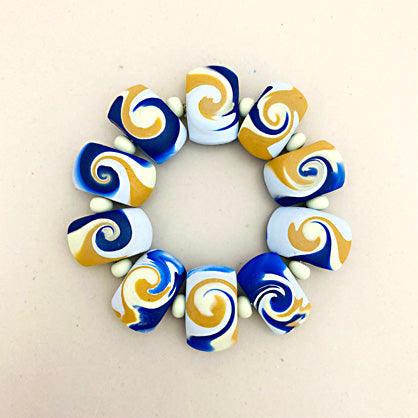
Sculpey Premo™ and Sculpey Soufflé™ Lentil Bead Bracelet
Sculpey Premo™ and Sculpey Soufflé™ Lentil Bead Bracelet
Designed by Amy Koranek
Read More
Create this gorgeous bracelet using a classic bi-cone lentil bead technique. There is a trick to rolling these that is completely explained in the project and once you get the technique down, you will be making these in every color combo you can!
COMPLETION TIME:
90 Minutes to make, bake, and assemble
Read Less
ADDITIONAL SUPPLIES
- 12” Stretchy string
- Scissors
Project Instructions
- Getting Started:
Start with clean hands, unwrap and knead clay until soft and smooth, or condition by running clay though a Pasta Machine. We recommend using a designated machine for clay purposes only. When working with multiple colors, clean hands with soap and water or baby wipes (we have found that baby wipes work best) before switching colors. Shape clay, pressing pieces firmly together. Wash hands after use.
- Baking (also called Curing):
Condition 1/8 bar of each color and shape into a thick log about 2.5” long.

Group the colors up as shown.

Roll and twist the colors into a log.

Keep rolling and twisting to thin the log and multiply the twists. Make the log about 5/8” thick.

Chop the log into equal sections about 5/8” long with the Mini Blade. You will need 10 pieces to complete a bracelet.

Roll each piece into a ball.

It will be best if you read through these instructions first before proceeding if you’ve never made a Lentil Bead before. The process takes you through a ball shape to a bi-cone shape to a Lentil Bead. If you’ve never done this before you may want to find a video online to walk you through it.
Now we will turn each ball into a Lentil Bead. Start by placing one ball with all four colors facing upward under the Lentil Bead Tool.
Now we will turn each ball into a Lentil Bead. Start by placing one ball with all four colors facing upward under the Lentil Bead Tool.

Holding the Lentil Bead Tool with both hands, rotate the tool making the clay ball spin between the tool and the work surface. Soon the top of the ball will be dragged by the Lentil Bead Tool and the bottom of the ball will be dragged by the work surface as you rotate the tool in a steady motion level to the work surface. Choose which direction you will go - either clockwise or counterclockwise - and
do NOT change the direction once you start rolling. The more rotations the clay goes through the more spirals will be achieved.
do NOT change the direction once you start rolling. The more rotations the clay goes through the more spirals will be achieved.

This will produce a bi-cone bead with two points each point having a swirl design on the top. I am only stopping here to show you what the bi-cone looks like. It would be ideal if you do not stop and just keep going even though the bi-cone has been achieved

Keep rotating the Lentil Bead Tool parallel to the work surface. Look through the tool to make sure the clay colors are spinning around the top point. When you like the look of the spirals, slow the circles down, make the circle rotations smaller until the bi-cone changes to a Lentil Bead shape.
The entire process takes a lot of practice! It took me a good long time and several tutorial videos before I really got the hang of it! Be patient with yourself and don’t give up - the end result of good technique and beautiful Lentil Beads is worth the investment of time.
The entire process takes a lot of practice! It took me a good long time and several tutorial videos before I really got the hang of it! Be patient with yourself and don’t give up - the end result of good technique and beautiful Lentil Beads is worth the investment of time.

Carefully slice the sides off the Lentil Bead to make Square Lentil Beads (if you like).

Poke a horizontal hole - flat side to flat side - through the Lentil Bead for stringing using the Mini Needle Tool.

Repeat Steps 8-13 to make at least 10 Lentil Beads.
Roll a rope of Glacier that is 1/4” thick. Cut off 1/4” pieces to create small spacer beads. Roll each into a ball and pierce with the Mini Needle Tool.
Bake the beads on the Baking Cushion following the baking instructions for Sculpey Soufflé™. Bake the spacer beads following the baking instructions for Sculpey Soufflé™. Allow the beads to cool completely before handling.

String the Lentil Beads with spacers between each one onto stretchy bead cord.

Tie off the bead cord with an overhand knot and pull the knot to hide it into one of the beads.
- Choosing a selection results in a full page refresh.
- Opens in a new window.