Skip to product information
1 of 1

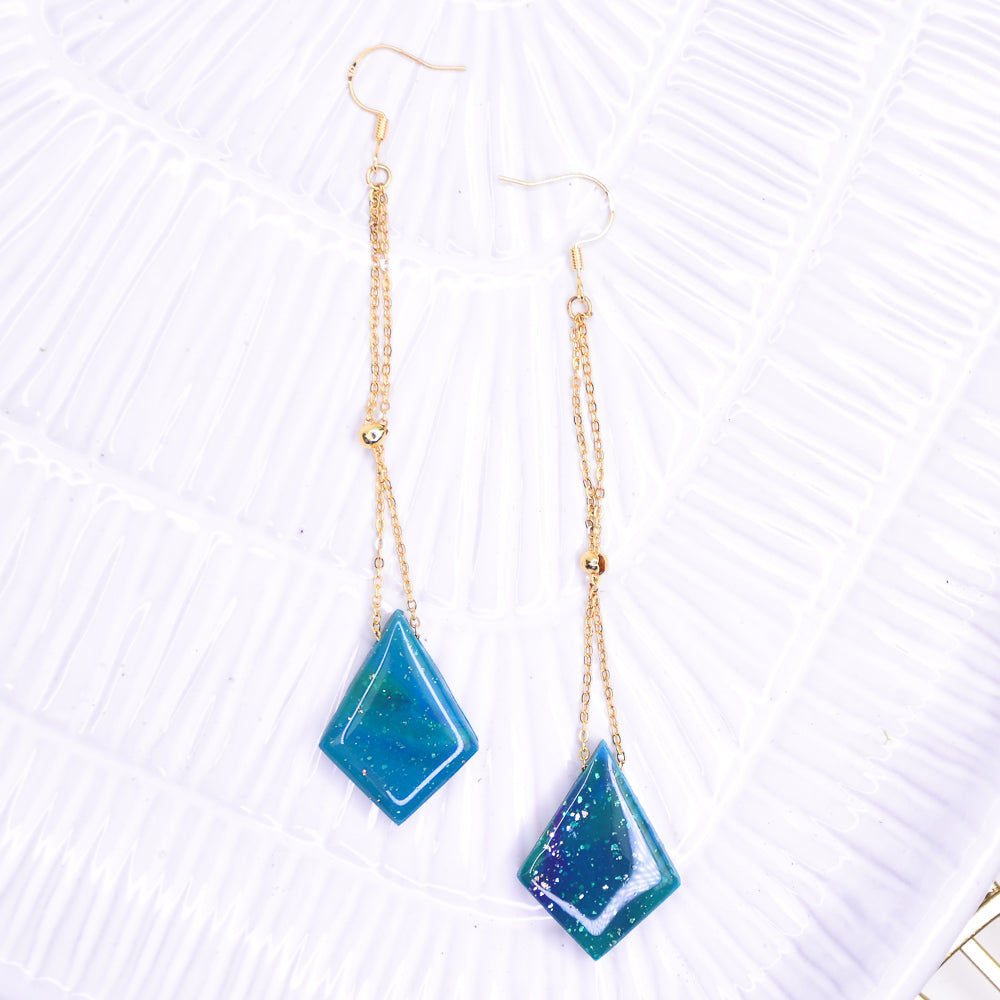
Sculpey Premo™ Marble Faux Stone Earrings

Sculpey Premo™ Marble Faux Stone Earrings

Designed by Erica Gamboa
Read More
Swirl together some rich jewel tones and add a touch of metallic gold highlights to create these elegant dangles. Time to completion: 35 minutes to make and 30 minutes to bake
Read Less
ADDITIONAL SUPPLIES
  • ·         Fish hook style earwires
  • ·         Jump Rings (6mm)
  • ·         Pliers
  • ·         Gold jewelry crimp
  • ·         Gold metal leaf
  • ·         Gold chain
  • ·         Square or Arch Shape Cutter
  • ·         Clay Roller
  • ·         Basic shape cutter
  • ·         Needle tip tool or toothpick
View full details
Project Instructions

Step 1

Getting Started:

Please make sure your work area is covered and you are not working on an unprotected work surface. We recommend working on the Sculpey Oven Safe Work Mat, wax paper, metal baking sheet or disposable foil. Uncured clay may damage unprotected furniture or finished spaces. Be sure to cover your area accordingly.

Always start with clean hands and wear lint free clothing to avoid pieces of lint falling into your clay. Unwrap and knead the clay until soft and smooth or you can condition your clay by running through a pasta machine. We recommend using a machine that is
designated specifically for clay use only. When working with multiple colors, be sure to clear your hands with soap and water or use baby wipes before switching colors.

Baking (also called curing):

Begin by preheating your oven to 275*F (130*C). After you are done creating, for best results bake/cure clay on an oven-safe surface such as metal, aluminum foil, tile, an index card or the Sculpey Clay Mat at 30 minutes per ¼” (6mm) thickness (according to package directions). For best baking results, use an over thermometer. DO NOT USE A MICROWAVE OVEN. DO NOT EXCEED THE ABOVE TEMPERATURES OR RECOMMENDED BAKING TIME.

Step 2

Cut a quarter bar of each clay color (NOTE: I've used to a little more for my green clay) and begin to condition your pieces through your machine on the thickest setting. Fold in half and continue to run through the machine to ensure the clay is conditioned and ready to work with. (Make sure to wipe down your machine between colors to avoid any contamination from the previous color). Roll out the conditioned clay on the thinnest setting to prepare for cutting.

Step 2

Step 3

Roll clay in to long tubes and twist together multiple times until you get your desired mixture.

Step 3

Step 4

Roll your clay into a ball and then flatten using your clay roller to about .25” thickness.


Step 4

Step 5

Add gold leaf to your slab and then cut using a shape cutter.

Step 5

Step 6

Using needle tip tool or toothpick, make holes through top sides of pieces for chain to be able to guide through.

Step 6

Step 7

Using your tissue blade, slowly and carefully run it along under the clay pieces to pull it away from your surface. Transfer to your baking surface and place in the pre-heated oven and bake as directed. *Remember to let your pieces cool completely before removing from the tray.*

Step 7

Step 8

Once your pieces are cool, remove from the baking surface. Use wire cutters to cut your chain to the size you prefer for the dangles. Use pliers to add jump rings to add the fish hooks to the jump rings and chain. You can also use the pliers to pinch the gold-toned jewelry crimp in the middle of the chain.

Step 8

Step 9

Enjoy your new Earrings!

Step 9