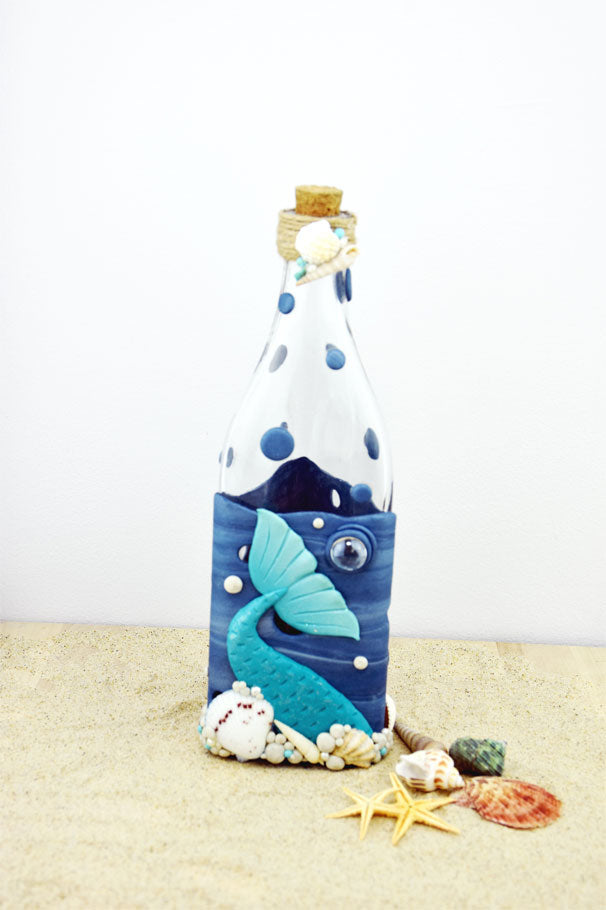
Sculpey III Mixed Media Mermaid Themed Bottle
Sculpey III Mixed Media Mermaid Themed Bottle
Read More
This beachy bottle can adorn any room in the house!
Design by Phoebe Doehring
Read Less
ADDITIONAL SUPPLIES
Bottle; Clear Glass half marbles (5 to 7); Assorted Small Seashells; Small Pearl Beads; Small turquoise Beads(or substitute and make small Teal balls); Twine; Glitter Dust; Glue Gun ;Small circle cutters (¾”, ½”); Plastic Wrap; waxed paper; Mermaid Tail template; hot glue gun

Project Instructions
- Getting Started:
Start with clean hands, unwrap and knead clay until soft and smooth, or condition by running clay though a Pasta Machine. We recommend using a designated machine for clay purposes only. When working with multiple colors, clean hands with soap and water or baby wipes (we have found that baby wipes work best) before switching colors. Shape clay, pressing pieces firmly together. Wash hands after use.
- Baking:
Roll a log of Navy Pearl clay approximately ¾” thick by 4”. Next roll a log of Light Blue Pearl clay ½” by 4”. Roll another log of Pearl clay ½” by 4”. Press these together and twist. Fold in half and repeat a couple of times. Roll into a ball. Your clay colors should now be marbled nicely together.


Flatten the ball into a rectangle that will fit into your clay machine. Run this through the clay machine on the #2 setting. Lay this out onto the wax paper. Lay a piece of plastic wrap on top of your marbled sheet of clay and cut out some random holes in the clay using the two small circle cutters. Do not cut too many, maybe 8 to 10. Spread them apart well. Remove the saran wrap and lift the sheet away from the waxed paper. Carefully wrap the sheet of clay around your bottle going slow and pushing out any air bubbles as you go. The sheet will only cover the bottle about three quarters of the way up. When you get to the end trim and fit the clay together to make it seamless all the way around. You will have to smooth out the seam with your fingers so that you don’t see a line. The top will likely be uneven so use your knife to make a nice even, wavey line along the top so it looks like the ocean moving. Attach the little remaining circles that are left randomly all around the top portion of the bottle that is not covered by the clay.
- Choosing a selection results in a full page refresh.
- Opens in a new window.

