
Skip to product information
1 of 1

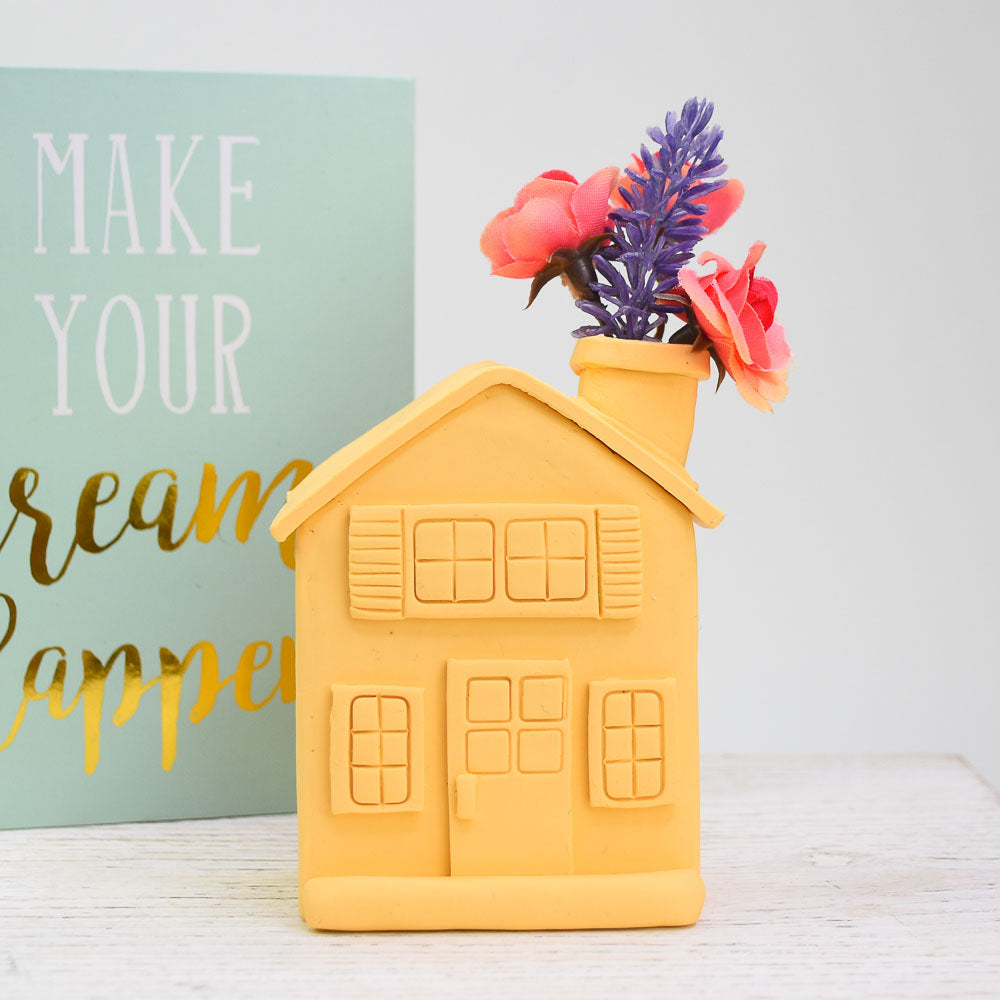
Sculpey III® Mini House Planter

Sculpey III® Mini House Planter

Designed by Amy Koranek
Read More
Display your favorite dried flowers, feathers, or scent skewers in this charming Mini House Planter. For a waterproof planter that you can water for cut flowers, you will need to adapt this tutorial to a square vase or other waterproof vessel. TIME TO COMPLETION: 90 minutes to make/bake
Read Less
ADDITIONAL SUPPLIES
  • Small cardboard box approximately 3” X 4” X 2” -OR- waterproof vessel of the same size
  • Packing tape
  • Pencil
  • Ruler
  • Sharp craft knife
  • Optional - small square and rectangle shaped cutters
View full details
Project Instructions

Step 1

Getting Started:

Please make sure your work area is covered and you are not working on an unprotected surface. We recommend working on the Sculpey® Oven Safe Work Mat, wax paper, metal baking sheet, or disposable foil. Uncured clay may damage unprotected furniture or finished surfaces. Be sure to cover your crafting area appropriately.

Start with clean hands, unwrap and knead clay until soft and smooth, or condition by running clay though a Pasta Machine. We recommend using a designated machine for clay purposes only. When working with multiple colors, clean hands with soap and
water or baby wipes (we have found that baby wipes work best) before switching colors. Shape clay, pressing pieces firmly together.  Wash hands after use.

Baking (also called Curing):

Begin by preheating oven to 275 °F (130 °C). After you are done creating; for best results bake clay on an oven-proof surface such as metal, aluminum foil, an index card or the Sculpey® Oven Safe Work Mat at 275°F (130 °C) for 15 minutes per ¼" (6
mm) of thickness according to package directions. Oven safe glass or ceramic
surfaces are also acceptable for baking; however please note that the baking
times may take longer as the glass or ceramic surfaces take longer to heat up. For
best baking results, use an oven thermometer. DO NOT USE MICROWAVE OVEN. DO NOT EXCEED THE ABOVE TEMPERATURE OR RECOMMENDED BAKING TIME.

Step 2

First prepare the cardboard box for covering with clay. The box I have is too tall, so I used a ruler and pencil to sketch out my basic shape.

Step 2

Step 3

Then I used a sharp craft knife to remove the excess box leaving a house shape with a closed bottom.

Step 3

Step 4

Since I want the top of my box to have a gabled roof, I stretched packing tape across the opening to act as a support for the roof pitch.

Step 4

Step 5

Use a Clay Roller or pasta machine on the thickest setting (approximately 1/8” thick) to make Melon sheets. Begin by covering the outside of the box with a single layer of the clay using the Clay Blade to trim away excess.

Step 5

Step 6

Add clay sheets to each side including the roof across the packing tape.

Step 6

Step 7

Sheet more Melon (as in Step 5) and add another single layer to the rooftop and let
it hang over the sides a bit for eaves.

Step 7

Step 8

Sheet more Melon (as needed). Cut out small rectangles for door and windows. Apply these to the front.


Step 8

Step 9

Use the tools to impress designs in the details like window panes and shutters. I
used small rectangular and square cutters to help make my details very neat.

Add a thick slab of clay across the front under the door for a porch.

Step 9

Step 10

Next form a square log of Melon for a chimney. Cut it at an angle with the Clay
Blade to sit on the rooftop.

Step 10

Step 11

Make a large hole using the Blunt Point Tool through the chimney (as shown).
Carefully make the hole larger by wiggling the tool and stretching the opening.


Step 11

Step 12

Keep making the hole carefully larger so that it can accommodate several stems of
dried flowers, etc.

Step 12

Step 13

Trace the size of the chimney into the rooftop. This part will be removed.

Step 13

Step 14

Carefully remove the hole in the roof with a craft knife so that the chimney hole goes
into the house itself making room for floral stems.

Place the chimney on top of the roof over the hole. Add extra details to the chimney
top with a band of clay. Add a little clay where the chimney meets the roof for extra support.

Bake/cure following the baking instructions for Sculpey III®. Allow to cool completely
before handling. Inside the chimney, cut away the packing tape with a sharp
craft knife so that the floral stems can go all the way into the house.

Step 14