
Sculpey® III Halloween Invite
Sculpey® III Halloween Invite
- Toothpick
- 5 different pieces of Halloween themed scrapbook paper
- Scrapbook adhesive
- Scissors
- Ruler
- White Craft Glue
- Black Ink
GETTING STARTED:
Do not use unbaked clay on unprotected furniture or finished surfaces. Start with clean hands and work surface area. Good work surfaces include wax paper, metal baking sheet, or disposable foil. Knead clay until soft and smooth. For best results, clean your hands in between colors. Shape clay, pressing pieces together firmly. Bake on oven-proof glass or metal surface at 275 °F (130 °C) for 15 minutes per 1/4” (6 mm) thickness. For best baking results, use an oven thermometer. DO NOT USE MICROWAVE OVEN. DO NOT EXCEED THE ABOVE TEMPERATURE OR RECOMMENDED BAKING TIME. Wash hands after use. Baking should be completed by an adult.
Begin by preheating oven to 275 °F (130 °C). Test temperature with oven thermometer for perfectly cured clay. For best results, condition all clay by running it through the clay dedicated pasta machine several passes on the widest setting. Fold the clay in half after each pass and insert the fold side into the rollers first.

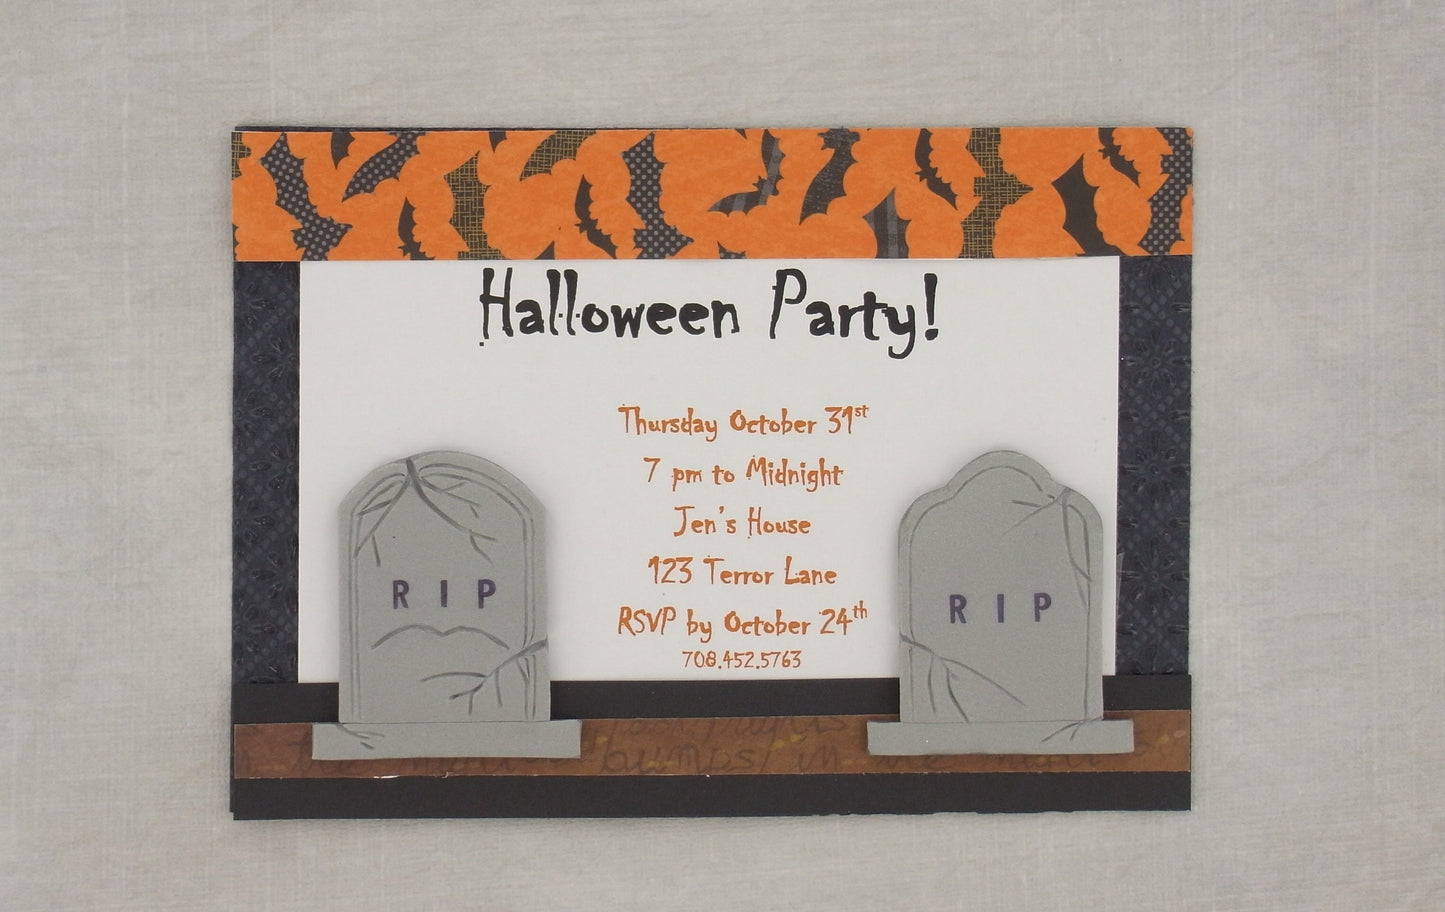
- Using the Clay Conditioning Machine on the #1 setting make a sheet of Silver clay.
- Using the Super Slicer, cut out one 1 1/2” W x 2” H rectangle.
- With the flexible blade from the Super Slicer, round the top to look like a tombstone.
- Using the Super Slicer, cut one 2” W x 1/8” H strips for the bottom of the headstone.

- Using the Clay Conditioning Machine on the #1 setting make a sheet of Silver clay.
- Using the Super Slicer, cut out one 1 1/2” W x 2” H rectangle.
- With the flexible blade from the Super Slicer, cut the top to look like a tombstone. The center rounded top should be higher than the two rounded sides.
- Using the Super Slicer, cut one 2” W x 1/8” H strips for the bottom of the headstone.
Press the headstones onto the bottom pieces and with a toothpick press lines into the headstones.
Bake as directed above and let cool completely.
Using the Alphabet Stamper and ink, press RIP onto both headstones.
Using scissors, cut a piece of scrapbook paper to 5” H x 7” W. This is the base of the invitation. Using 2 different patterned papers cut 2 strips that are 7” W x 1” H these pieces will be on the top and bottom of the invite. Using a different patterned paper cut a strip that is 7” W x 3/8” H. Print your invite info and cut the paper to 3.5” H x 6” W.
- Assemble the card as shown using adhesive.
- Add the clay pieces to the card using White Craft Glue.