

Sculpey® III Custom Notebook
Sculpey® III Custom Notebook
Read More
Read Less
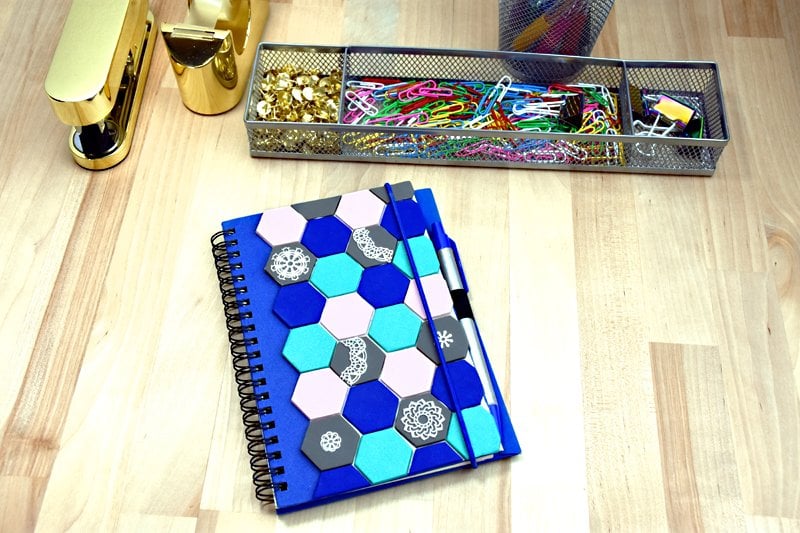
Create a quick custom look for your journal or notebook!
ADDITIONAL SUPPLIES
- Scissors
- Notebook
- Craft Glue
Project Instructions
- Clay Getting Started:
Start with clean hands, unwrap and knead clay until soft and smooth, or condition by running clay though a Pasta Machine. We recommend using a designated machine for clay purposes only. When working with multiple colors, clean hands with soap and water or baby wipes (we have found that baby wipes work best) before switching colors. Shape clay, pressing pieces firmly together. Wash hands after use.
- Clay Baking:
- Liquid Clay Getting Started:
- Liquid clay Baking:
First let’s prepare the mandala shapes so they will be ready to go when we need them. Squirt a small amount of White Liquid Sculpey® (LS) into each of the mandala shapes on the mold. Either spread the LS into all the crevices with your fingertip or with the edge of the squeegee. Bake the LS in the mold at 275 for 20 minutes. When the mold is completely cool, gently peel the baked pieces from the mold. I used the small pieces as they are and cut the larger ones with scissors to fit the hexagon shapes. Set the mandalas aside for now.

If you want to paint exposed edges of your notebook that won’t be covered with clay you should do that now. Allow the paint to dry completely before going to the next step. Cover the outside of the notebook with a layer of white craft glue. Spread the glue evenly with your fingertips so it is smooth. Allow the glue to dry completely. The glue will make a nice surface to stick the unbaked clay pieces to bond the clay to the notebook.

Sheet each clay color through the pasta machine on the thickest setting. Cut out a set of small hexagon shapes using the cutter from each color. Lay the pieces on a piece of paper or parchment paper to make them easy to move around while you’re working on your project.

Place little mandalas in the centers of the Gray hexagons. Trim larger mandalas to fit the Gray hexagons.

Place the hexagons in rows on the cover of the notebook on top of the dried glue. Be sure to place the pieces all close together with sides touching. I placed mine in a pattern of colors and rows

Carefully open the front cover and trim any clay that hangs over the edge from the back side.

Bake the entire notebook to cure the clay pieces on the front cover following the baking instructions. As soon as the time is completed, use an oven mitt to remove the notebook from the baking pan and place it on a flat hard surface like the counter top. Place a heavy book on the clay part of the cover so that the cover stays flat while it cools.
