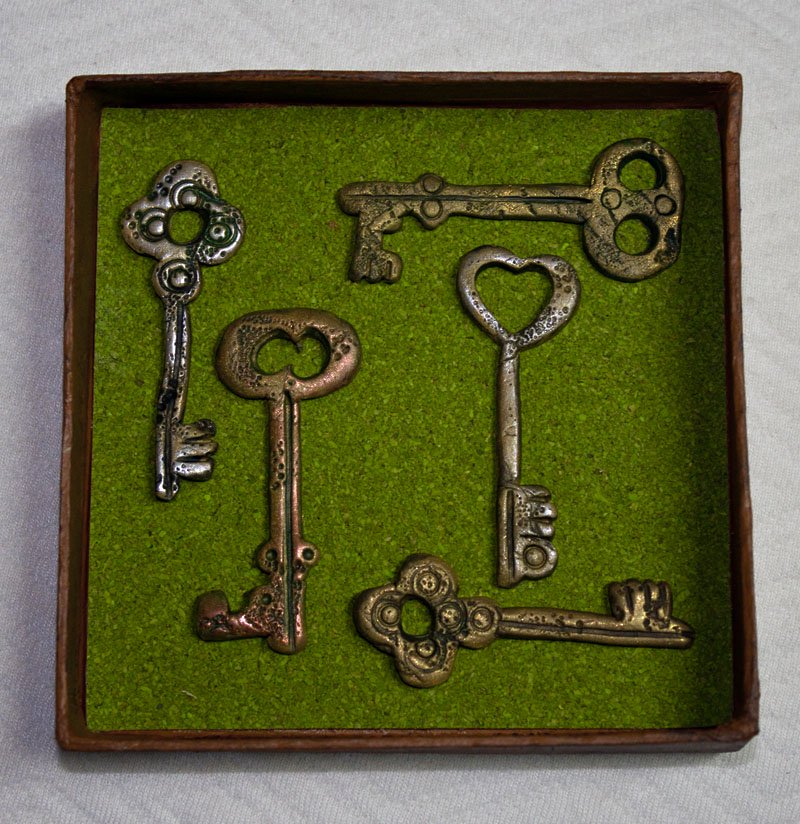
Sculpey® III Antique Key Wall Decor
Sculpey® III Antique Key Wall Decor
syndee holt
We are usually trying to turn BACK the clock and make things look new and shiny, but we are taking new clay and antiquing it. This new key template is just the ticket to create some wonderful “antique” keys in minutes!
• Small box frame
• Material for background (scrapbook page made out of cork was used)
• White glue
• Smooth ceramic tile
• Craft knife
•Couple sheets of “candy paper”, or commonly called deli wrap (Plastic wrap will work if other is not available)
• Dark grey or black acrylic paint
• Small brushs
• Paper towels
• Expired credit card or gift card
• Rough sandpaper (small piece)
• Pearl Ex powders – Antique Gold, Copper, Silver|• Small box frame
• Material for background (scrapbook page made out of cork was used)
• White glue
• Smooth ceramic tile
• Craft knife
•Couple sheets of “candy paper”, or commonly called deli wrap (Plastic wrap will work if other is not available)
• Dark grey or black acrylic paint
• Small brushs
• Paper towels
• Expired credit card or gift card
• Rough sandpaper (small piece)
• Pearl Ex powders – Antique Gold, Copper, Silver

Please make sure your work area is covered and you are not working on an unprotected surface. We recommend working on the Sculpey® Work ‘n Bake Clay Mat, wax paper, metal baking sheet, or disposable foil. Uncured clay may damage unprotected furniture or finished surfaces. Be sure to cover your crafting area appropriately.
Getting Started:
Start with clean hands, unwrap and knead clay until soft and smooth, or condition by running clay though a Pasta Machine. We recommend using a designated machine for clay purposes only. When working with multiple colors, clean hands with soap and water or baby wipes (we have found that baby wipes work best) before switching colors. Shape clay, pressing pieces firmly together. Wash hands after use.
Baking:
Begin by preheating oven to 275 °F (130 °C). After you are done creating; for best results bake clay on an oven-proof surface such metal, aluminum foil, an index card or the Sculpey® Clay Mat at 275°F (130 °C) for 15 minutes per ¼" (6 mm) thickness according to package directions. Oven safe glass or ceramic surfaces are also acceptable for baking; however please note that the baking times may take longer as the glass or ceramic surfaces take longer to heat up. For best baking results, use an oven thermometer. DO NOT USE MICROWAVE OVEN. DO NOT EXCEED THE ABOVE TEMPERATURE OR RECOMMENDED BAKING TIME.


