
Skip to product information
1 of 1

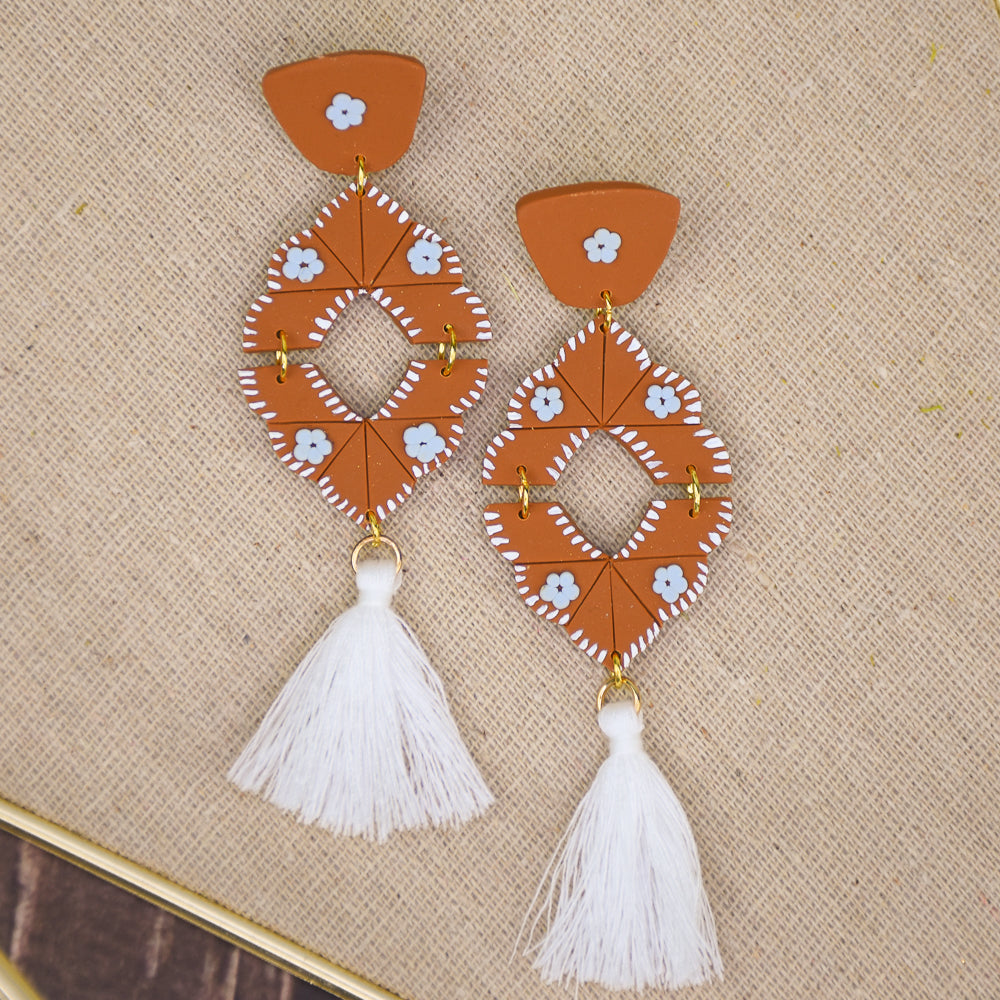
Sculpey III® Western Inspired Earrings

Sculpey III® Western Inspired Earrings

Designed by Precious Nunez
Read More
These scalloped floral earrings blend soft texture with elegant movement, making them a perfect statement piece for any season. The project uses simple cuts, layered details, and miniature flowers to create a charming, handcrafted look. TIME TO COMPLETION: About 45 minutes
Read Less
ADDITIONAL SUPPLIES

• Super glue 
• Paint brush 
• Dotting tool 
• Jewelry pliers 
• White tassels  
• White Acrylic paint 
• 6 mm Gold jump rings  
• Earring backings and posts 
View full details
Project Instructions

Step 1

Getting Started:

Please make sure your work area is covered and you are not working on an unprotected surface. We recommend working on the Sculpey® Oven Safe Work Mat, wax paper, metal baking sheet, or disposable foil. Uncured clay may damage unprotected furniture or finished surfaces. Be sure to cover your crafting area appropriately.

Start with clean hands, unwrap and knead clay until soft and smooth, or condition by running clay though a Pasta Machine. We recommend using a designated machine for clay purposes only. When working with multiple colors, clean hands with soap and
water or baby wipes (we have found that baby wipes work best) before switching
colors. Shape clay, pressing pieces firmly together.  Wash hands after use.

Baking (also called Curing):

Begin by preheating oven to 275 °F (130 °C). After you are done creating; for best results bake clay on an oven-proof surface such as metal, aluminum foil, an index card
or the Sculpey® Oven Safe Work Mat at 275°F (130 °C) for 15 minutes per ¼"
(6 mm) of thickness according to package directions. Oven safe glass or ceramic
surfaces are also acceptable for baking; however please note that the baking
times may take longer as the glass or ceramic surfaces take longer to heat
up. For best baking results, use an oven thermometer. DO NOT USE MICROWAVE
OVEN. DO NOT EXCEED THE ABOVE TEMPERATURE OR RECOMMENDED BAKING TIME.

Step 2

Condition one bar of Sandalwood clay and roll it through the thickest setting of the clay conditioning machine.

Use the large, scalloped template to cut out two shapes. Slice each shape horizontally through the center to create four pieces total.

Step 2

Step 3

Use the pointed end of the medium teardrop template and place the tip at the center of each scalloped piece and trim around it to create the cutout detail shown in the reference photo.

Step 3

Step 4

Add the indents shown in the design with a needle tool or the blunt end of a clay blade,
pressing gently to create clean impressions.

Step 4

Step 5

Use the excess clay from Step 3 to create your earring toppers. Use the designated topper shape in your template to cut out two matching pieces.

Step 5

Step 6

Condition a small amount of Arctic Blue clay, then roll it into tiny balls and shape them into miniature flowers. Place the flowers along the indented center lines of each piece, gently flattening them with a dotting tool so they adhere securely. Repeat the floral placement from top to bottom on both earrings.

Step 6

Step 7

Add one small flower to the center of each topper.

Step 7

Step 8

Use a needle tool to poke small connection holes...

One at the bottom center of each topper.

One at the top center of each scalloped middle piece.

Two at the bottom left and bottom right corners
of the lower pieces (as shown in your reference photo). Repeat for the second earring.

Step 8

Step 9


When the clay has cooled, use a small paintbrush and white acrylic paint to add fine painted lines along the outer edges of each piece, as well as along the inner cut edges created in Step 4.

Step 9

Step 10

Use jewelry pliers to open jump rings and assemble the earrings by connecting the toppers, middle sections, and bottom sections. Close each jump ring securely and repeat for the second earring.


At the bottom point of each earring, add a jump ring and attach the tassel. Close with jewelry pliers.

Step 10

Step 11

Apply a small amount of superglue to the back of each topper and secure the earring posts in place. Allow the glue to dry completely.

Step 11

Step 12

Here is a look at my completed earrings.

Step 12