Skip to product information
1 of 1

Sculpey III® Sculpted Rose Heart Decor

Sculpey III® Sculpted Rose Heart Decor

Designed by Sasha Schnee
Read More
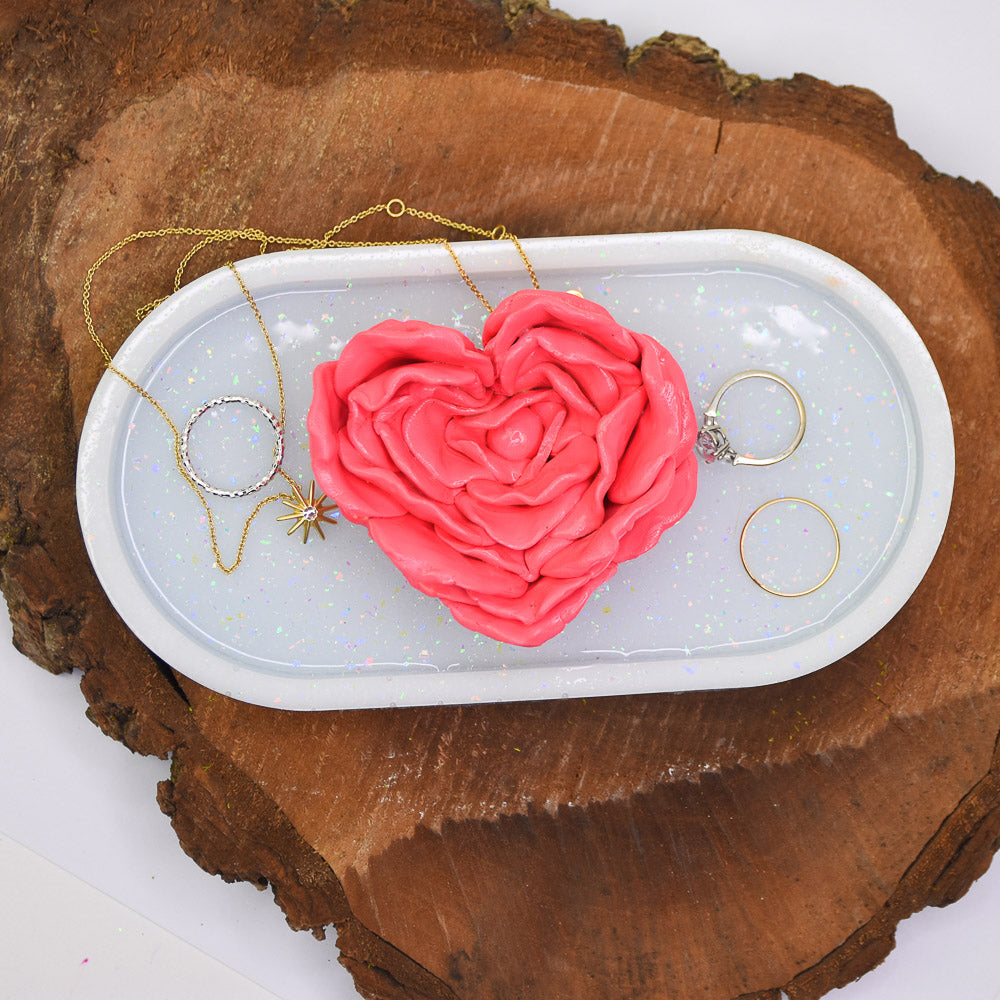
This project was fun to make and a favorite of mine because I love home decor crafts! The flower was challenging at first until I realized it was based upon odd numbers of petals. The heart shape starts to form on its own when you create/ add an odd number of petals in layers. TIME TO COMPLETION: 60 minutes
Read Less
ADDITIONAL SUPPLIES
  • Silicone tray mold 
  • 2-part epoxy
View full details
Project Instructions

Step 1

Getting Started:

Please make sure your work area is covered and you are not

working on an unprotected surface. We recommend working on the Sculpey® Oven
Safe Work Mat, wax paper, metal baking sheet, or disposable foil. Uncured clay may damage unprotected furniture or finished surfaces. Be sure to cover your crafting area appropriately.

Start with clean hands, unwrap and knead clay until soft and smooth, or condition by running clay though a Pasta Machine. We recommend using a designated machine for clay purposes only. When working with multiple colors, clean hands with soap and
water or baby wipes (we have found that baby wipes work best) before switching
colors. Shape clay, pressing pieces firmly together.  Wash hands after use.

Baking (also called Curing):

Begin by preheating oven to 275 °F (130 °C). After you are done creating; for best results bake clay on an oven-proof surface such as metal, aluminum foil, an index card or the Sculpey® Oven Safe Work Mat at 275°F (130 °C) for 15 minutes per ¼"
(6 mm) of thickness according to package directions. Oven safe glass or ceramic
surfaces are also acceptable for baking; however please note that the baking

times may take longer as the glass or ceramic surfaces take longer to heat up. For best baking results, use an oven thermometer. DO NOT USE MICROWAVE OVEN. DO NOT EXCEED THE ABOVE TEMPERATURE OR RECOMMENDED BAKING TIME.

Step 2

Create a ball for the center piece of the flower. This is what you’ll begin to build
around.


Step 3

Flatten out 3 petal pieces. You’ll want to create layers in odd numbers to achieve heart
shape.


Step 4

Wrap the 3 petals around the center piece. This is how it should look.


Step 5

Flatten out 3 more petal pieces and follow the same step as Step 2.


Step 6

Continue to repeat the same step of making petals and wrapping them around. As the
flower size increases, the petal size increases. Remember to continue creating
an odd number of petals.


Step 7

Continue following the same previous steps. As the flower size increases, you’ll want to
increase the petal size along with the quantity from 3 to 5 petals.


Step 8

As the flower size increases with the odd number of petals, you’ll notice the natural
heart shape appears. From there strategically place petals so that you can
enhance your heart shape.


Step 9

Continue adding an odd number of petals to increase the size of the heart flower.


Step 10

As you continue adding petals, you can play with the shape/ texture to give it a more realistic petal look.


Step 11

Once you're done sculpting you can bake your clay at 275 degrees Fahrenheit (130 degrees Celsius) for 30 minutes per ¼ inch (6mm) thickness.


Step 12

Once it cools, you can adhere to a tray to create a home decor piece.