Skip to product information
1 of 1

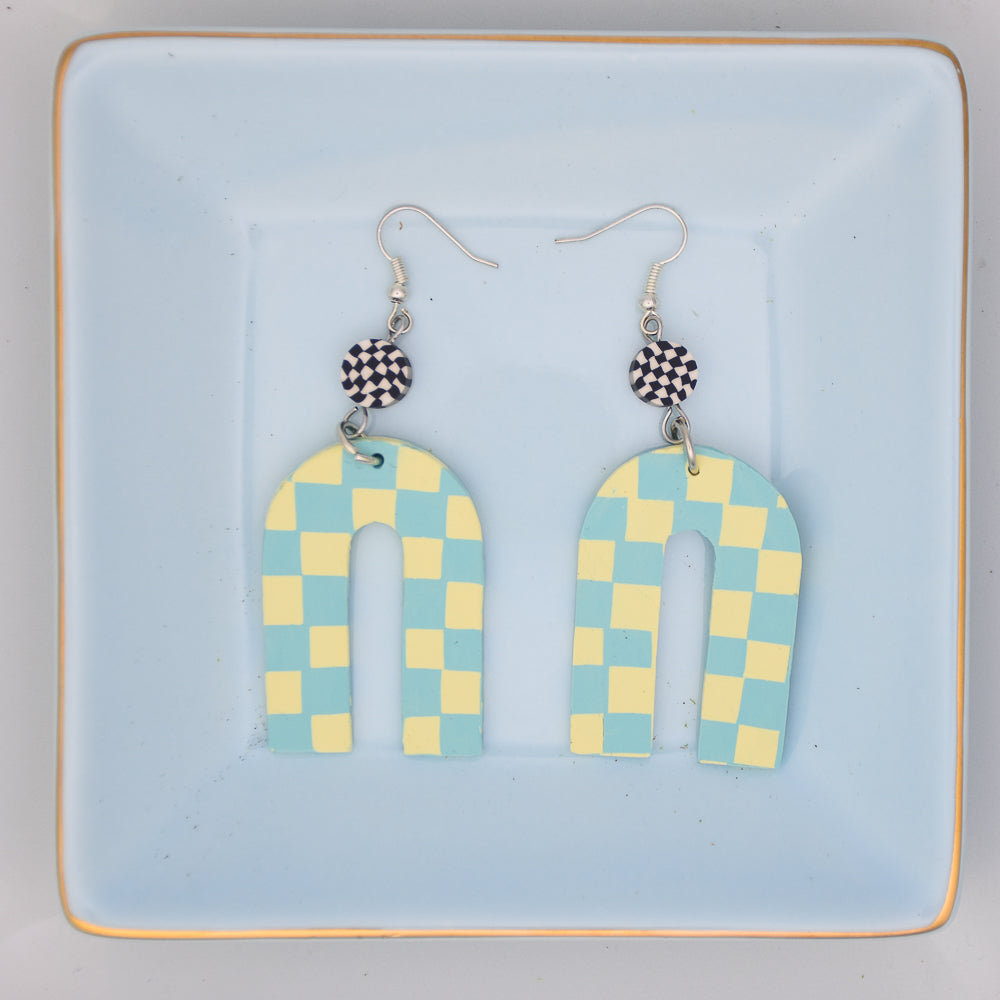
Sculpey III® Funky Checkered Earrings

Sculpey III® Funky Checkered Earrings

Designed by Bea
Read More
“Funky, spunky and where is MY pair?” will be the delighted comments you get when you wear these retro-inspired earrings! TIME TO COMPLETION: 45 minutes
Read Less
ADDITIONAL SUPPLIES
  • Rolling pin or Sculpey Acrylic Roller
  • Blade
  • New Template Sheet
  • Black and white beads
  • Earring Finding
  • Jump rings
View full details
Project Instructions

Step 1

Getting Started:

Please make sure your work area is covered and you are not working on an unprotected surface. We recommend working on the Sculpey® Oven Safe Work Mat, wax paper, metal baking sheet, or disposable foil. Uncured clay may damage unprotected furniture or finished surfaces. Be sure to cover your crafting area appropriately.

Start with clean hands, unwrap and knead clay until soft and smooth, or condition by running clay though a Pasta Machine. We recommend using a designated machine for clay purposes only. When working with multiple colors, clean hands with soap and
water or baby wipes (we have found that baby wipes work best) before switching
colors. Shape clay, pressing pieces firmly together.  Wash hands after use.

Baking (also called Curing):

Begin by preheating oven to 275 °F (130 °C). After you are done creating; for best results bake clay on an oven-proof surface such as metal, aluminum foil, an index card
or the Sculpey® Oven Safe Work Mat at 275°F (130 °C) for 15 minutes per ¼"
(6 mm) of thickness according to package directions. Oven safe glass or ceramic
surfaces are also acceptable for baking; however please note that the baking
times may take longer as the glass or ceramic surfaces take longer to heat
up. For best baking results, use an oven thermometer. DO NOT USE MICROWAVE
OVEN. DO NOT EXCEED THE ABOVE TEMPERATURE OR RECOMMENDED BAKING TIME.

Step 2

Roll a thin sheet of Sugar Cookie with either a clay dedicated pasta machine you can place a small piece of cardboard on either side of your sheet and roll to the thickness of the cardboard or select something else in your home or clay table to use as a thickness guide.

Step 3


Roll a thin sheet of Arctic Blue to the same thickness.

Step 4

Cut thin even strips and alternate the colors.

Step 5

Roll the striped sheet using a clay roller tool to seal the strips together and cut perpendicularly as shown.

Step 6

Align the strips to create an alternating checkered pattern

Step 7

Roll lightly with the acrylic clay roller (or similar tool) to help bind the pieces together.

Step 8

Use the Sculpey Tools Template Sheet to cut out the rainbow shape as shown.

NOTE: It really helps if the sheet of clay is gently pressed against a smooth surface like a ceramic tile or sheet of glass.

Step 9

Pierce the top with a needle tool. 

Bake according to the directions in Step 1 above. Allow to cool.

Step 10

   
Connect with jump rings to earring findings. I choose to add some black and white beads as well.