
Skip to product information
1 of 1

Sculpey III® Cowgirl Trinket Dish

Sculpey III® Cowgirl Trinket Dish

Designed by Precious Nunez
Read More
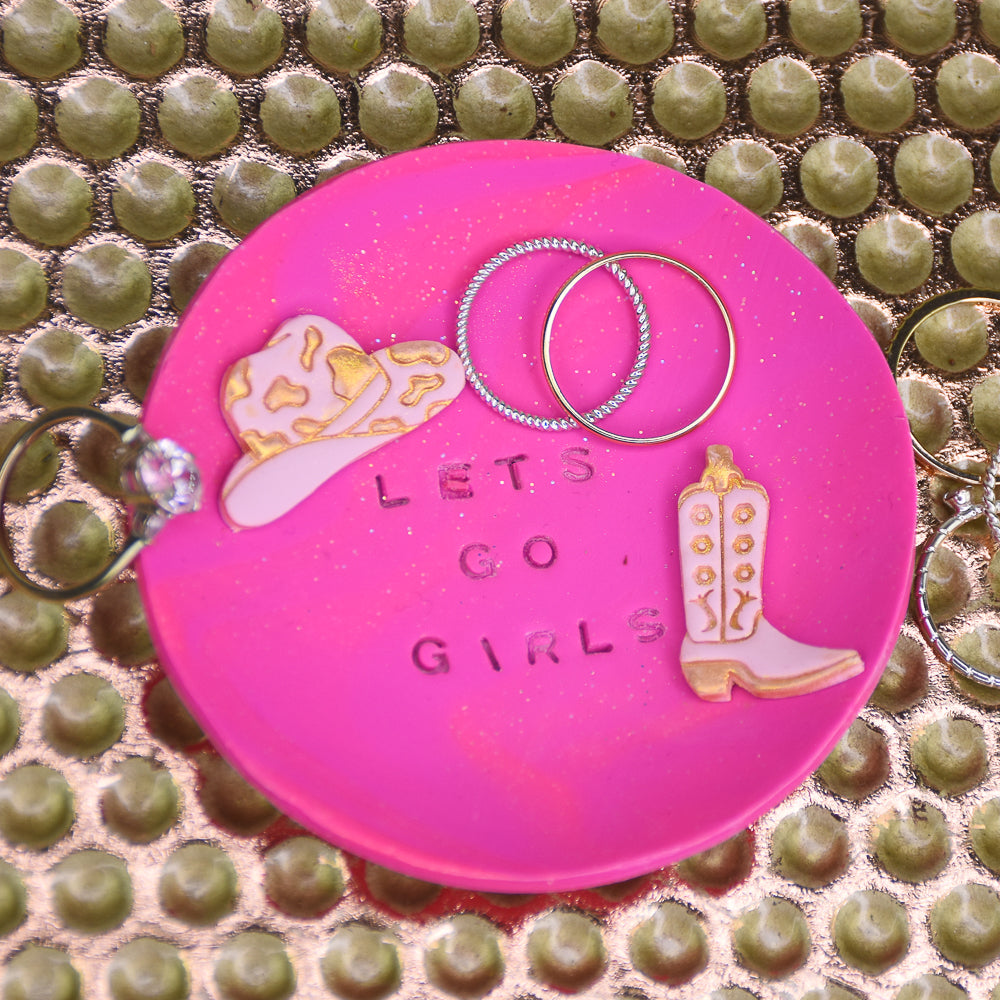
Add a little western flair to your space with this colorful Cowgirl Trinket Dish, complete with bold marbling and glittery charm details. This project is simple to create and perfect if you love pieces that are both cute and useful. With a few easy techniques, you can turn bright clay into a sturdy dish that shows off your style. It also makes a fun handmade gift or the perfect spot to keep your favorite jewelry. TIME TO COMPLETION: About 45 minutes
Read Less
ADDITIONAL SUPPLIES

 ·         Cornstarch

·         Small paint brush

·         Gold mica powder

·         Clay letter stamps

·         Nail file/ sandpaper

·         Gloss/glaze (optional)

·         Oven-safe shallow dish

·         Lid or large circle cutter

·         Cowboy themed clay cutters


View full details
Project Instructions

Step 1

Getting Started:

Please make sure your work area is covered and you are not working on an unprotected surface. We recommend working on the Sculpey® Oven Safe Work Mat, wax paper, metal baking sheet, or disposable foil. Uncured clay may damage unprotected furniture or finished surfaces. Be sure to cover your crafting area appropriately.

Start with clean hands, unwrap and knead clay until soft and smooth, or condition by running clay though a Pasta Machine. We recommend using a designated machine for clay purposes only. When working with multiple colors, clean hands with soap and
water or baby wipes (we have found that baby wipes work best) before switching
colors. Shape clay, pressing pieces firmly together.  Wash hands after use.

Baking (also called Curing):

Begin by preheating oven to 275 °F (130 °C). After you are done creating; for best results bake clay on an oven-proof surface such as metal, aluminum foil, an index card
or the Sculpey® Oven Safe Work Mat at 275°F (130 °C) for 30 minutes per ¼"
(6 mm) of thickness according to package directions. Oven safe glass or ceramic
surfaces are also acceptable for baking; however please note that the baking times may take longer as the glass or ceramic surfaces take longer to heat up. For best baking results, use an oven thermometer. DO NOT USE MICROWAVE OVEN. DO NOT EXCEED THE ABOVE TEMPERATURE OR RECOMMENDED BAKING TIME.

Step 2

Condition one full bar from each block of Magenta and Pink Glitter Sculpey clay until soft and pliable.

Step 2

Step 3

Roll both colors into long, thick snakes. Spiral them together and continue twisting to create a marbled effect. Combine into a smooth, marbled ball, making sure not to overmix.

Step 3

Step 4

Roll the marbled clay through your clay conditioning machine on #3 to form a tall, wide slab.

Step 4

Step 5

Use a large round cutter or a jar lid to cut out the base of your dish.

Step 5

Step 6

Remove the excess clay. Place the round cutout onto the bottom center of a small, oven-safe dish. Gently press and smooth the clay with your fingers to eliminate any trapped air bubbles.

Step 6

Step 7

Roll a thin slab of Ballerina clay. Dip the cowboy hat clay cutter into gold mica powder, press it onto the slab, and remove it to reveal the design. Repeat with the boot cutter. If needed, use a small paintbrush to add extra mica powder into any areas that need more coverage.

Step 7
Step 7

Step 8

Place the cowboy hat and boot accents onto the dish, positioning them near the phrase in the top left and bottom right corners. Lightly dust your small letter stamps with cornstarch to prevent sticking. Stamp the phrase “Let’s Go Girls” or any phrase you prefer onto the dish.

Bake according to the directions in Step 1 above and allow to cool. Once cooled, gently sand any rough edges with a nail file. Use a soft brush to remove leftover cornstarch from the stamped letters. Apply a glaze if you prefer a glossy finish.

Step 8