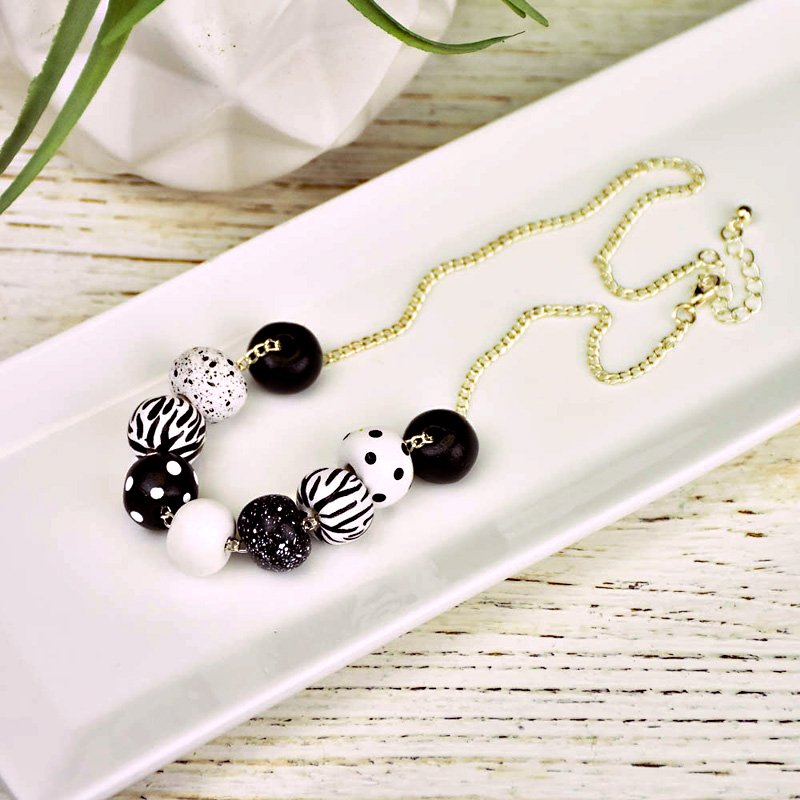
Sculpey Air-Dry Clay Dramatic Black and White Bead Necklace
Sculpey Air-Dry Clay Dramatic Black and White Bead Necklace
Designed by Linda Hollander
Read More
Read Less
This painted necklace is so easy to make you will want to make a bunch to match with all of your lewks!
ADDITIONAL SUPPLIES
- DecoArt Multi-Purpose Sealer
- DecoArt Americana Gloss Enamels: Black, White
- Paint brushes: flat, round, liner
- Chain necklace
- Fine grit sand paper or sanding sponge
- Dust mask
- Pliers
- Spatter tool or old toothbrush
- Blow dryer
Project Instructions
- Getting Started:
Start with clean hands, unwrap and knead clay until soft and smooth. Wash hands after use. Wrap any extra clay in then wrapper and then put in an air tight container.
Here are general guidelines to follow when working with air dry clay: Surface: For the best results in sculpting and crafting with air dry clay, plan to work with a smooth, well-cleaned, non-porous surface. Amount: Because the clay is made to air-dry, try to open only what you need at the time and leave the rest still wrapped or sealed and stored. Pinch or cut off the amount you need and take more out as you go, even for larger projects. Working: Knead your clay before you begin shaping it for your creations. Our polymer clay is already soft and pliable, but warming the clay with your hands is a good practice to spread the substance, condition the material and get a feel for what you’re working with. Shaping: You can use a combination of your hands, crafting tools and multimedia materials to shape your clay into the design you desire, create unique patterns and textures and incorporate mixed media elements. Remember: you can create anything you can imagine! Just make sure the finished product is exactly what you want before allowing it to dry. Drying: Lay or stand your air dry clay projects on a nonporous surface with a clean and smooth finish in an area with low humidity. Let the projects remain untouched and undisturbed for about 24 hours to ensure complete hardening.
Making the beads: Condition and roll a ball of clay the size of a golf ball. Roll out a thin sheet of clay ¼” thick. Use cutter to cut 14 even sized circles

Roll each circle into a uniformly shaped ball. Cover the unused wet clay with a damp paper towel while you work. Working one at a time center the blunt tool over one of the balls and use a screwing motion to ream a hole in the center until the tool pokes out through the other side. Remove the tool and insert gently in the other side to recess the edges of the hole. Let the beads dry now.


Sand beads to smooth imperfections. Use the round brush to apply a coat of Multi-Purpose Sealer to each bead. It is helpful to put the bead on the blunt tool to paint them. Use the blow dryer to speed drying time. Wipe tool periodically to remove sealer and paints.
To paint the dried beads: Use the round brush to apply a coat of Multi-Purpose Sealer to each bead. It is helpful to put the bead on the blunt tool to paint them. Use the blow dryer to speed drying time. Wipe tool periodically to remove sealer and paints.
Use White to basecoat 8 beads and Black to basecoat 6 beads.
Spattered beads: Load the spatter tool or old toothbrush with Black paint. Use your thumb to pull back the bristles and spatter paint. Offload excess paint onto scrap paper then spatter two beads.
Dotted beads: Use the large ball stylus tool or the wooden end of a paint brush to add dip dots to two beads. The secret to uniform dots is simply to reload your tool with paint for each dot.
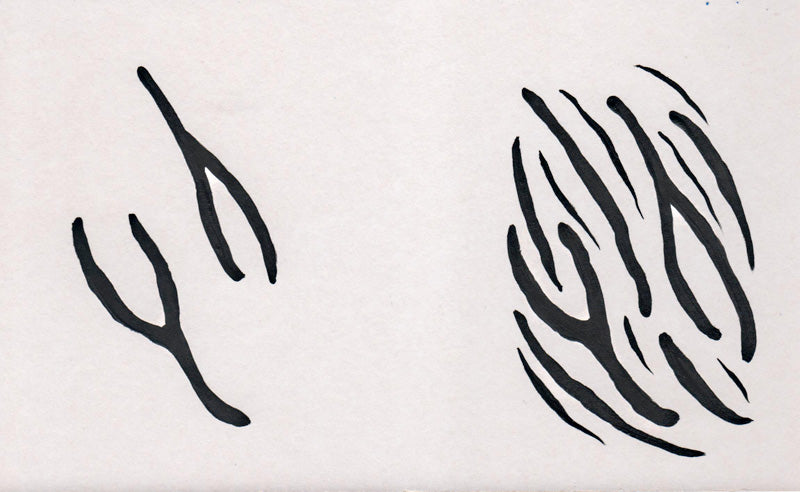
Zebra striped beads: Use the liner brush to paint random zebra stripes to two beads. Begin by painting loose “Y” shapes then fill in with slightly wavy stripes of different lengths
Use White to basecoat 8 beads and Black to basecoat 6 beads.
Spattered beads: Load the spatter tool or old toothbrush with Black paint. Use your thumb to pull back the bristles and spatter paint. Offload excess paint onto scrap paper then spatter two beads.
Dotted beads: Use the large ball stylus tool or the wooden end of a paint brush to add dip dots to two beads. The secret to uniform dots is simply to reload your tool with paint for each dot.
Zebra striped beads: Use the liner brush to paint random zebra stripes to two beads. Begin by painting loose “Y” shapes then fill in with slightly wavy stripes of different lengths