

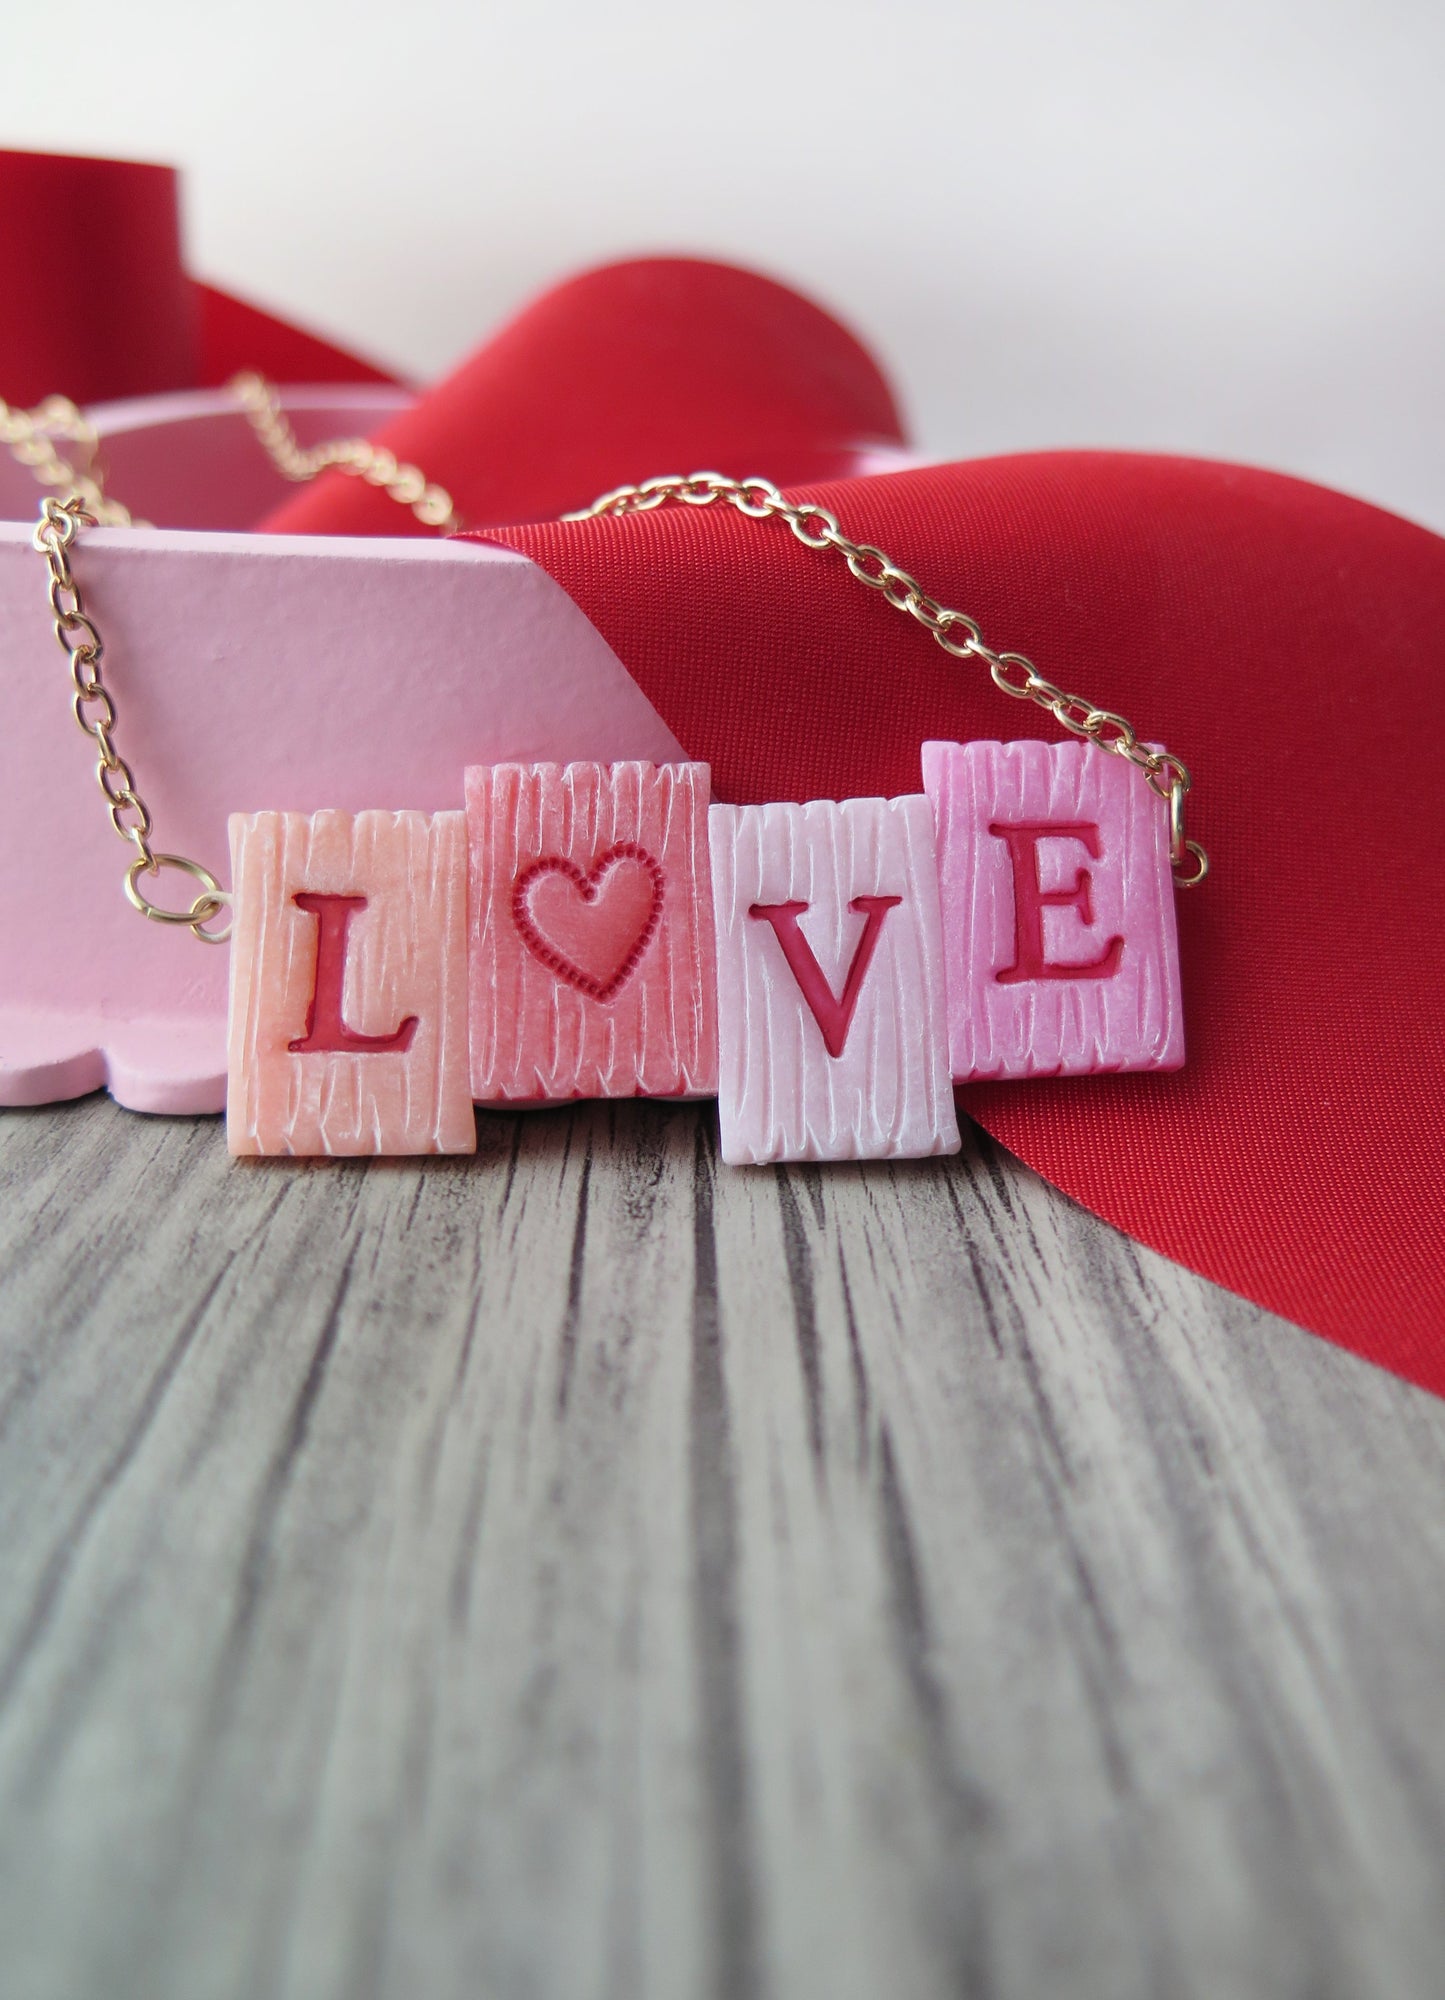
premo Sculpey Valentine “Love” Necklace
premo Sculpey Valentine “Love” Necklace
Read More
Whether you’re celebrating Valentine’s Day, Galentine’s Day or just a party with the ones you love, this “Love” necklace project is sure to make a statement.
Swirly Designs by Lianne and Paul Stoddard
Read Less
ADDITIONAL SUPPLIES
• Ceramic tile• ½ size Letter stamps L, V, E and Heart shape
• Acrylic Paints: white, dark red
• Paint brushes
• Wire cutters
• Pliers
• Clasp
• Jump Rings
• Eyelets
• Chain
Project Instructions
Getting Started:Please make sure your work area is covered and you are not working on an unprotected surface. We recommend working on the Sculpey® Work ‘n Bake Clay Mat, wax paper, metal baking sheet, or disposable foil. Uncured clay may damage unprotected furniture or finished surfaces. Be sure to cover your crafting area appropriately. Start with clean hands, unwrap and knead clay until soft and smooth, or condition by running clay though a Pasta Machine. We recommend using a designated machine for clay purposes only. When working with multiple colors, clean hands with soap and water or baby wipes (we have found that baby wipes work best) before switching colors. Shape clay, pressing pieces firmly together. Wash hands after use. Baking:Begin by preheating oven to 275 °F (130 °C). After you are done creating; for best results bake clay on an oven-proof surface such metal, aluminum foil, an index card or the Sculpey® Clay Mat at 275°F (130 °C) for 30 minutes per ¼" (6 mm) thickness according to package directions. Oven safe glass or ceramic surfaces are also acceptable for baking; however please note that the baking times may take longer as the glass or ceramic surfaces take longer to heat up. For best baking results, use an oven thermometer. DO NOT USE MICROWAVE OVEN. DO NOT EXCEED THE ABOVE TEMPERATURE OR RECOMMENDED BAKING TIME.
Take a 2oz block of the White Translucent clay and super slicer blade and cut the clay block into quarters.

Take one of the White Translucent pieces and a pinch (a very small piece) of Pearl clay and a pinch of Sunset Pearl clay. Combine with your acrylic roller.

Run the clay through clay-conditioning machine on the #7 setting, until the color is mixed into the clay. You can add more color clay until you get a color consistency you are happy with.

Repeat Steps 2 & 3 for the three remaining pieces of White Translucent clay:• White Translucent + Premo + Pomegranate Clay• White Translucent + Premo + Magenta Pearl Clay• White Translucent + Premo + Fushsia Clay

Use ½ size letter & heart stamps.

Use ½ size letter & heart stamps.

Take a super slicer blade and cut out your letters. Making sure you cut each letter in various heights but all with similar widths. This is so you can stagger the letters when creating the word.

Spell out your word (LOVE) and carefully attach each of the letters together. Use your super slicer tool to flip the letters over and apply some Sculpey bake and bond and set piece aside.

Open another 2oz block of White Translucent cut into fourths and mix one fourth with some Pearl clay. Run the piece of clay through the clay-conditioning machine on the #6 setting. Make sure the piece is large enough to cover the back side of your “Love” design.Lay the “Love” design on top of the piece (bake & bond side down) use your super slicer to cut around your letters and to remove the excess of clay.

Take two eyelets and apply some bake and bond to the ends and insert the eyelet one on each side of your Love charm.
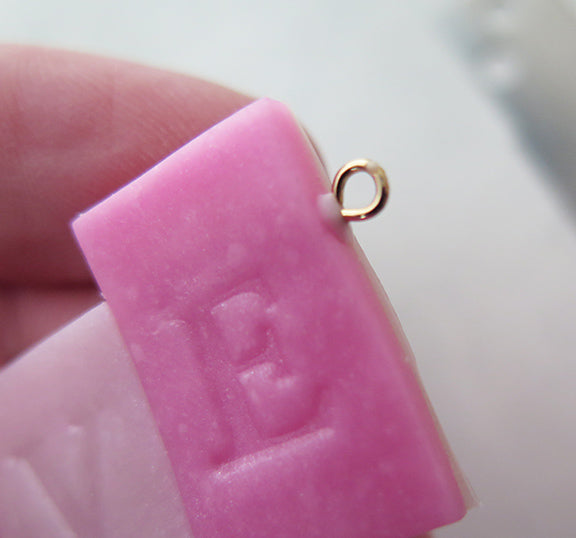
Use a needle end pointer and create faux wood texture to each of the letters.

Place your piece on the ceramic tile and bake in the oven according to the manufacturer’s instructions on the packaging.
Once the piece comes out of the oven. Remove from the tile and place it right into a bowl of ice cubed filled cold water. This is said to increase the clarity of translucent clay.

Once cooled. Lightly dry brush some white paint over your piece.

Use a thin brush and some red paint to fill into your letters.

Use your wire cutters & pliers to assemble your jump rings, clasp and chain to your Valentine Love necklace.
