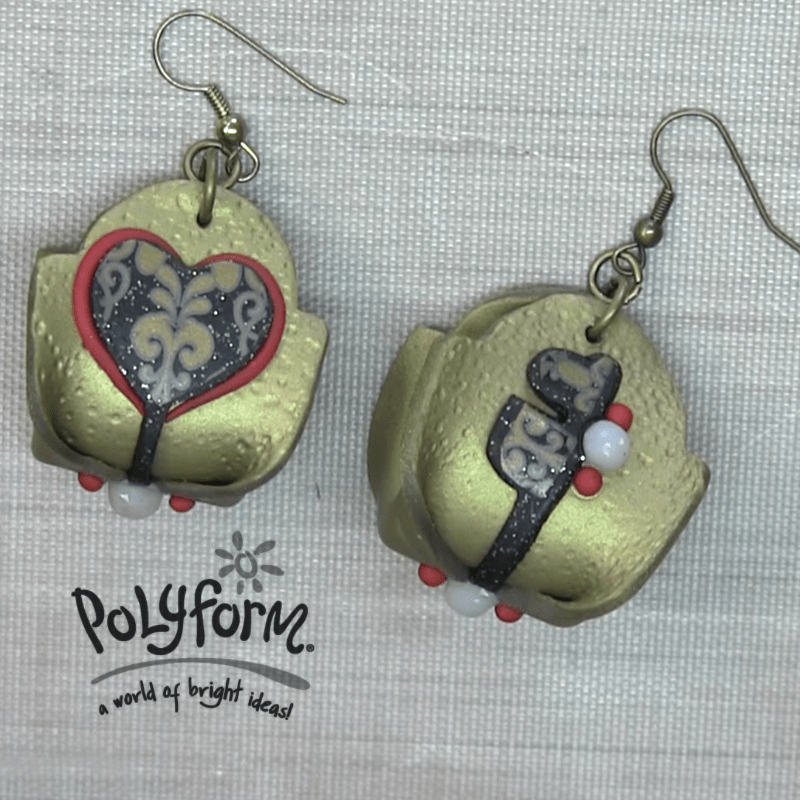
premo! Sculpey Queen of Hearts Earrings
premo! Sculpey Queen of Hearts Earrings
Read More
Several of the new Sculpey tools combine to create this cool pair of earrings. Watch the video below to learn more!
Read Less
ADDITIONAL SUPPLIES
Shallow dish of water, Paper towels, Pencil
Scissors|Shallow dish of water, Paper towels, Pencil
Scissors

Project Instructions
Getting Started:Polymer clay may stain. CLAY MAY DAMAGE UNPROTECTED FURNITURE OR FINISHED SURFACES. DO NOT USE polymer clay on unprotected surfaces. We recommend working on the Sculpey® Work ‘n Bake Clay Mat, wax paper, metal baking sheet, or disposable foil. Start with clean hands and work surface area. Knead clay until soft and smooth. For best results, clean your hands in between colors. Shape clay, pressing pieces together firmly. Bake on oven-proof glass or metal surface at 275°F (130 °C) for 30 minutes per ¼" (6 mm) thickness. For best baking results, use an oven thermometer. DO NOT USE MICROWAVE OVEN. DO NOT EXCEED THE ABOVE TEMPERATURE OR RECOMMENDED BAKING TIME. Wash hands after use. Baking should be completed by an adult. Begin by preheating oven to 275 °F (130 °C). Test temperature with oven thermometer for perfectly cured clay. For best results, condition all clay by running it through the Clay Conditioning Machine for several passes on the widest setting. Fold the clay in half after each pass and insert the fold side into the rollers first.
1.Sheet Twinkle Twinkle through the clay conditioning machine on the third thickest setting. Sheet Antique Gold through the clay conditioning machine on the second thickest setting.

Using the knife tool from the 5 in 1 Tool Set, cut out around the outside of the positive frame template shape. Repeat for two earrings.

Using the knife tool from the 5 in 1 Tool Set, cut out around the outside of the positive heart key template shape. Repeat making a second key shape but flip the key over so that the two keys are a mirror image of each other. Remove the excess clay and set aside.

Stipple the Antique Gold frame shapes with the dots design block. Be sure to turn the block in different directions to make the pattern random.

Smooth the outside edge of the frame shapes with your fingertips to take away the sharp cut.

Trim the very tips of the points from the triangle shaped areas on the sides so that when the frame shape is folded later it will match up to the sides of the key shape nicely.

Smooth the outside edges of the key shapes with your fingertips.

Position one key shape centered on each frame shape.

Bend the triangle tabs from the frame up to the sides of the key.

Score little radiating line details in the tab areas as shown with the small Etch ’n Pearl.

Using the large Etch ’n Pearl, place a Opal pearl shape where the tabs meet the key.

Place a medium Opal pearl along side the key prongs. Place small Red Glitter pearls on either side of the Opal pearls as shown.

Using the negative key template, trace the heart shape onto the Wrought Iron Decal where you would like the design to be used for the key head. Trim the heart shape out with scissors removing the pencil line. Make sure the heart shape fits the key head well. Dip the heart shape in shallow water. Transfer the decal onto the key head and wipe away excess water with paper towel. Repeat for the other key.

Trace the areas that you would like to put on the key prongs using the negative key template and a pencil. Cut out the pieces, soak in water, and apply to the clay key prongs. Wipe away excess water with paper towels. Repeat for the other key remembering that the second key goes the opposite direction.

Gently pick up the entire piece and bend in half making the back and the front meet at the edge above the key head. Gently pinch together at the edge.

Make a hole just above the heart with the small Etch ’n Pearl. Go through one way and then the other to push any excess clay back inside the hole. Repeat for the second earring. Bake as directed above.

When the earring pieces are completely cool, assemble with coordinating jump rings. Place a large jump ring through the clay piece. Attach a smaller jump ring and then attach the ear wire. Assemble the second earring so that the prongs are the front if desired and enjoy!


