

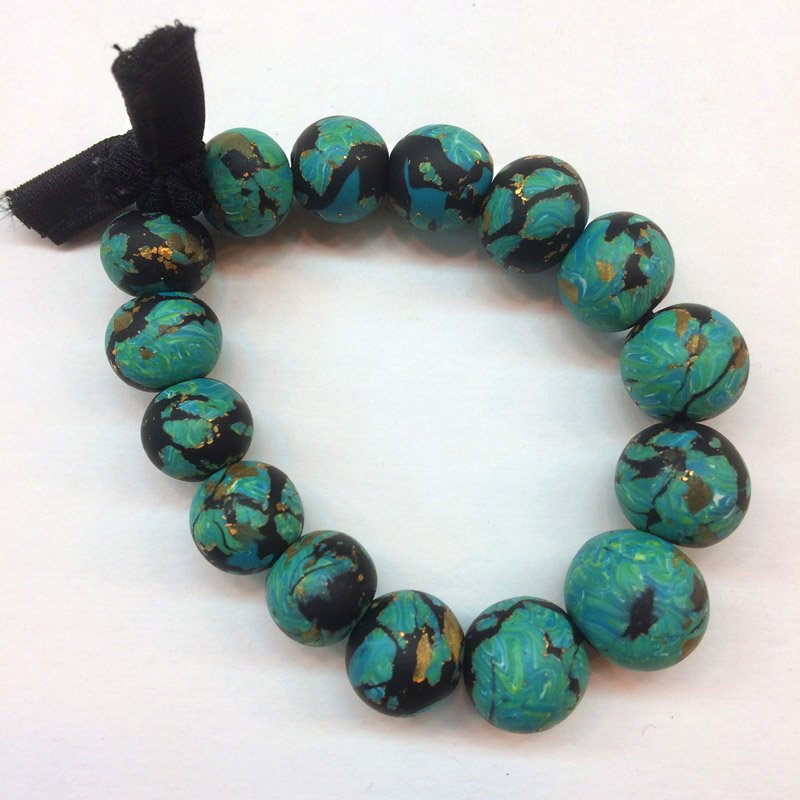
premo! Sculpey® Faux Turquoise Beaded Bracelet
premo! Sculpey® Faux Turquoise Beaded Bracelet
Read More
This clever bracelet is both stylish and comfortable! Wear with your jeans or your favorite LBD.
Design by Amy Koranek
Read Less
CLAYS:
premo! Sculpey® 2oz. Turquoise - 1 Block
premo! Sculpey® 2oz. Wasabi - 1 Block
premo! Sculpey® 2oz. White - 1 Block
premo! Sculpey® Accents 2oz. Antique Gold - 1 Block
premo! Sculpey® 2oz. Black - 1 Block
ADDITIONAL SUPPLIES
craft knife, Gold leaf, Black stretchy elastic cord, Black ribbon
Project Instructions
Getting Started:Polymer clay may stain. CLAY MAY DAMAGE UNPROTECTED FURNITURE OR FINISHED SURFACES. DO NOT USE polymer clay on unprotected surfaces. We recommend working on the Sculpey® Work ‘n Bake Clay Mat, wax paper, metal baking sheet, or disposable foil. Start with clean hands and work surface area. Knead clay until soft and smooth. For best results, clean your hands in between colors. Shape clay, pressing pieces together firmly. Bake on oven-proof glass or metal surface at 275°F (130 °C) for 30 minutes per ¼" (6 mm) thickness. For best baking results, use an oven thermometer. DO NOT USE MICROWAVE OVEN. DO NOT EXCEED THE ABOVE TEMPERATURE OR RECOMMENDED BAKING TIME. Wash hands after use. Baking should be completed by an adult. Begin by preheating oven to 275 °F (130 °C). Test temperature with oven thermometer for perfectly cured clay. For best results, condition all clay by running it through the Clay Conditioning Machine for several passes on the widest setting. Fold the clay in half after each pass and insert the fold side into the rollers first
Instructions-Faux Turquoise:To create the base color for Turquoise, mix together 1 stick (1/4 package) of Turquoise with 1/8 stick (1/32 package) of Wasabi and 1/8 stick (1/32 package) of White. Do not mix completely.

Mix the Turquoise color so that there are just faint traces of the other colors. In addition to the Turquoise mix, you will need about 1/8 stick (1/32 package) of Antique Gold.

Chop the clay colors up with the super slicer.

Continue chopping the pieces up until they are a variety of sizes not larger than 3/8” in any direction. With your fingers moosh the clays back together into a mound.

Make sure some of the Antique Gold is visible on the top of the mound

Press a sheet of gold leaf over the top of the mound making sure it goes into the crevices.

It’s okay if the leaf is all crackly over the top of the mound. Just make sure it is stuck well.

Sheet Black through the clay conditioning machine on the fourth thickest setting. Press it to the mound over the gold leaf. The Black should be pressed down over the mound really well so that it follows the crevices.

Score through the layers with the back side of a craft knife. I like to use the back side instead of the cutting side so that it pushes the scores in instead of cutting them in.

Form the mound back up by pushing on it from all directions. Push down on the top as well smoothing the scores slightly.

Using the super slicer, slice through the top parallel to your work surface to remove a thin layer.

Set aside the thin sliver to reveal the faux veins and Turquoise look. You can slice off as many thin areas as you wish to use as a veneer for covering beads. You will also have the slab to use for making solid Turquoise pieces like cabochons.[

Instructions-Beaded Bracelet:Make bead cores in the approximate size you want your beads to be. I made mine in graduating sizes. Use either Turquoise or Black for your bead cores in case a bit of the core shows through the veneer.

Cover all the bead cores with slivers from the turquoise slab. Roll the beads gently in your hands to smooth the beads. It’s ok if it takes more than one sliver to cover a bead.

Poke holes in each bead using the skewers from the Bead Baking Rack. Poke through one direction and then back through in the other direction to make a smooth hole. Make sure the hole is large enough to accommodate your elastic bead cord. If the holes are not large enough you can make them larger by gently pushing the beads onto an Etch n Pearl tool.

Set up all your beads on skewers on the Bead Baking Rack and bake according to instructions above.

When the beads are completely cool, string them on the elastic cord. Tie an overhand knot to close. Trim the cord. Tie a piece of ribbon over the knot to conceal it and enjoy!
