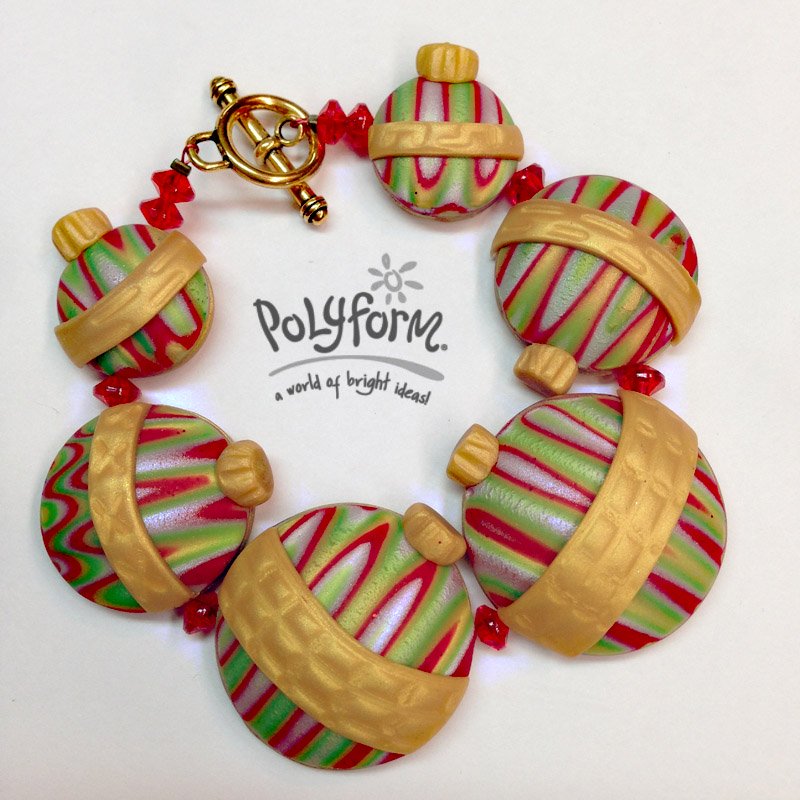
premo! Christmas Ornament Bracelet
premo! Christmas Ornament Bracelet
Read More
Happy Holidays! Get in the festive spirit with this Christmas-colored bracelet.
Read Less
ADDITIONAL SUPPLIES
7 strand bead wire (20”), Gold tone toggle and clasp set, Gold tone crimp beads (2),Jewelry pliers,Wire cutters, Coordinating crystal beads (9)|7 strand bead wire (20”), Gold tone toggle and clasp set, Gold tone crimp beads (2),Jewelry pliers,Wire cutters, Coordinating crystal beads (9)

Project Instructions
Getting Started:Polymer clay may stain. CLAY MAY DAMAGE UNPROTECTED FURNITURE OR FINISHED SURFACES. DO NOT USE polymer clay on unprotected surfaces. We recommend working on the Sculpey® Work ‘n Bake Clay Mat, wax paper, metal baking sheet, or disposable foil. Start with clean hands and work surface area. Knead clay until soft and smooth. For best results, clean your hands in between colors. Shape clay, pressing pieces together firmly. Bake on oven-proof glass or metal surface at 275°F (130 °C) for 30 minutes per ¼" (6 mm) thickness. For best baking results, use an oven thermometer. DO NOT USE MICROWAVE OVEN. DO NOT EXCEED THE ABOVE TEMPERATURE OR RECOMMENDED BAKING TIME. Wash hands after use. Baking should be completed by an adult. Begin by preheating oven to 275 °F (130 °C). Test temperature with oven thermometer for perfectly cured clay. For best results, condition all clay by running it through the Clay Conditioning Machine for several passes on the widest setting. Fold the clay in half after each pass and insert the fold side into the rollers first.
Sheet each color through the clay conditioning machine on the thickest setting. Cut out equal amounts of each color, at least a 2” X 2” square of each.

Sheet Pearl and Bright Green Pearl together through the clay conditioning machine on the thickest setting. Sheet Red Glitter and 18K Gold together through the clay conditioning machine on the thickest setting.

Layer the two bi-colored sheets together and sheet through the clay conditioning machine on the thickest setting.

Section into four equal pieces.

Stack the pieces on top of each other.

Section the stack into four equal pieces.

Stack the pieces on top of each other.

Push down on the top of the stack to firm them all together. Push on all sides of the stack to form the stack into a neat cube.

Turn the stack so that the stripes are perpendicular to your work surface. Slice down through the stack with the wave blade parallel to the stripes. A rippled pattern will emerge in each slice of the stack.


Slice the stack into several rippled slices.

Sheet each slice through the clay conditioning machine on the thickest setting and then again on the second thickest setting.

Use the circle cutters to cut out circles that coordinate with the circle cabochons. Push a circle shape into each of the circle cabochon molds. Make sure you put your favorite side of each circle in face first.

Back fill each cabochon shape with scrap clay.

Pop the clay cabochons out carefully by flexing the mold. Repeat making cabochons so you have two large, two medium, and two small.

Sheet 18K Gold through the clay conditioning machine on the thickest setting. Cut out enough circles and sizes to match your cabochons. Impress a skewer from the Bead Baking Set into a circle.

Sandwich the skewer into place by placing a matching sized cabochon over the top.

Sheet 18K Gold through the clay conditioning machine on the thickest setting. Impress a design block into the clay.

Carefully shave off the texture from the clay.

Use the acrylic roller to roll over the clay to smooth and thin the clay sheet.

Use the rigid blade to cut patterned stripes out of the gold.

Use the acrylic roller to roll over again to make sure the stripes are as thin as you would like them to be.

Lay the stripes across the center of a cabochon curving it to make the cabochon look more curved.

Use a larger circle cutter to trim the ends

Roll a 1/4” rope of 18K Gold. Slice of a 3/16” section.

Push the gold piece onto the top of the cabochon. Texture it with the side of the dots texture block. Repeat for all the cabochons. Bake as directed above

Bend the bead wire in half. String the open end of the clasp onto the wire at the half way point. Secure with a crimp bead on both wires. Trim the ends.

String on two coordinating beads. Then follow the pattern as shown to string on the ornaments and spacer beads.

At the end string on a crimp bead, string both ends through the toggle end of the clasp and back through the crimp bead

Smash the crimp bead with pliers, trim the ends and enjoy!


