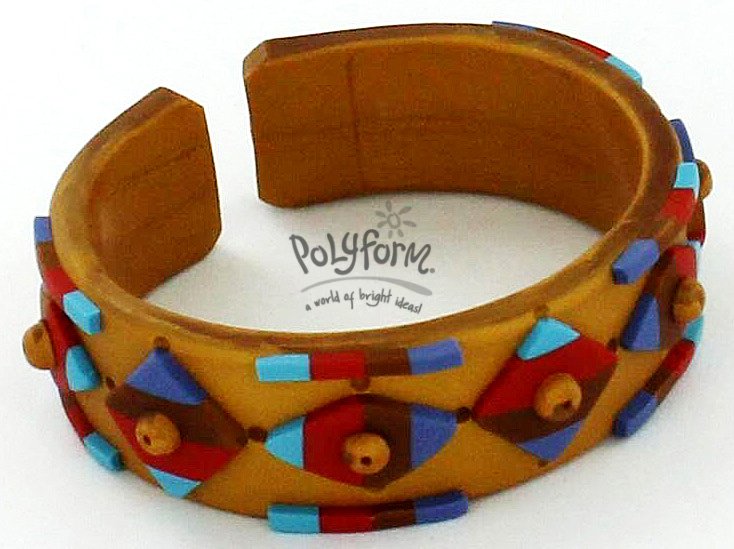
Premo! Sculpey Aztec Bangle
Premo! Sculpey Aztec Bangle
Read More
Crafted to a standard of perfection this beautiful cuff bracelet showcases a combination of rich colors. The various shapes catch the light and create a statement.
Designed by Amy Koranek
Read Less
ADDITIONAL SUPPLIES
Small cup of water, Paper towels, Scissors, Pen or pencil, Black stretch elastic (24”), Matte black pony beads (20)|Small cup of water, Paper towels, Scissors, Pen or pencil, Black stretch elastic (24”), Matte black pony beads (20)

Project Instructions
Getting started:Polymer clay may stain. CLAY MAY DAMAGE UNPROTECTED FURNITURE OR FINISHED SURFACES. DO NOT USE polymer clay on unprotected surfaces. We recommend working on the Sculpey clay mat, wax paper, metal baking sheet, or disposable foil. Start with clean hands and work surface area. Knead clay until soft and smooth. For best results, clean your hands in between colors. Shape clay, pressing pieces together firmly. Bake on oven-proof glass or metal surface at 275°F (130 °C) for 30 minutes per ¼" (6 mm) thickness. For best baking results, use an oven thermometer. DO NOT USE MICROWAVE OVEN. DO NOT EXCEED THE ABOVE TEMPERATURE OR RECOMMENDED BAKING TIME. Wash hands after use. Baking should be completed by an adult. Begin by preheating oven to 275 °F (130 °C). Test temperature with oven thermometer for perfectly cured clay. For best results, condition all clay by running it through the Clay Conditioning Machine for several passes on the widest setting. Fold the clay in half after each pass and insert the fold side into the rollers first.
Press a sheet of Gold through the Clay Conditioning Machine on the thickest setting. You’ll need a sheet that is 2” X 7”. Cut the sheet in half so you have two pieces 1” X 7”. Place the pieces on top of each other and roll over them with the acrylic roller to seal together. Wrap the pieces around the cuff bracelet. Make sure there is a gap at the open end.

Trim the top and bottom edges of the Gold clay with the Super Slicer following the edges of the metal cuff. Set the bracelet aside.

Make a striped cane. Sheet each of the colors through the clay conditioning machine on the thickest setting. Double each color. Cut out pieces from each doubled color that are 1.5” X 2”. Stack the colors as shown.

Step 4Slice thin pieces from the striped cane perpendicular to the stripes. The slices should be about 1/8” thick.

Using the square mini metal cutter, cut out three squares on an angle. Using the diamond mini metal cutter, cut out four diamond shapes. Using the Super Slicer, cut out eight thin strips by cutting perpendicular to the stripes.

Arrange the cut out shapes on the bracelet as shown.

Using the 6mm Ball Tool, make a divot in the center of each of the squares and diamonds.

Using the medium Etch ‘N Pearl tool, seat balls of Gold into each divot.

Using the tip of the Etch ‘N Pearl tool, pierce each Gold ball.

Using the 2mm Ball Tool, make a decorative dot at the tip of each of the squares and diamonds.

Bake as directed above on the metal cuff. Allow to cool completely, when the piece is completely cool, gently remove the clay bracelet from the metal cuff.


