

Premo Pumpkin Spice Mokume Gane Jewelry Set
Premo Pumpkin Spice Mokume Gane Jewelry Set
Read More
Julie Picarello is a master of the Mokume Gane technique and she shares some of her techniques and tips with us in this gorgeous project!
Design by Julie Picarello
Read Less
ADDITIONAL SUPPLIES
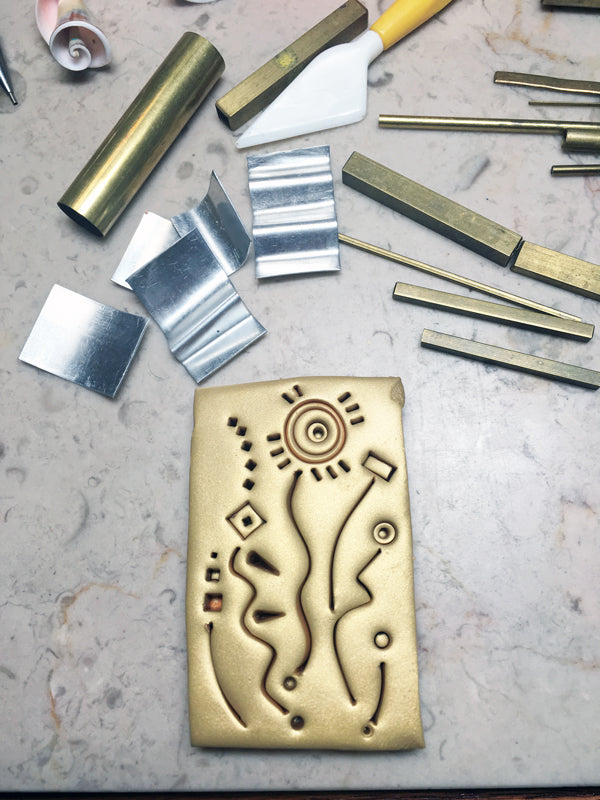
Half the fun with imprinting is finding unusual tools that can be used to create an imprint. In addition to tools created specifically for polymer, consider baking tools, toys, shells, and thread spools, metal tubes of all shapes, even sheet metal bent into curves; eye pins (2); ear wires(2); Gold Pearl Ex (optional)

Project Instructions
- Getting Started:
Start with clean hands, unwrap and knead clay until soft and smooth, or condition by running clay though a Pasta Machine. We recommend using a designated machine for clay purposes only. When working with multiple colors, clean hands with soap and water or baby wipes (we have found that baby wipes work best) before switching colors. Shape clay, pressing pieces firmly together. Wash hands after use.
- Baking:
Color MixingA simple color palette might consist of four contrasting colors of the same thickness, typically the thickest setting on the pasta machine (PM). However, additional colors can be incorporated in varying thicknesses as well. In this example, the pumpkin color is “iced” with pearl to create a shimmering color that is run through the PM at a medium thin setting. The thickest setting pumpkin and thinner iced pumpkin are stacked together and run through the PM at the thickest setting, creating a two-color strip.Make sure to run the other three colors through on the thickest setting as well, and then trim all four into 1.5” x 3” strips. Set them side-by-side on deli paper alternating light with dark colors, and swap the strips around until satisfied with the color order.

Building an Imprint StackPlace the first two strips together and run through the PM lengthwise on the thickest setting. Do the same with the third & fourth strips to end up with two long strips of two colors each. Don't worry if the strips are not sized identically, as they can be trimmed later in the process. Stack the two strips together and run one last time through the PM on the thickest setting. This will create one very long strip containing all four of the colors that should be cut into two equal pieces and stacked on top of each other. Cut that in half and stack once again, creating a pad of clay in which each original color is represented four times.


Imprint a PatternHalf the fun with imprinting is finding unusual tools that can be used to create an imprint. In addition to tools created specifically for polymer, consider baking tools, toys, shells, and thread spools, metal tubes of all shapes, even sheet metal bent into curves.

Brayer the color stack to the tile work surface and ensure it has adhered firmly. Spritz the stack with water prior to imprinting. Push imprint tools firmly into the clay but not so hard that the pattern is distorted, and keep in mind that designs can always be re-imprinted during slicing if the pattern is shallow.
Slice the Stack Horizontally Hold a clean tissue blade in both hands parallel to the work surface, and position the cutting edge just below the top of the stack. Begin slicing from back to front of the stack, maintaining the parallel orientation of the blade to the clay. As each slice is removed, place it gently on a piece of deli paper. Strive to keep each slice consistent in height - neither paper thin nor super thick. Also remember that you can "re-imprint" your pattern at any time as you are slicing. NOTE: If you encounter too much drag as you begin to slice, add scrap clay to both ends of the stack. This will help to minimize distortion in the patterned clay.


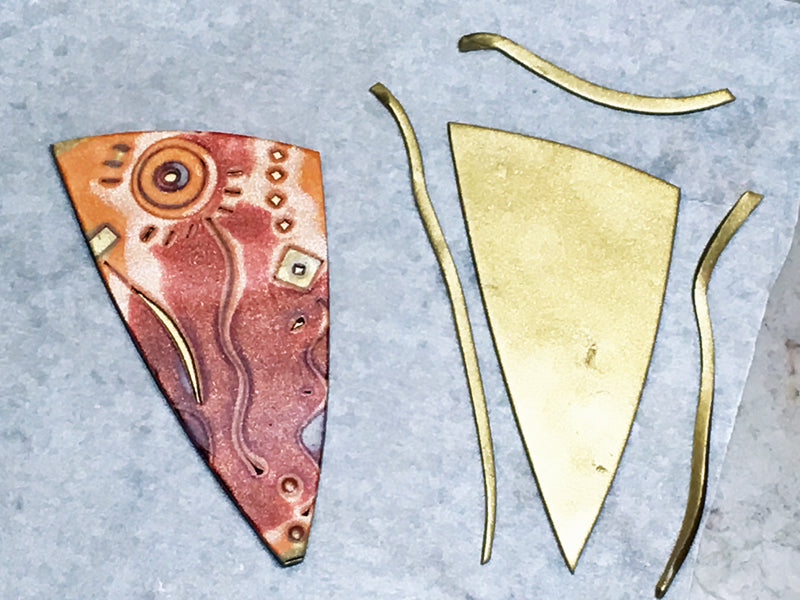
Cut the Pendant Bead If your slice is very thin, overlay it on a medium-thin piece of clay and gently brayer to adhere. If your slice is very thick you can skip this step. If your slice is uneven, flip it so it is face down on your tile and gently shave down the thickest areas to make it a more consistent thickness all over. Use a tissue blade to rough cut the pendant shape.


Shape the Pendant Bead The pendant will consist of three parts – a rough cut patterned “face”, a middle layer for bulk, and a textured back layer. There is no set thickness for each part – the key is that the combination of all three is thick enough to accommodate a drill hole for the stringing material of your choice. For the textured back layer, medium thick clay can be placed against a piece of 3M stair tread tape and run through the PM on the thickest setting. The clay should just peel away from the tread tape, but it can be spritzed with water as a release to ensure it does not stick.The middle bulk layer should start out exactly the same size as the face, but then each edge should be trimmed by approximately 1/16 of an inch. Set the bulk layer on top of the face-down textured back layer, and then set the patterned face layer on top of both. Smooth the edges over and then make the final pendant cuts.


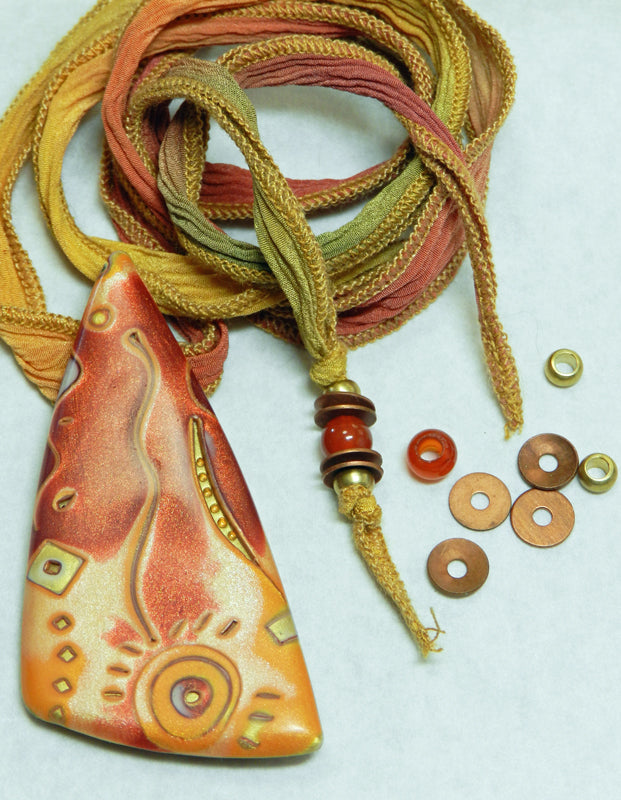
A ball stylus is a great tool to add small touches of metallic powder in grooves or on the surface. A hidden bail on the back of the pendant can be attached, along with any decorative additions and/or a maker’s mark. Cure the beads at manufacturer’s recommended temp and time. When cooled, use wet/dry sandpaper in grits 400/600/800 to smooth the beads, then polish using a bench lathe or by hand with a soft piece of cotton.


- Stringing
Follow the same steps described for the pendant to build up the earring thickness so it can be drilled for the ear wire. In this instance, a cutter is used to punch out the earring shape, and plastic wrap is placed on top of the clay before the cutter is pressed down. This will help to create a smooth, folded edge on the earrings pieces. NOTE: Sculpey circle cutters can be bent on the cut side only using nylon jaw pliers to create organic "new" shapes!

Cure the earring pieces at the manufacturer’s recommended temp and time. When cooled, use wet/dry sandpaper in grits 400/600/800 to smooth them, then polish using a bench lathe or by hand with a soft piece of cotton. Drill the earring pieces straight through, and use complementary stones and metal discs to accent the polymer
