
premo! Magnificent Mokume Gane Pendant
premo! Magnificent Mokume Gane Pendant
Read More
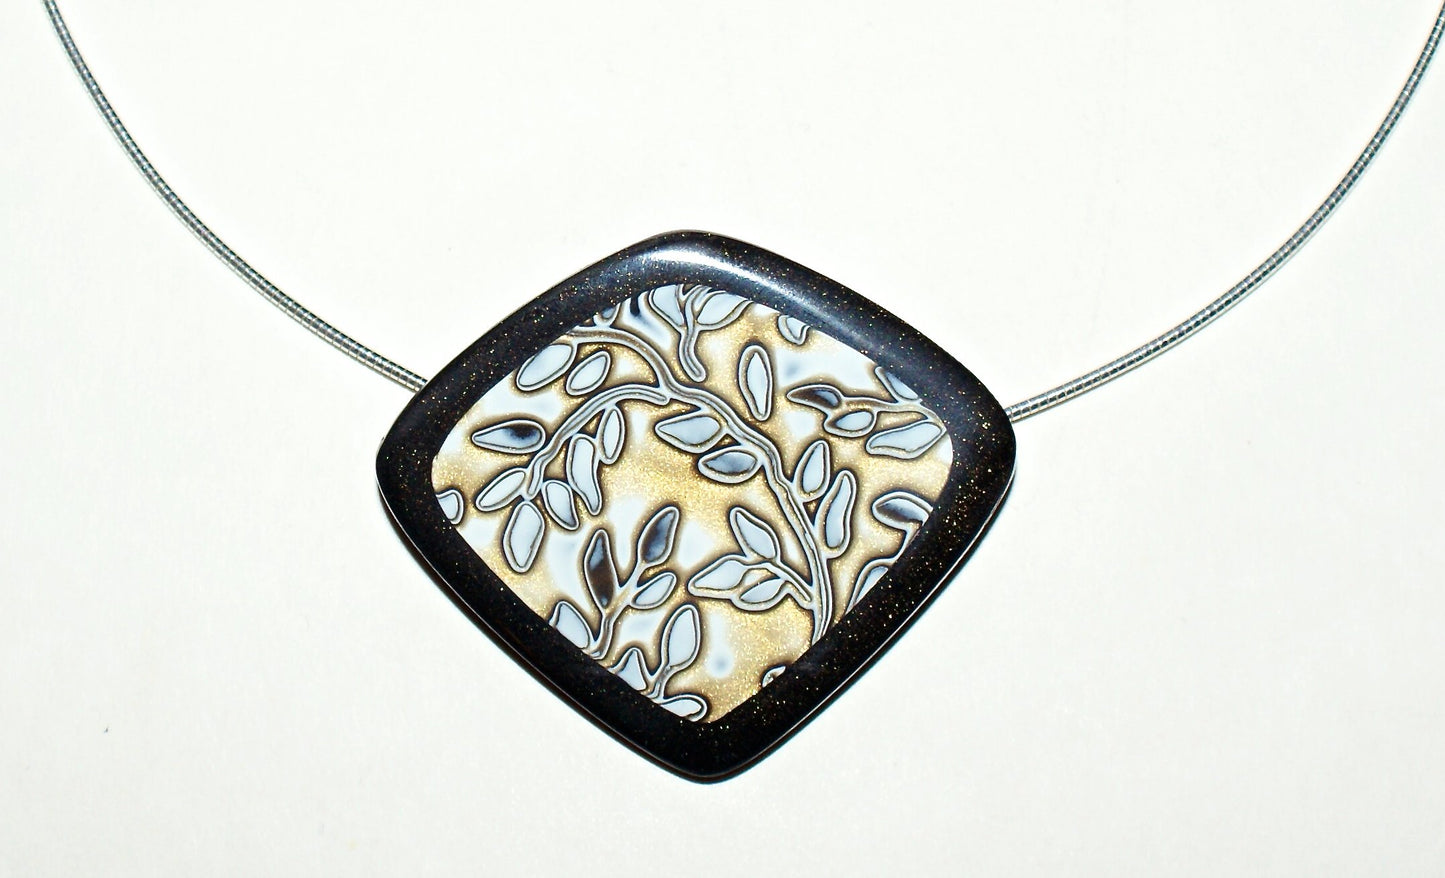
Make a sophisticated statement with this exquisite pendant. High contrast colors are the key to the success of this technique.
Getting Started
Polymer clay may stain. CLAY MAY DAMAGE UNPROTECTED FURNITURE OR FINISHED SURFACES. DO NOT USE polymer clay on unprotected surfaces. We recommend working on the Sculpey clay mat, wax paper, metal baking sheet, or disposable foil. Start with clean hands and work surface area. Knead clay until soft and smooth. For best results, clean your hands in between colors. Shape clay, pressing pieces together firmly. Bake on oven-proof glass or metal surface at 275 °F (130 °C) for 15 minutes per ¼" (6 mm) thickness. For best baking results, use an oven thermometer. DO NOT USE MICROWAVE OVEN. DO NOT EXCEED THE ABOVE TEMPERATURE OR RECOMMENDED BAKING TIME. Wash hands after use. Baking should be completed by an adult.
Begin by preheating oven to 275 °F (130 °C). Test temperature with oven thermometer for perfectly cured clay. For best results, condition all clay by running it through the Clay Conditioning Machine for several passes on the widest setting. Fold the clay in half after each pass and insert the fold side into the rollers first.
Read Less
ADDITIONAL SUPPLIES
Glass work surface
Plain copy paper
Melanie Muir Template
Melanie Muir Texture Sheets
Water Spritzer
Corn starch
Craft knife
Wet/dry sandpaper 300 and 400 grit
MicroMesh 1500 and 3600
Loctite Power Flex
Two buna “O” rings
Hand drill a bit larger than “O” ring|Glass work surface
Plain copy paper
Melanie Muir Template
Melanie Muir Texture Sheets
Water Spritzer
Corn starch
Craft knife
Wet/dry sandpaper 300 and 400 grit
MicroMesh 1500 and 3600
Loctite Power Flex
Two buna “O” rings
Hand drill a bit larger than “O” ring
Project Instructions
Using the Clay Conditioning Machine, roll out 1 ounce of premo! Black, White and Antique Gold on the #3 setting (medium). Designers’ Note: The important thing for successful mokume gane is not the difference in colors but in contrast - think dark, medium and light. I am showing a basic technique here, with three colors, but if you feel confident, go wild with mixing colors in layers or including Skinner blends!

Stack the three colors, then roll at your thickest setting of the Clay Conditioning Machine, working your way back down to No 3 again. Cut in half, stack again and repeat the process twice. If you lose count and need to check, cut off a thin piece and look for your darkest color in the layers - you should see (in this case) the Black appear four times. When complete place your stack on a glass work surface.

Spritz the clay with a very light mist of water, to act as a resist. Another key to successful mokume gane is getting a really good impression; you will need textures which are at least ⅛ inch/2mm deep. I am using Polyform’s Texture Sheet and my own “Organic TexturesTM”. Don’t just use the same texture for the whole sheet - that’s boring! Mix it up a little and you will have a variety of nice patterns to choose from which all mix and match - great for creating a series of necklace/pendants plus earrings etc! Stand up and really press down hard - the clear textures mean you can see if you are getting it nice and deep, plus a side benefit is you will work your tricep muscles!!

You can see how we have ended up with ‘mountains and valleys’.

Using a the Super Slicer flexible blade at the angle shown, ‘shave’ off the tops of the mountains, down to the valleys, using a slight sawing sideways motion. Take a deep breath, go slow and don’t panic; if you cut too deep, simply stop and reverse out!

Once you have ‘shaved’ the veneer as smooth as you can, there will still be lots of uneven patches. The usual technique is to roll the veneer through a pasta machine to even it all out. However, this distorts the pattern and you lose definition, so instead, use a sheet of ‘rag’/‘layout’ or watercolour paper and shiny card (or a smooth pebble!) and rub really hard all over.

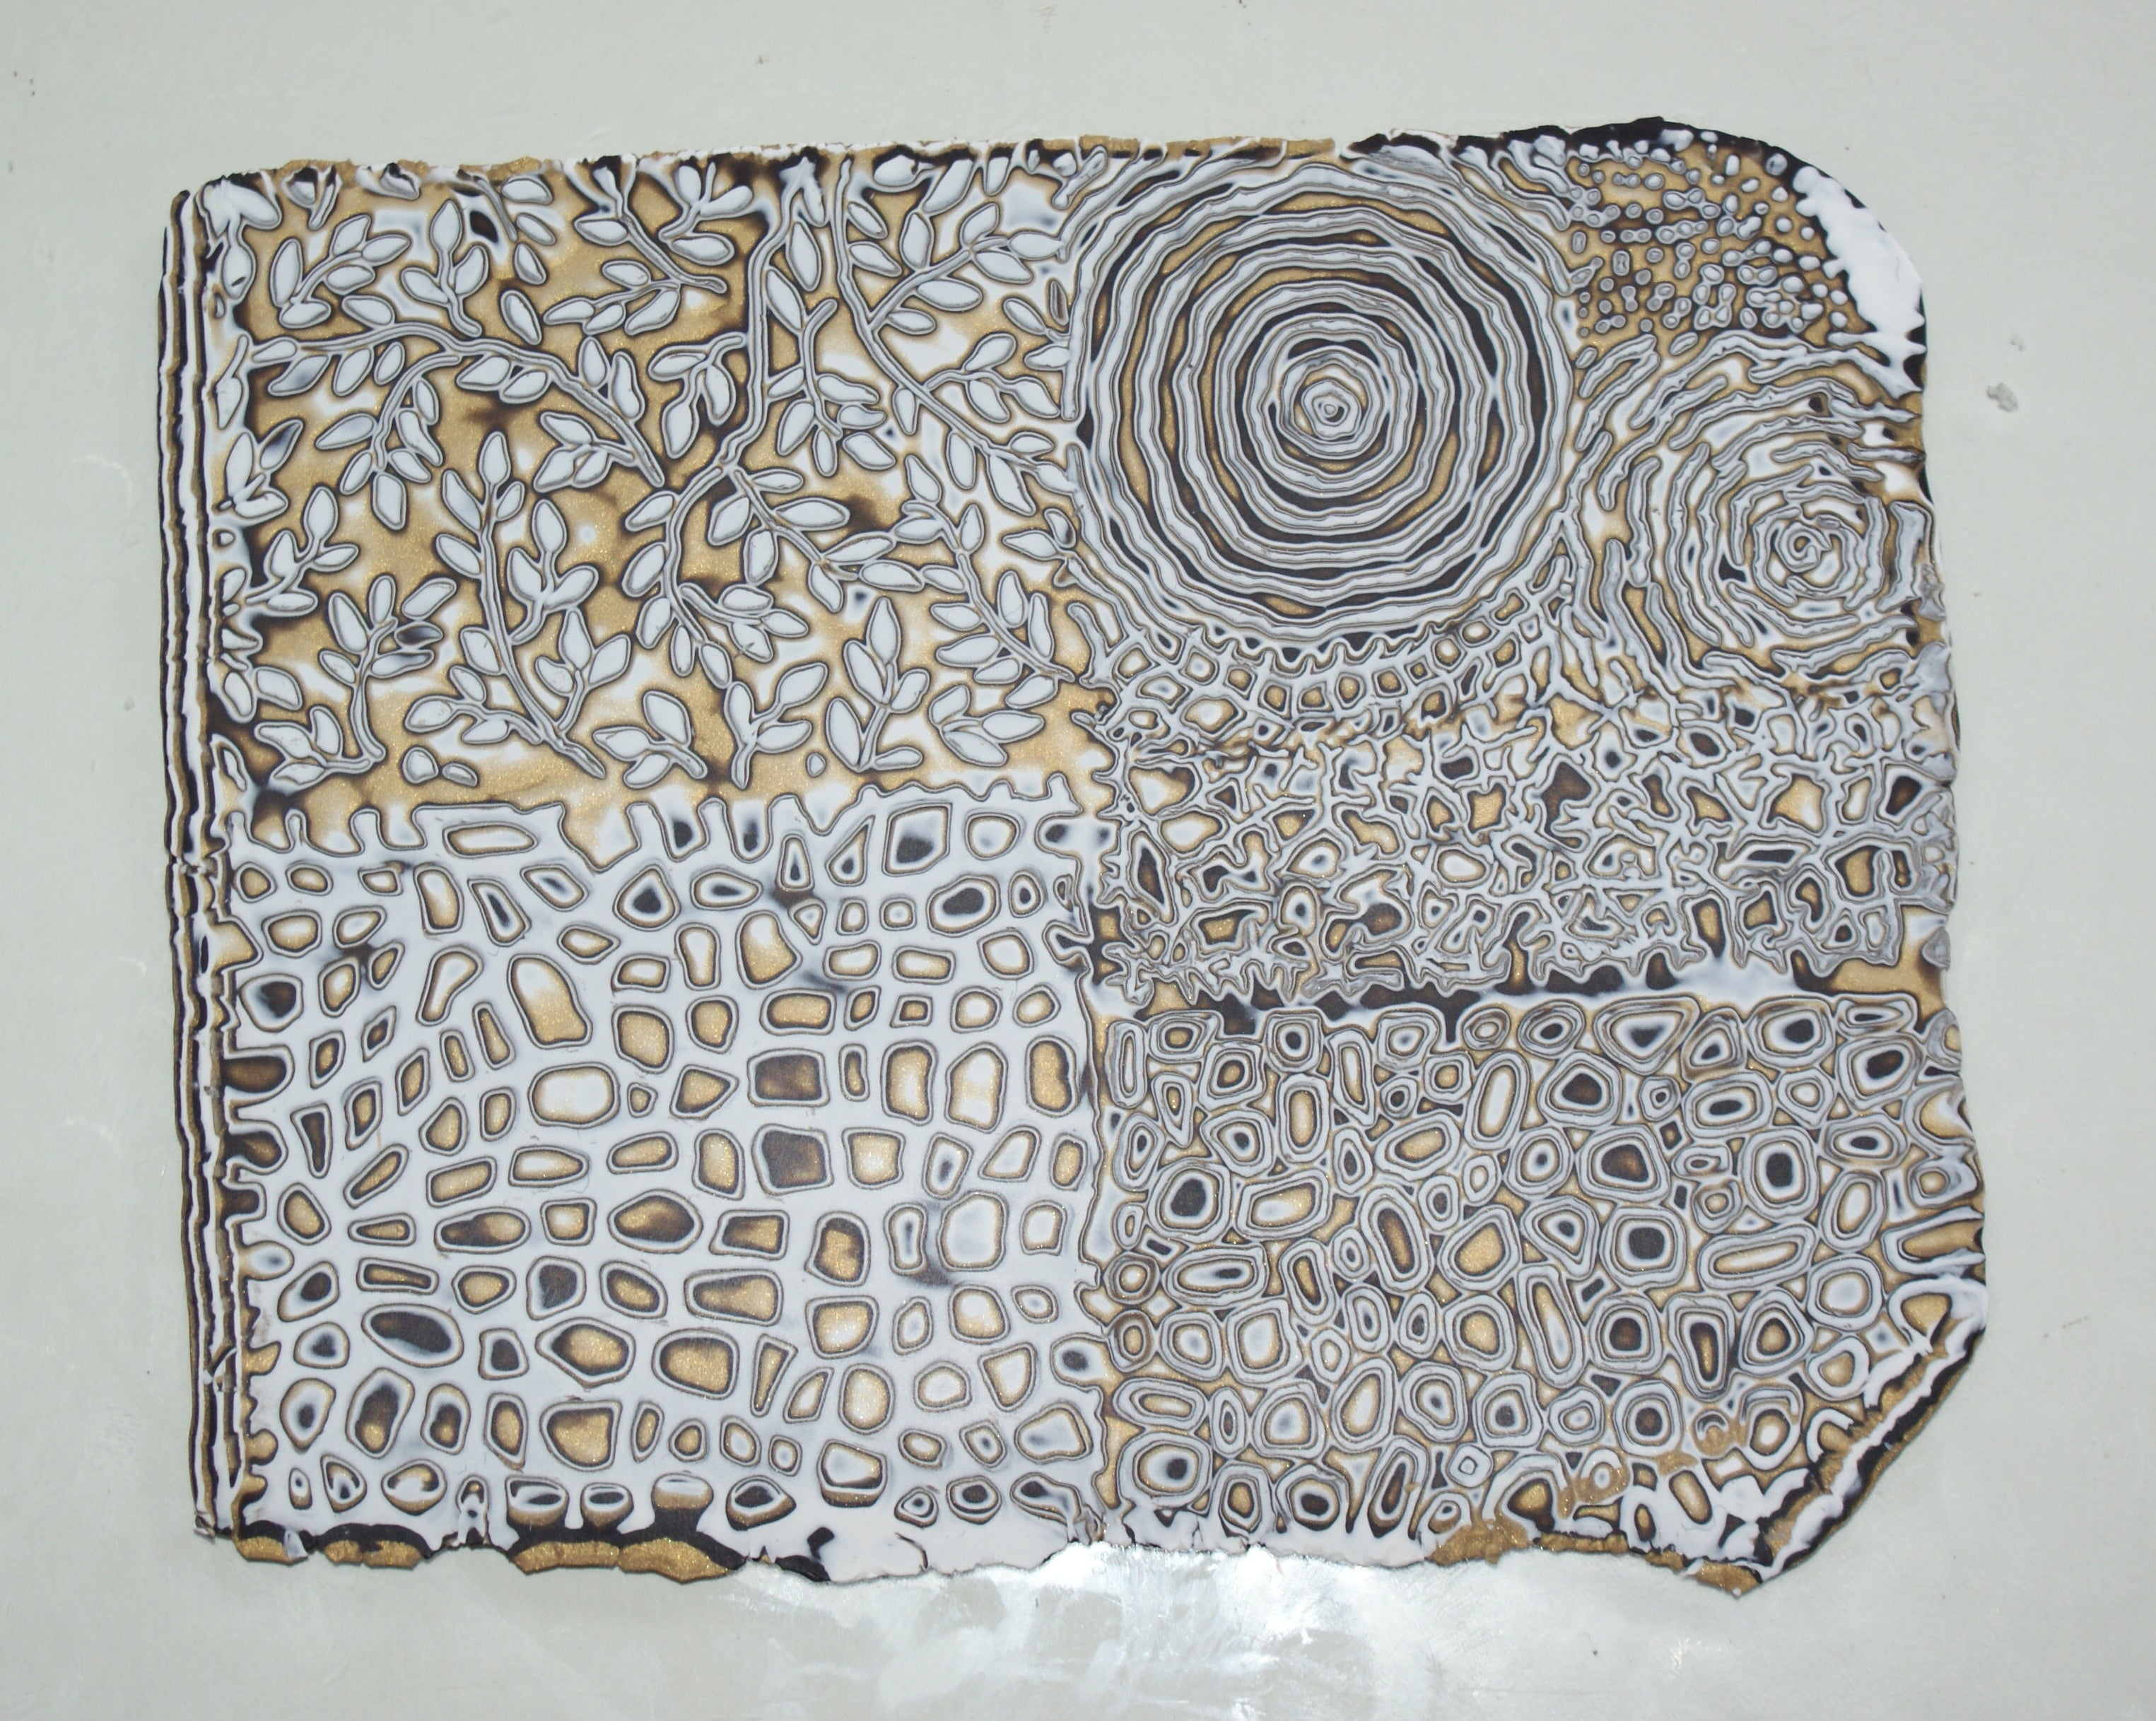
You will end up with a perfectly smooth surface, with lots of interesting patterns to choose from.
Using the Super Slicer Rigid Blade, placed firmly down at the angle shown, lift the veneer from the glass by quickly sliding the blade back and forth underneath, holding the edge in your other hand - don’t pull, simply support. Put the veneer on some greaseproof or other paper which you can easily peel the clay from. If you make a cut/tear, don’t panic! Simply ‘heal’ it with the paper smoothing technique.

Now for some fun! I am using some of my ‘Organic Templates’TM to choose the areas of pattern I want to use. If you have simple circles or ovals at home already, they work well too. Use a very light dust of cornstarch if your clay is a little ‘sticky’ with the template.

Using a thin scalpel/Exacto and ‘leaning’ the blade against the wall of the template, cut smoothly and then peel the pieces out by bending the paper. You can see how many things you can make from just one sheet of veneer!

Using the same size of shape, cut a piece (a ‘window’) out of a sheet of plain clay (rolled to the same thickness as the veneer - No 3) which contrasts with your color way. We used Twinkle, Twinkle. Place the patterned veneer in the ‘window’ and smooth with the paper and card/pebble technique. You will find the seams join together invisibly! Cut out again, using the next size up in your template, to create a ‘frame’.

Place the cut out piece on a backing the same colour as your frame, rolled to the thickest setting on your pasta machine. If you are making earrings you can go much thinner - No 6 is fine. We need a thick back on the pendant because we will be drilling holes in it. Rub over the whole thing using your smoothing paper - this joins top and bottom seamlessly.

Here is your pendant, cut out and ready backed. Place gently on a tile or card and bake as directed above. I always use polyester wadding/padding over the top to prevent burning/discoloring.

Use Melanie’s ‘Shiny Show’ finishing technique! Use 320 grit wet ‘n dry sanding paper (Melanie always uses 3M brand) with water all over, back, front and sides, then move to 400 grit. Then switch to using Micromesh, but you only need 1500 and 3600, not the whole set. Check the Micromesh logo appears as shown - there are cheap copies out there which are inferior quality! Use the Micromesh on just the front and sides, leave the back matt.

You can leave your pendant satin finish by simply rubbing on denim or other cloth, but for a high shine which makes metallics ‘pop’, use a buffing wheel as shown on the front and sides.

The back of the pendant should look as the front! Use two buna ‘O’ rings, with a little snip cut out and a drill bit marginally bigger than the O ring thickness. Using a ruler and fine marker pen, put two equidistant dots slightly up from horizontal centre, and another below each one, approximately ¼ inch/5mm down. Drill slowly and carefully, until each hole is around ⅛ inch/2mm deep.

Using superglue (Melanie highly recommend Loctite Power Flex as shown, it’s a gel and is therefore easier to ‘place’) and a needle tool or similar, put a tiny blob of glue in each hole. Using tweezers, place first one end of the O ring and then the other in the holes. They will set straight away, but wait a few minutes and then pull to test the bond.

Thread onto your cable of choice and you’re done! Give yourself a big pat on the back. And then set to and make the earrings…necklace…second pendant etc - enjoy!
Using the Clay Conditioning Machine, roll out 1 ounce of premo! Black, White and Antique Gold on the #3 setting (medium). Designers’ Note: The important thing for successful mokume gane is not the difference in colors but in contrast - think dark, medium and light. I am showing a basic technique here, with three colors, but if you feel confident, go wild with mixing colors in layers or including Skinner blends!
Stack the three colors, then roll at your thickest setting of the Clay Conditioning Machine, working your way back down to No 3 again. Cut in half, stack again and repeat the process twice. If you lose count and need to check, cut off a thin piece and look for your darkest color in the layers - you should see (in this case) the Black appear four times. When complete place your stack on a glass work surface.
Spritz the clay with a very light mist of water, to act as a resist. Another key to successful mokume gane is getting a really good impression; you will need textures which are at least ⅛ inch/2mm deep. I am using Polyform’s Texture Sheet and my own “Organic TexturesTM”. Don’t just use the same texture for the whole sheet - that’s boring! Mix it up a little and you will have a variety of nice patterns to choose from which all mix and match - great for creating a series of necklace/pendants plus earrings etc! Stand up and really press down hard - the clear textures mean you can see if you are getting it nice and deep, plus a side benefit is you will work your tricep muscles!!
You can see how we have ended up with ‘mountains and valleys’.
Using a the Super Slicer flexible blade at the angle shown, ‘shave’ off the tops of the mountains, down to the valleys, using a slight sawing sideways motion. Take a deep breath, go slow and don’t panic; if you cut too deep, simply stop and reverse out!
Once you have ‘shaved’ the veneer as smooth as you can, there will still be lots of uneven patches. The usual technique is to roll the veneer through a pasta machine to even it all out. However, this distorts the pattern and you lose definition, so instead, use a sheet of ‘rag’/‘layout’ or watercolour paper and shiny card (or a smooth pebble!) and rub really hard all over.
You will end up with a perfectly smooth surface, with lots of interesting patterns to choose from.
Using the Super Slicer Rigid Blade, placed firmly down at the angle shown, lift the veneer from the glass by quickly sliding the blade back and forth underneath, holding the edge in your other hand - don’t pull, simply support. Put the veneer on some greaseproof or other paper which you can easily peel the clay from. If you make a cut/tear, don’t panic! Simply ‘heal’ it with the paper smoothing technique.
Now for some fun! I am using some of my ‘Organic Templates’TM to choose the areas of pattern I want to use. If you have simple circles or ovals at home already, they work well too. Use a very light dust of cornstarch if your clay is a little ‘sticky’ with the template.
Using a thin scalpel/Exacto and ‘leaning’ the blade against the wall of the template, cut smoothly and then peel the pieces out by bending the paper. You can see how many things you can make from just one sheet of veneer!
Using the same size of shape, cut a piece (a ‘window’) out of a sheet of plain clay (rolled to the same thickness as the veneer - No 3) which contrasts with your color way. We used Twinkle, Twinkle. Place the patterned veneer in the ‘window’ and smooth with the paper and card/pebble technique. You will find the seams join together invisibly! Cut out again, using the next size up in your template, to create a ‘frame’.
Place the cut out piece on a backing the same colour as your frame, rolled to the thickest setting on your pasta machine. If you are making earrings you can go much thinner - No 6 is fine. We need a thick back on the pendant because we will be drilling holes in it. Rub over the whole thing using your smoothing paper - this joins top and bottom seamlessly.
Here is your pendant, cut out and ready backed. Place gently on a tile or card and bake as directed above. I always use polyester wadding/padding over the top to prevent burning/discoloring.
Use Melanie’s ‘Shiny Show’ finishing technique! Use 320 grit wet ‘n dry sanding paper (Melanie always uses 3M brand) with water all over, back, front and sides, then move to 400 grit. Then switch to using Micromesh, but you only need 1500 and 3600, not the whole set. Check the Micromesh logo appears as shown - there are cheap copies out there which are inferior quality! Use the Micromesh on just the front and sides, leave the back matt.
You can leave your pendant satin finish by simply rubbing on denim or other cloth, but for a high shine which makes metallics ‘pop’, use a buffing wheel as shown on the front and sides.
The back of the pendant should look as the front! Use two buna ‘O’ rings, with a little snip cut out and a drill bit marginally bigger than the O ring thickness. Using a ruler and fine marker pen, put two equidistant dots slightly up from horizontal centre, and another below each one, approximately ¼ inch/5mm down. Drill slowly and carefully, until each hole is around ⅛ inch/2mm deep.
Using superglue (Melanie highly recommend Loctite Power Flex as shown, it’s a gel and is therefore easier to ‘place’) and a needle tool or similar, put a tiny blob of glue in each hole. Using tweezers, place first one end of the O ring and then the other in the holes. They will set straight away, but wait a few minutes and then pull to test the bond.
Thread onto your cable of choice and you’re done! Give yourself a big pat on the back. And then set to and make the earrings…necklace…second pendant etc - enjoy!