

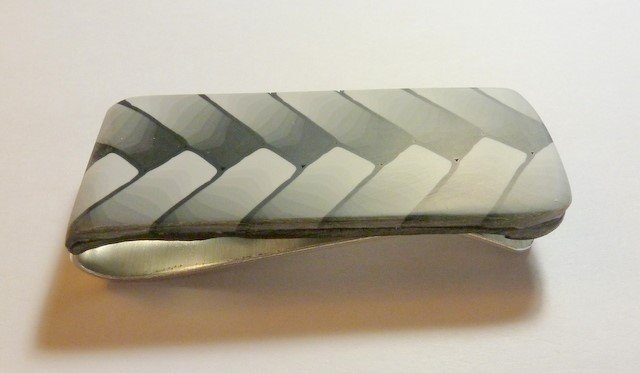
premo! Herringbone Money Clip
premo! Herringbone Money Clip
Read More
Fathers Day is coming up, and this would be the perfect gift for a special Dad! This fashionable, custom made money clip would also be great for anniversaries or birthdays. Keep reading to find out how to make your own.
Project and Design by Matt Kernan
Read Less
ADDITIONAL SUPPLIES
ruler, waxed paper, craft knife, pen that will write on waxed paper, tile or something to bake flat on, money clip blank (several sources can be found online)|ruler, waxed paper, craft knife, pen that will write on waxed paper, tile or something to bake flat on, money clip blank (several sources can be found online)
Project Instructions
Getting StartedPolymer clay may stain. CLAY MAY DAMAGE UNPROTECTED FURNITURE OR FINISHED SURFACES. DO NOT USE polymer clay on unprotected surfaces. We recommend working on the Sculpey clay mat, wax paper, metal baking sheet, or disposable foil. Start with clean hands and work surface area. Knead clay until soft and smooth. For best results, clean your hands in between colors. Shape clay, pressing pieces together firmly. Bake on oven-proof glass or metal surface at 275°F (130 °C) for 30 minutes per ¼" (6 mm) thickness. For best baking results, use an oven thermometer. DO NOT USE MICROWAVE OVEN. DO NOT EXCEED THE ABOVE TEMPERATURE OR RECOMMENDED BAKING TIME. Wash hands after use. Baking should be completed by an adult.Begin by preheating oven to 275 °F (130 °C). Test temperature with oven thermometer for perfectly cured clay. For best results, condition all clay by running it through the Clay Conditioning Machine for several passes on the widest setting. Fold the clay in half after each pass and insert the fold side into the rollers first.
Using the widest setting on your pasta machine, roll out all 3 colors in to sheets that are as wide as your pasta machine opening.

Cut a strip from the BLACK sheet that is the same size as your white strip. Place the white on top of the black and make a diagonal cut as shown.

Peel apart the triangles and place them onto the SILVER sheet as shown. You will only be using 1 of the BLACK triangles. Set the other aside.

Now run this sheet through your pasta machine as shown. The top of the sheet should come out uneven. So using your clay blade, cut off the uneven part as shown and set aside for later use.


Fold your sheet in half and run it back through the pasta machine. Continue folding in half and running the sheet through the pasta machine another 25-30 times until you have a gradient blend from dark silver to light silver.


Once you have a nice gradient blend, fold your sheet in half and cut off the uneven part. Then fold in half again. Then cut in half as shown.


Place your 2 halves, one on top of the other. Then, trying not to change the width too much - flatten and lengthen this strip as shown so it will fit through your pasta machine more easily.

Now run this strip lengthwise through the pasta machine on your THICKEST setting as shown. Then run it through again on a medium (3 or 4) setting.


Now fold this long strip back and forth like an accordion, with each layer being about 2” - 2 ½” long. It is easiest to do this halves or thirds because it’s so long. Just make sure that if you do cut it into sections, you pay attention to the order and direction of the sections. Cut off uneven ends. Then, if you have the ridges in the side of your stack like I do – you will need to take your clay blade and cut straight down as shown to shave them off so you have smooth sides


Now take the leftover Silver piece from step 4 and thoroughly mix it into the rest of your Black sheet. You will not use all of this clay, but you need it for the color. After mixed it should be a Metallic Black color.

Cut a strip of your Metalic Black that is the same width as your stack. Run it through your pasta machine on setting 4 or 5. The use this thin sheet to wrap your stack exactly once as shown.

Now, slowly and evenly reduce/lengthen your stack so that the face of it is a rectangle that is approximately ¾”-1” tall, ¼” wide, and the length does not matter. But for reference mine is about 12” long. I use my hands and fingers but for some, a roller might come in handy for this step. It is easier to do this reduction if the clay is evenly warm. So, what I do is this – Put it in a Ziploc bag. Make sure the bag has no leaks. Submerge it in a big bowl of very warm (NOT hot) water. Leave it there for about 15 minutes and then it should be nice and soft, and ready to reduce easily.
- Choosing a selection results in a full page refresh.
- Opens in a new window.