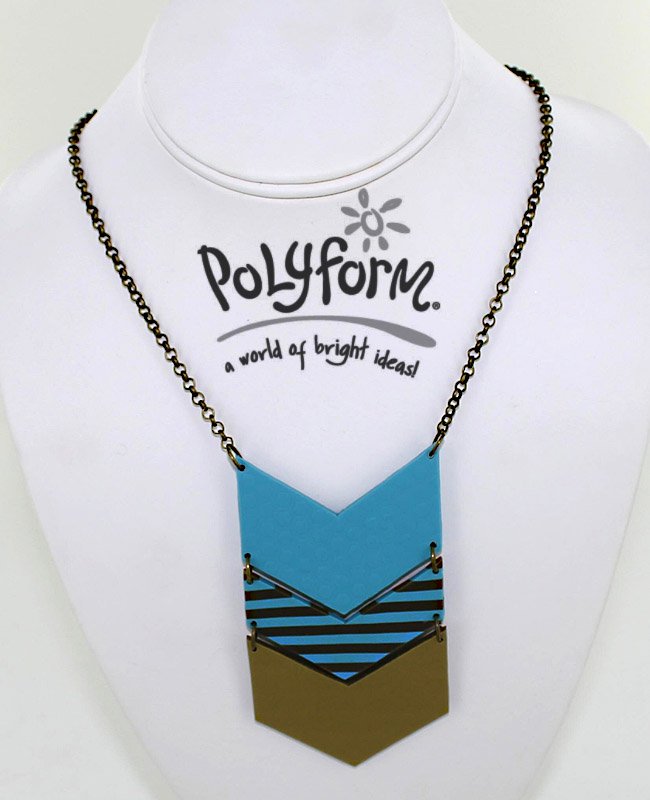
premo! Geometric Chevron Necklace
premo! Geometric Chevron Necklace
Read More
Keep up with the trend with this beautifully colored chevron necklace.
Designed By: Britta Lautenschlager
Read Less
ADDITIONAL SUPPLIES
Sculpey Needle tool from one of the Sculpey tool sets, Jeweler tools, Eight jump rings, Toggle, Chain|Sculpey Needle tool from one of the Sculpey tool sets, Jeweler tools, Eight jump rings, Toggle, Chain

Project Instructions
Getting Started:Polymer clay may stain. CLAY MAY DAMAGE UNPROTECTED FURNITURE OR FINISHED SURFACES. DO NOT USE polymer clay on unprotected surfaces. We recommend working on the Sculpey clay mat, wax paper, metal baking sheet, or disposable foil. Start with clean hands and work surface area. Knead clay until soft and smooth. For best results, clean your hands in between colors. Shape clay, pressing pieces together firmly. Bake on oven-proof glass or metal surface at 275 °F (130 °C) for 15 minutes per ¼" (6 mm) thickness. For best baking results, use an oven thermometer. DO NOT USE MICROWAVE OVEN. DO NOT EXCEED THE ABOVE TEMPERATURE OR RECOMMENDED BAKING TIME. Wash hands after use. Baking should be completed by an adult. ChainGetting Started:Polymer clay may stain. CLAY MAY DAMAGE UNPROTECTED FURNITURE OR FINISHED SURFACES. DO NOT USE polymer clay on unprotected surfaces. We recommend working on the Sculpey clay mat, wax paper, metal baking sheet, or disposable foil. Start with clean hands and work surface area. Knead clay until soft and smooth. For best results, clean your hands in between colors. Shape clay, pressing pieces together firmly. Bake on oven-proof glass or metal surface at 275 °F (130 °C) for 15 minutes per ¼" (6 mm) thickness. For best baking results, use an oven thermometer. DO NOT USE MICROWAVE OVEN. DO NOT EXCEED THE ABOVE TEMPERATURE OR RECOMMENDED BAKING TIME. Wash hands after use. Baking should be completed by an adult. Begin by preheating oven to 275 °F (130 °C). Test temperature with oven thermometer for perfectly cured clay. For best results, condition all clay by running it through the clay conditioning machine several passes on the widest setting. Fold the clay in half after each pass and insert the fold side into the rollers first.
Roll out sheets of Turquoise and Antique Gold on the # 1 setting of the clay conditioning machine. Using the flexible texture sheet-honey comb pattern, press into the Turquoise sheet. Then, take your Chevron shape template from the Design It Templates and cut out one Chevron pattern, out of each color. With the needle tool, press holes into the top and bottom of the Turquoise piece and holes into the top of the Antique Gold piece.

Take two ounces of each Turquoise and Antique Gold and roll out each to a 2 1/2” wide strip. Stack the strips together, cut in half, stack and repeat this step two more times. Make sure to secure the sheets together by going over them with the acrylic roller. With the tissue blade, cut off a slice as thick as the other Chevron pieces. Cut out a chevron piece out of the slice, but making it half the height of the other pieces. With the needle tool, press holes into the top and bottom.

Bake all three pieces according to the directions above, let them cool and attach them to each other, with the Turquoise on top and the stripes in the middle. Attach the chevron pieces and the toggles to the chain.


