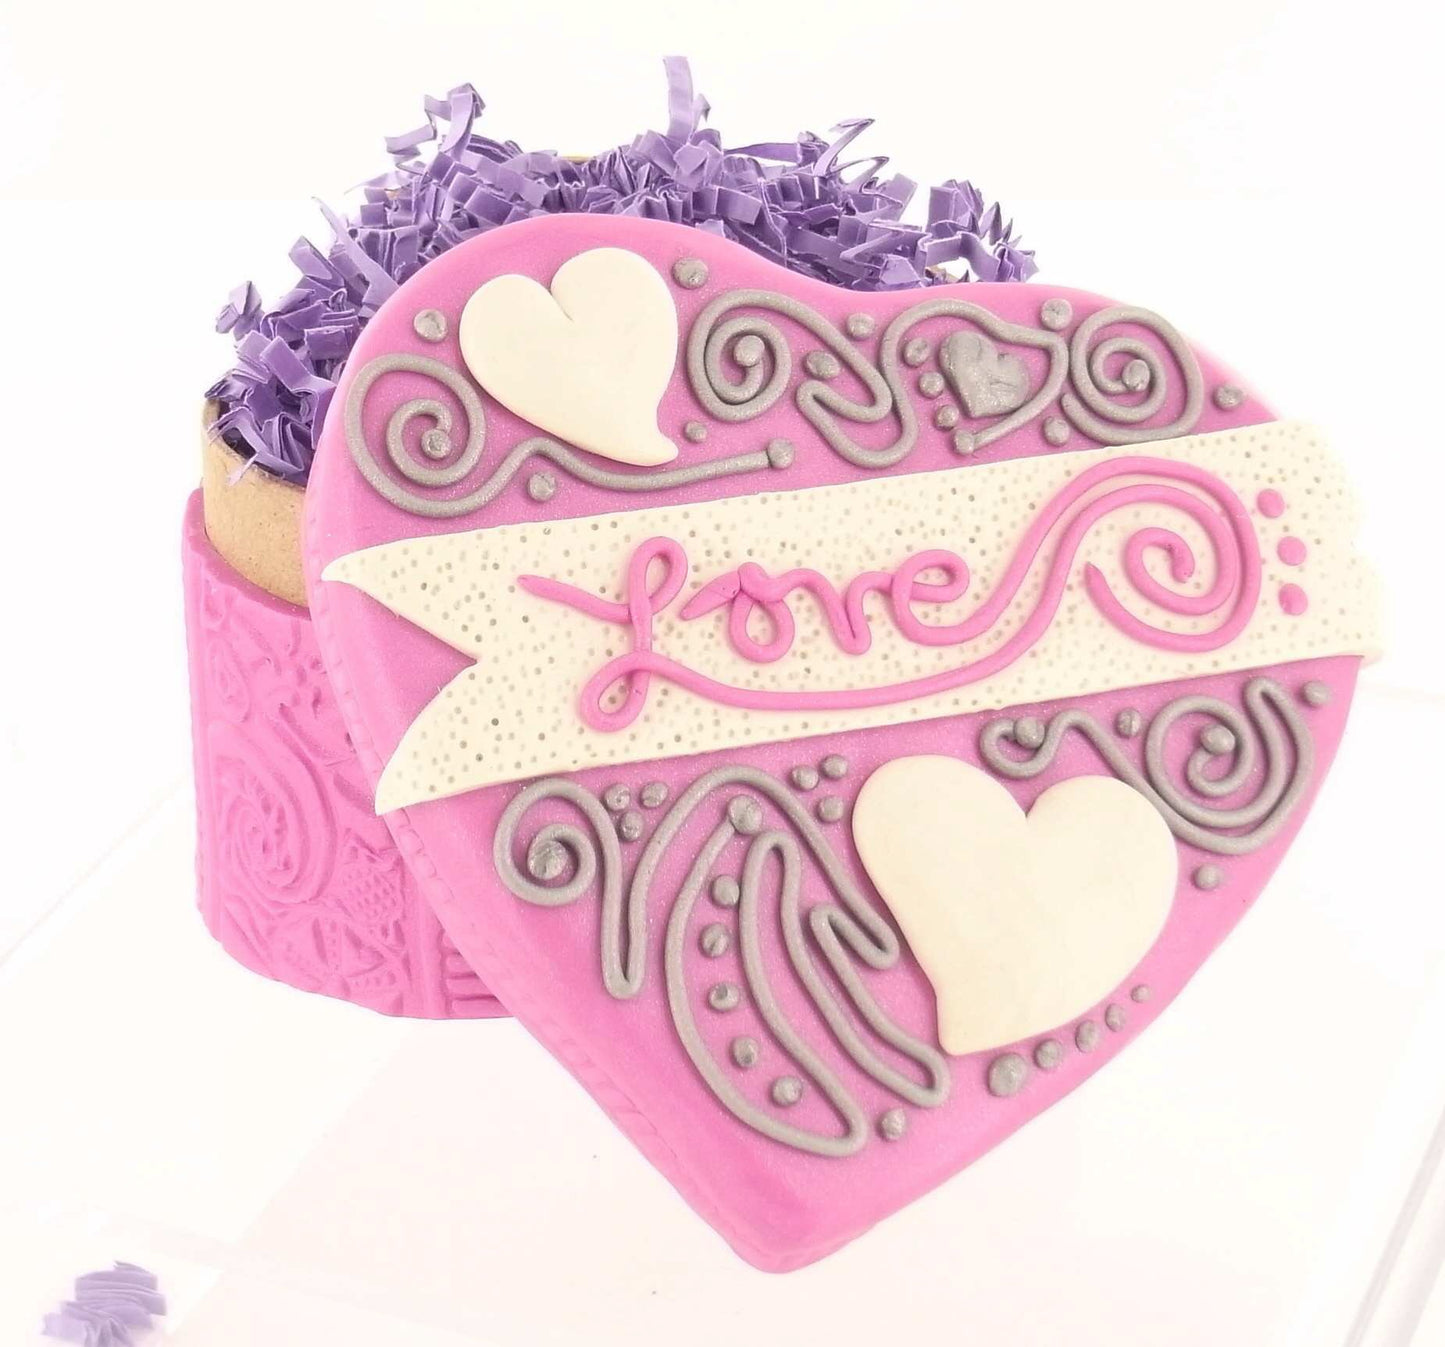
premo! Flirty Heart Box
premo! Flirty Heart Box
Read More
This flirty box is perfect for storing your favorite jewelry pieces OR you can make one for a friend as a gift.
Created by Jennifer Bezingue
Read Less
ADDITIONAL SUPPLIES
Craft Knife
White craft glue
One large rubber stamp or texture sheet
Paper mache heart box, 4" wide
Disposable sponge or brush
Spray water bottle
Pencil|Craft Knife
White craft glue
One large rubber stamp or texture sheet
Paper mache heart box, 4" wide
Disposable sponge or brush
Spray water bottle
Pencil

Project Instructions
Polymer clay may stain. CLAY MAY DAMAGE UNPROTECTED FURNITURE OR FINISHED SURFACES. DO NOT USE polymer clay on unprotected surfaces. We recommend working on the Sculpey clay mat, wax paper, metal baking sheet, or disposable foil. Start with clean hands and work surface area. Knead clay until soft and smooth. For best results, clean your hands in between colors. Shape clay, pressing pieces together firmly. Bake on oven-proof glass or metal surface at 275°F (130 °C) for 30 minutes per ¼" (6 mm) thickness. For best baking results, use an oven thermometer. DO NOT USE MICROWAVE OVEN. DO NOT EXCEED THE ABOVE TEMPERATURE OR RECOMMENDED BAKING TIME. Wash hands after use. Baking should be completed by an adult.Begin by preheating oven to 275 °F (130 °C). Test temperature with oven thermometer for perfectly cured clay. For best results, condition all clay by running it through the Clay Conditioning Machine for several passes on the widest setting. Fold the clay in half after each pass and insert the fold side into the rollers first.
COVERING THE BOXWith the lid on the box, trace around the section where the lid and box meet with a pencil, making a continuous line around the box. Remove lid. Use a disposable sponge or brush to coat the outside of the box, up to the pencil line, with White glue. Then coat the top and sides of the lid with White glue. Allow the glue to dry completely.
With the Clay Conditioning Machine on setting #1, roll out a sheet of Magenta Pearl. Lay it on your work surface and place the box on top of the clay sheet. Make sure there is enough clay to cover the entire bottom heart shape. Use the knife tool to trim around the bottom edge of the box, creating the heart shape that will cover the bottom of your box. Gently remove the heart shaped clay from your work surface and press onto the bottom of your box. Press and smooth the clay on the bottom and slightly around all edges, taking care not to trap air bubbles.


With the Clay Conditioning Machine on setting #1, roll out two more sheets of Magenta Pearl. Spritz your rubber stamp or texture sheet lightly with water. Press the texture into the clay, making sure you imprint the entire sheet. Gently remove the textured clay from your work surface and press it onto one side of the box. Start at the center of the heart and continue to press, working your way to the point of the heart. Trim off any excess clay. Repeat on the other side. Smooth seams at the center and point of the heart. Place lid on box, make sure it fits and there isn’t any clay above the pencil line. If there is, use the knife tool to trim excess.

With the Clay Conditioning Machine on setting #1, roll out a sheet of Magenta Pearl. Make sure it is large enough to cover the entire lid, including the sides. Place the clay on the lid, gently press and smooth, starting from the middle and working your way to the edges. Once the entire lid is covered, flip the lid over and use the Super Slicer Flexible Blade to gently remove any excess clay from the edges.
EMBELLISHING THE BOXMix 3 parts Pearl clay with 1 part White clay to make White Pearl. With the Clay Conditioning Machine on setting #1, make a sheet of White Pearl and trim to 1" x 6". Cut a triangle shape out of each end and drape the sheet across the lid to make a banner.
Make a heart by creating a teardrop shape. Indent the rounded end of the teardrop with the side of the needle tool tip, this will create the indent for the heart. Gently flatten and shape rounded ends and point into a heart. Make two hearts and place above and below the banner.

Mix 1 part Silver clay with 1 part White clay to make Light Silver. Put the small circle disk in the Clay Extruder and extrude several Light Silver clay strings. Arrange the strings on the top of the box in a lacy or swirl pattern, add tiny balls of Light Silver as desired. Extrude several strings of Magenta Pearl clay and arrange them to spell "Love" on the banner. Firmly, but gently, press the clay strings to make sure they adhere. Texture the banner with a needle tool if desired. Bake box and lid as instructed above and allow to cool.


