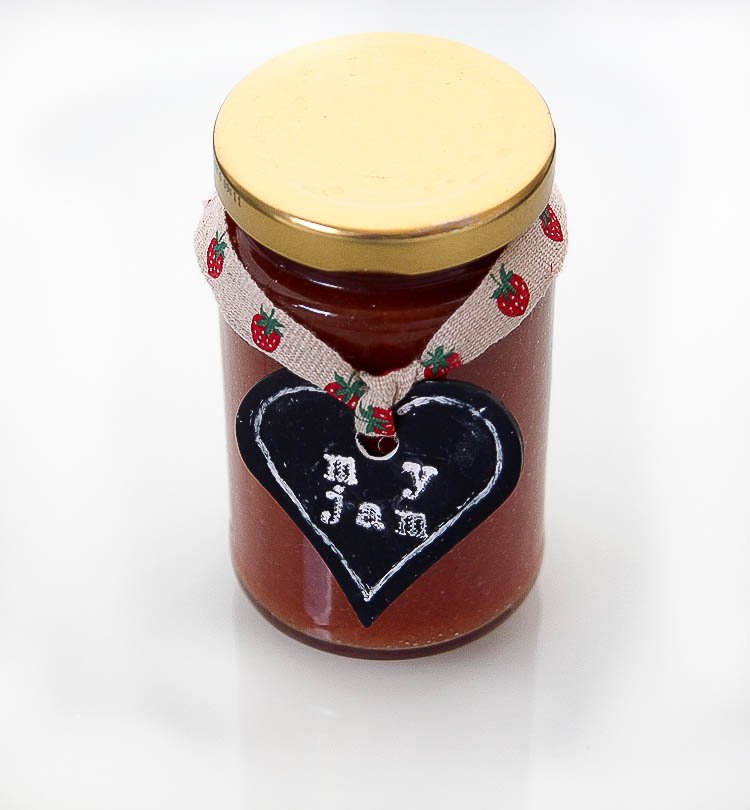
premo! Faux Chalkboard Tags
premo! Faux Chalkboard Tags
Read More
In summer there are always items that need labelling or you need one for a present. Chalk board are also very trendy right now. I combined those two things to make little Faux Chalk Board Talks (with polymer clay of course!). They are fun and easy to make. Use them for summer parties or when you make your own lemonade or jam. Or just as a small token for a loved one ;-) Since they are quite small you do not need a lot of material. You can use left over polymer clay from other projects, if you pick the right colours!
Design by Anke Humpbert
NOTE: Sculpey Design It! General Shape Templates are a great tool to use to create these tags if you don't have cutters.
CLAY USED: premo! Sculpey Black - 2 oz
Read Less
ADDITIONAL SUPPLIES
A small smooth ceramic tile; Needle tool; A small round Kemper cutter (I used one with 8mm); A set of small letter rubber stamps (I used a set from EK success, but they are no longer available. But there are many similar stamps sets out there!), White acrylic paint, a small brush, water and some kitchen paper; Ribbons or twine for the finished tags; Optional: cookie cutter in various shapes (I used a tag and a heart) if you don't have the Sculpey templates, Optional: a bowl to cure your tag on, if you want a curved tag (I used a bowl from Ikea)

Project Instructions
Getting StartedPolymer clay may stain. CLAY MAY DAMAGE UNPROTECTED FURNITURE OR FINISHED SURFACES. DO NOT USE polymer clay on unprotected surfaces. We recommend working on the Sculpey clay mat, wax paper, metal baking sheet, or disposable foil. Start with clean hands and work surface area. Knead clay until soft and smooth. For best results, clean your hands in between colors. Shape clay, pressing pieces together firmly. Bake on oven-proof glass or metal surface at 275°F (130 °C) for 30 minutes per ¼" (6 mm) thickness. For best baking results, use an oven thermometer. DO NOT USE MICROWAVE OVEN. DO NOT EXCEED THE ABOVE TEMPERATURE OR RECOMMENDED BAKING TIME. Wash hands after use. Baking should be completed by an adult.Begin by preheating oven to 275 °F (130 °C). Test temperature with oven thermometer for perfectly cured clay. For best results, condition all clay by running it through the Clay Conditioning Machine for several passes on the widest setting. Fold the clay in half after each pass and insert the fold side into the rollers first.
Sheet out your conditioned clay on the widest setting on the Sculpey Clay Conditioning Machine. Now cut your clay with your cookie cutters or if it is an easy form just with your blade, like the rectangle I did.

Use the small Kemper cutter to make holes in your tags. If you have a long tag you might want to make two holes!

Now place you tags on a tile, if you want to have then flat. That way they do not need to be moved any more and they don’t get distorted!

If you want to have a curved shape for your tag place it on a small bowl or an empty soda can. You might want to do that for tags to hang on bottles or carafes, when they are finished. Press them gently to the bowl so they stay put!

Use your smallest Style and Detail tool (or ball stylus) to make a line around the edge of the tag shapes. If you like you can interrupt them or even add little doodle shapes!

Now use your stamp set and print the message you would like to have on your tags. Just press them gently in the fresh clay. If you want to make it easier to get the letters in a straight line you can temporarily glue the stamps for one word together with removable artist or washi tape. Most stamp sets have little symbols as well. Of course you can also use those!


Bake the completed stamps according to the directions in Step 1.
Let your tags cool completely before you move to the next step! Now you will need the white acrylic paint, a small brush , some water and some kitchen paper.

Add a little bit of white paint to your work surface. You do not need very much! Thin it a little with water if it is too thick for your liking and apply it all over the surface of your tag. Make sure the paint gets deep into the places where you stamped the letters and in the line of the frame! Let it sit for a little bit, but wipe all the paint off before it dries completely! Don’t go in the indentations! You still want the paint to be in there.

The paint will not be whipped off completely, but that is exactly what makes the faux chalk board effect! When you are happy with the result, let the paint dry completely. Add some ribbon or twine to your tags and use them to decorate your jam, tokens or summer drinks.


