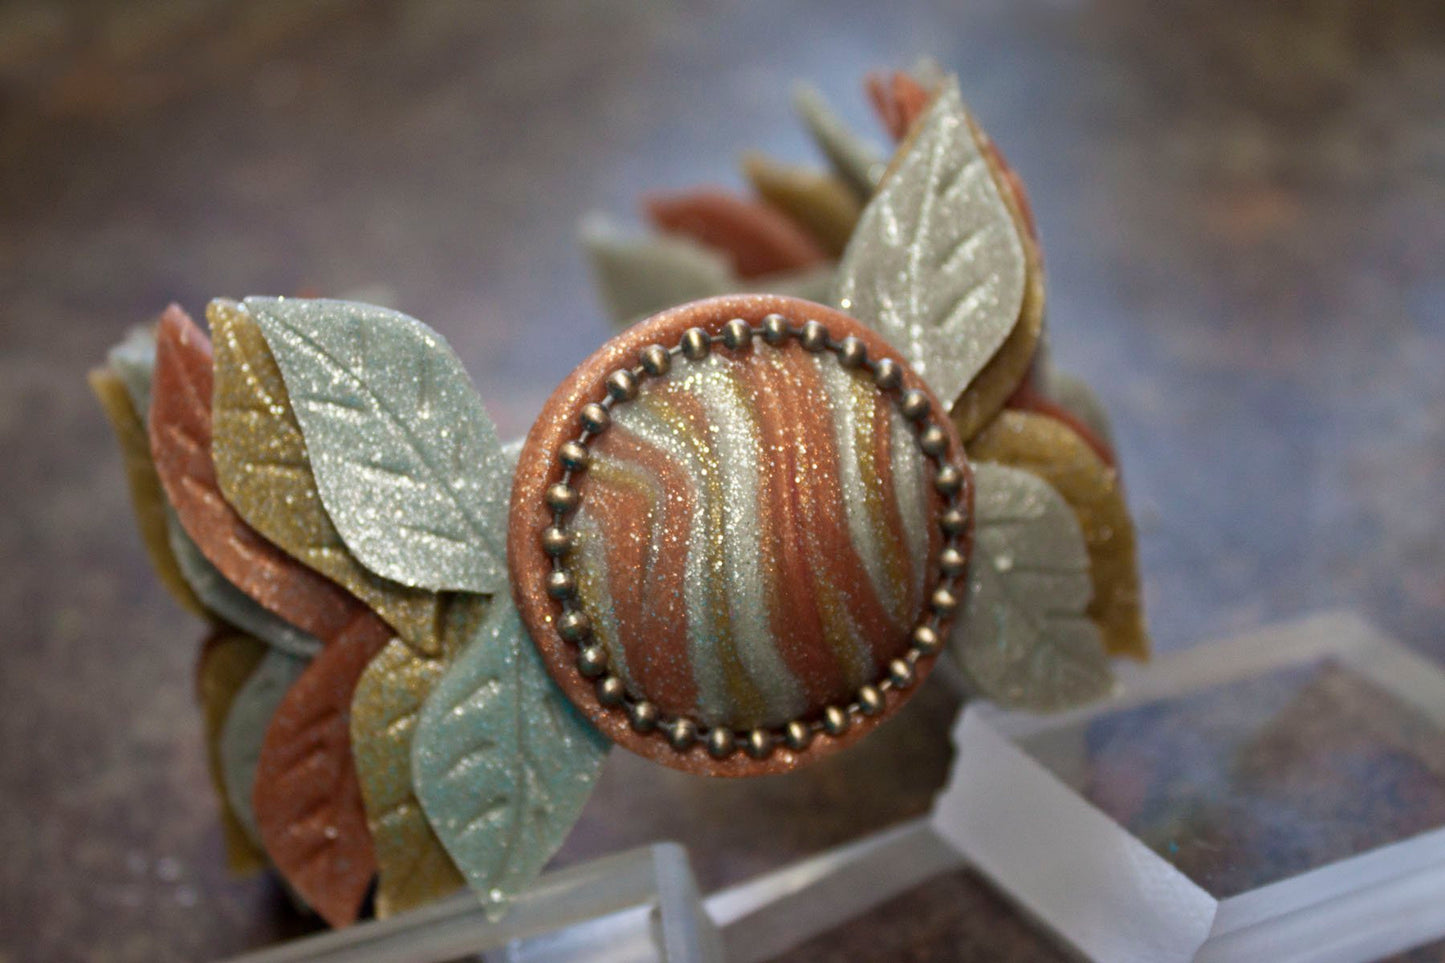
premo! Dramatic Leaf Cuff Bracelet
premo! Dramatic Leaf Cuff Bracelet
Read More
This bracelet echoes the Roman era with its metallic leaf motif. Break out the toga and sandals!
Read Less
ADDITIONAL SUPPLIES
Clear fast-drying glue
Craft knife
Small ceramic tile
Small spray bottle of water
Jewelry wire cutters
Bake-able coffee cup
Small amount of ball chain, any color metal|Clear fast-drying glue
Craft knife
Small ceramic tile
Small spray bottle of water
Jewelry wire cutters
Bake-able coffee cup
Small amount of ball chain, any color metal

Project Instructions
Getting StartedPolymer clay may stain. CLAY MAY DAMAGE UNPROTECTED FURNITURE OR FINISHED SURFACES. DO NOT USE polymer clay on unprotected surfaces. We recommend working on the Sculpey clay mat, wax paper, metal baking sheet, or disposable foil. Start with clean hands and work surface area. Knead clay until soft and smooth. For best results, clean your hands in between colors. Shape clay, pressing pieces together firmly. Bake on oven-proof glass or metal surface at 275°F (130 °C) for 30 minutes per ¼" (6 mm) thickness. For best baking results, use an oven thermometer. DO NOT USE MICROWAVE OVEN. DO NOT EXCEED THE ABOVE TEMPERATURE OR RECOMMENDED BAKING TIME. Wash hands after use. Baking should be completed by an adult.Begin by preheating oven to 275 °F (130 °C). Test temperature with oven thermometer for perfectly cured clay. For best results, condition all clay by running it through the Clay Conditioning Machine for several passes on the widest setting. Fold the clay in half after each pass and insert the fold side into the rollers first.
Roll out a small portion of the Premo! Accents Yellow Gold Glitter clay on the #2 setting on the Clay Conditioning Machine. Place the sheet of clay on the ceramic tile and using the Sculpey Design Template – leaf shape and the craft knife, trace around the leaf template. Repeat 16 times.

Use the side of the medium Etch n’ Pearl tool to draw in the veins on each leaf. Repeat Steps 1 and 2 with the White Gold Glitter and Rose Gold Glitter clay. Set all the leaves aside.

Make small snakes of each color about 3 inches long. Twist the colors together. Roll into a ball and twist again.

Pinch about half of the clay off and roll into a ball shape. Lightly spray the large round cabochon mold with water (wipe any water from the upper surfaces of the mold around the intended mold). Press the ball of clay into the mold and trim off the excess clay with the Super Slicer. Pop the clay out of the mold.

Roll a small amount of Red Gold Glitter out on the #1 setting on the Clay Conditioning Machine and use a circle cutter to cut out a circle of clay that is closest in size to the selected bezel mold. Spray the mold lightly with water and press this circle of clay firmly into the mold. Gently remove the clay from bezel.

Place the cabochon into the bezel and lay the ball chain around the edge of the cabochon, trim to size with the wire cutters. Press gently into place.

Roll out a sheet of the White Gold Glitter clay out on the #1 setting to create a long sheet of clay at least 7 inches long and place on a sheet of clean paper. Place the edge of the cuff blank on the left side and trim to the blank.

Slowly roll the blank to the right and the clay will wrap around the bracelet blank. Trim the right edge to the bracelet blank. Use the Super Slicer to slide along the edge of the cuff blank and trim the clay to the blank on both sides.

Repeat Steps 7 and 8 to add a second layer to the cuff blank.

Add the leaves to the bracelet, starting at one end and overlapping each pair of leaves. We used 10 pairs of leaves on each side of the cuff.

Repeat on the other side. There should just be enough room to mount the cabochon/bezel in the center of the bracelet. Put a small amount of Bake n’ Bond between the cabochon and the cuff to hold it securely.

Hang the completed bracelet from the edge of the bakeable coffee cup and bake according to the directions above and allow to completely cool. Once the bracelet has baked and cooled, just pop the clay off of the bracelet blank. Add a couple of drops of clear fast-drying glue to anchor the ball chain and you are done!

