Getting StartedPolymer clay may stain. CLAY MAY DAMAGE UNPROTECTED FURNITURE OR FINISHED SURFACES. DO NOT USE polymer clay on unprotected surfaces. We recommend working on the Sculpey clay mat, wax paper, metal baking sheet, or disposable foil. Start with clean hands and work surface area. Knead clay until soft and smooth. For best results, clean your hands in between colors. Shape clay, pressing pieces together firmly. Bake on oven-proof glass or metal surface at 275°F (130 °C) for 30 minutes per ¼" (6 mm) thickness. For best baking results, use an oven thermometer. DO NOT USE MICROWAVE OVEN. DO NOT EXCEED THE ABOVE TEMPERATURE OR RECOMMENDED BAKING TIME. Wash hands after use. Baking should be completed by an adult.Begin by preheating oven to 275 °F (130 °C). Test temperature with oven thermometer for perfectly cured clay. For best results, condition all clay by running it through the Clay Conditioning Machine for several passes on the widest setting. Fold the clay in half after each pass and insert the fold side into the rollers first.
Sheet out a piece of White Premo! clay about 7cm x 7cm (2.75 square) on the #4 setting on the Clay Conditioning Machine. Cut out 4 circles with a 3 cm (1-1/4 inch) round circle cutter.
Take a polystyrene ball and cover it with 1 circle under and 1 on top of it. Use your fingers to close the sides and roll the ball between your hands.
Pierce the ball with a needle. Mark the clay on one side with a round 0.9mm circle cutter and the other with an eyelet (inside hole of 5mm) . Place in an oven for 40 minutes at 100°C/212°F with a support so that the pearls are not squashed. (NOTE: These are the artist's baking directions)
After cooking, remove both seals as well as the polystyrene on the inside of the ball with the help of a large needle
To remove all finger prints, sandpaper the balls with different grades 120, 500, 800, 1000, 1500, 2000. This step is essential as if the ball is not perfectly smooth, the ink from the felt pens will diffuse.
Place the balls on carpenter’s nails to make working on them easier.Decorate them with alcohol based felt tip pens. You can then outline them with a black pen. Once decorated, bake again for 20 minutes at 100°C/212°F to fix the color.
Once the balls have cooled down, buff them gently with DREMEL.
Using a 1.2 cm (1/2 inch) circle cutter, cut out 2 black circles. Next give them texture with a foam. Place them above the ball and pierce them with a large needle. Cook them for 20 minutes a 100°C/212°F.
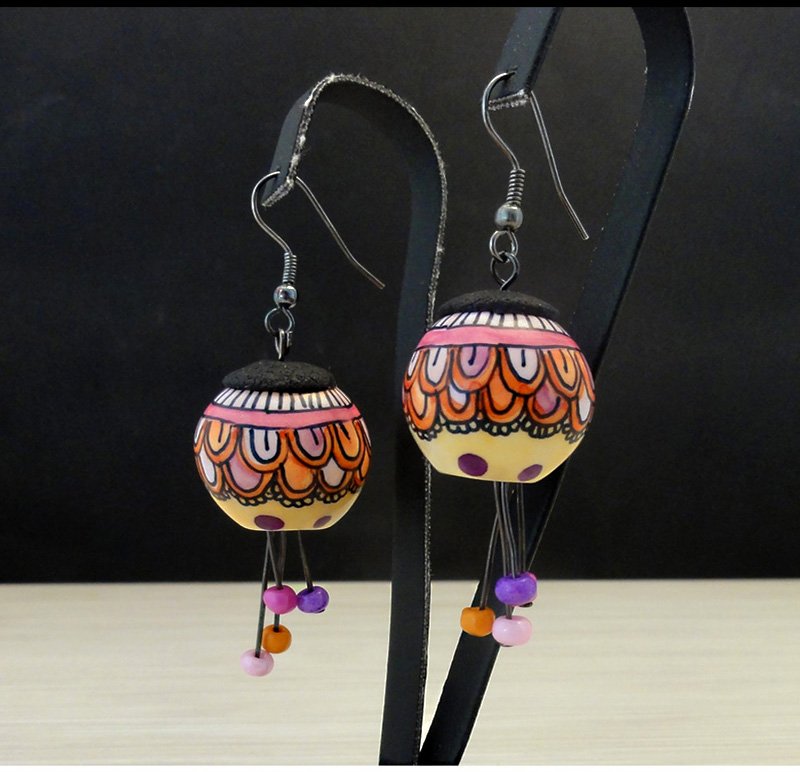
To assemble, take the 8 flat headed nails (headpins), 2 round headed nails (eyepins), 2 7mm rings, 2 earring mounts and 8 beads.
Thread a bead on a flat headed nail and then bend the end of stem with special pliers or round ended pliers.Repeat this 8 times. Each nail should be of a differing length. Attach the stems to a 7mm (3/8 inch) ring and attach to round headed nail.
Thread the round headed nail (eyepin) through the clay ball. Form a loop in the wire at the top of the earring. Next insert the earring mount and close up the links using a pair of round headed pliers.The earrings are finished!


