Pearling
Pearling
Read More
Read Less
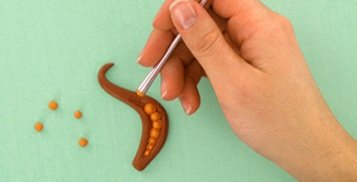
Etch 'n Pearl tools make beautiful little pearl shaped designs that sit nicely on the surface of a project. Pearls can be easily created anywhere on the surface of your project.
ADDITIONAL SUPPLIES

Project Instructions
Use the Ball Tool from the Clay Tool Variety Set or one of the Ball Ends from the Dual End Tool Set to make a recessed area where you would like to place a pearl. Depending on what size pearls you desire, use a ball tool that corresponds to the size of the pearl. For example, for small pearls, use the smallest Etch 'n Pearl and the 6mm Ball Dual End Tool.
Make balls that are about the same size as the end of the Etch 'n Pearl Tool. Set a ball in each recessed area. Seat the pearl in place by gently pushing straight down over it with the Etch 'n Pearl Tool.
For extra hold or when placing pearls on a flat surface, spread a small amount of Bake 'n Bond in the desired area and cover with pearls.
Use the Ball Tool from the Clay Tool Variety Set or one of the Ball Ends from the Dual End Tool Set to make a recessed area where you would like to place a pearl. Depending on what size pearls you desire, use a ball tool that corresponds to the size of the pearl. For example, for small pearls, use the smallest Etch 'n Pearl and the 6mm Ball Style & Detail Tool.
Make balls that are about the same size as the end of the Etch 'n Pearl Tool. Set a ball in each recessed area. Seat the pearl in place by gently pushing straight down over it with the Etch 'n Pearl Tool.
For extra hold or when placing pearls on a flat surface, spread a small amount of Bake 'n Bond in the desired area and cover with pearls.

