

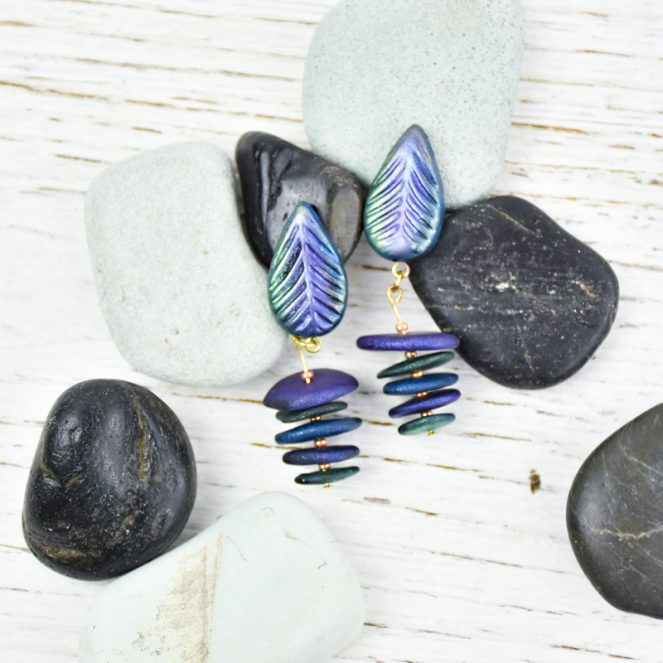
Model Air® Porcelain Peacock Inspired Drop Earrings
Model Air® Porcelain Peacock Inspired Drop Earrings
Designedby Linda Hollander
Read More
Read Less
Sculpey Air-Dry™ Porcelain is a great no-bake alternative for creating these Peacock-inspired Drop Earrings.
TIME TO COMPLETION: 30 minutes plus drying time.
ADDITIONAL SUPPLIES
Jewelry findings:
• Two each: Jump rings, earring posts, eye pins, head pins
• 10 small gold beads of choice (spacers)
Tools:
• 2 pair needle nosed pliers, 1-Step Looper (optional)
• Black acrylic paint
• Corn starch or baby powder
• Paint brush
• Super glue
• Plastic food wrap
• Hard smooth surface to roll out clay
• Jacquard Pearl Ex Powders: Sapphire Blue, Emerald, Reflex Violet or mica powders of choice
Project Instructions
- Getting Started:
Start with clean hands, unwrap and knead clay until soft and smooth. Wash hands after use. Wrap any extra clay in then wrapper and then put in an air tight container.
Tear off a piece of clay and roll into a golf ball sized ball. Flatten the ball and add a nickel sized puddle of black paint. Fold the clay over and over until the paint is mixed with the clay well. Add more paint as needed. Divide clay in half. Cover unused clay with plastic wrap to keep it from drying out.

2. Roll a sheet of clay approximately 3/16” in thickness. Choose an interesting design on the texture sheet and use the paint brush to dust cornstarch on the area. The cornstarch will act as a releasing agent to avoid the clay from sticking to the folder. Lay the sheet of clay on the texture sheet then place upside down on a hard surface. Use the roller and firm pressure to impress the clay. Gently remove the clay.

Lay plastic wrap over area of clay to be cut. Use the cutter to cut two teardrop shapes. The plastic wrap will bevel the edges of your cut clay. Use light finger pressure to smooth the edges. Use the pliers to cut two eye pins to about 1” in length. Put a tiny drop of glue on the cut end and carefully insert into small end of the teardrop. Use the paintbrush or your fingertip to apply a small amount of mica powder to the raised areas of the wet clay. Reflex Violet was used in the center of each teardrop, Emerald was used on one side and Sapphire on the other.

Form two each: graduated sized irregular discs form remaining clay. Use the mica powders to color both sides of the discs. Use the needle tool to make a hole in the center of each disc. Turn each disc over and reinsert needle tool to make the neaten the holes

To dry clay, place a sheet of scrap paper on a smooth, flat surface. Flip clay shapes over during the drying process to speed drying time.
6. Gather your jewelry finding, beads, and tools. For the dangle part: slide the smallest disc onto head pin. Place a spacer bead on next, then the next largest disc. Repeat until all five discs are loaded onto the head pin. Use the 1 -Step Looper to form a loop at the other end of the head pin. If you do not have this tool use the pliers to trim the eye pin down and make the loop with the pliers. Repeat with remaining discs to form the other dangle.

Glue the earring posts to the back of the tear drop shapes. Let dry. Use both pliers to open and close jump rings. Use the jump rings to connect the dangle and the teardrop parts.
