

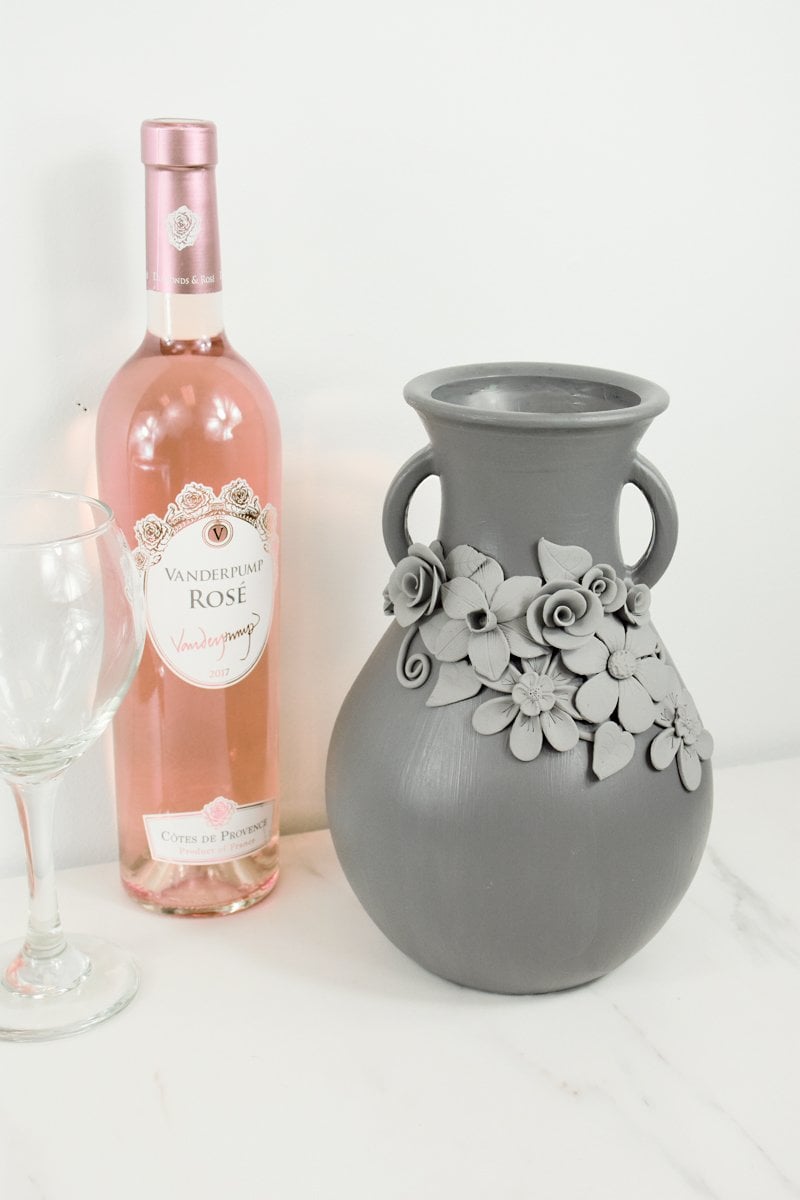
Original Sculpey® Gray Floral Vase
Original Sculpey® Gray Floral Vase
Designed by Syndee Holt
Read More
“You MADE that?!!?” My friends (who all know that this is what I do professionally, right?) have all been shocked when they have seen this vase. I am NOT a sculptor by ANY stretch of the imagination, but, yet, I created this piece! All with the help of the Sculpey flower mold.
Read Less
ADDITIONAL SUPPLIES
- Glass vase
Project Instructions
- Getting Started:
Start with clean hands, unwrap and knead clay until soft and smooth, or condition by running clay though a Pasta Machine. We recommend using a designated machine for clay purposes only. When working with multiple colors, clean hands with soap and water or baby wipes (we have found that baby wipes work best) before switching colors. Shape clay, pressing pieces firmly together. Wash hands after use.
- Baking:
To Make the Daffodil:Sheet out a portion of the conditioned Sculpey Original Grey on the #3 (or middle) setting on your Clay Conditioning Machine. Use the oval (or circle) cutter that most closely fits the shape of the petal. Lightly spray the mold with water and then firmly press the clay into the mold. Use the Super Slicer to trim away the excess clay, slicing from the center out to each end of the petal.


Make 6 leaves in the shape above. Position 3 of the petals for the bottom layer and then add the other 3 petals on top as shown.

Lightly spray the center of the flower shape with water and use a small snake of the clay to create the center.Wrap the completed part gently around the largest Etch n’ Pearl (using the flared shape of the tool) and press together.I added a small ball of clay in the center of the petals and pressed the center gently over the ball of clay to help anchor it. I pressed the small Style n’ Detail tool into the ball to add a more realistic look. Set the flower aside.


To create the layered flower:Make 6 of the long curved petals and one of the small daisy-type flowers. I used a tear drop cutter for the longer petals and a small circle cutter for the daisy to get the basic shape for the molds. I used a toothpick to add texture to the petals and the small daisy flower. Gently press the daisy-type flower onto the center of the petals. I used the rubber chisel tip on the medium Style n’ Detail tool to add more texture to the petals. Set aside the completed flower. Make more of this flower if you wish!


To Make the Roses:Sheet out some of the conditioned clay on the #4 (thinner) setting. Use the circle cutter closest to size for the rose petal. Remember to lightly spray the mold with water! Make at least 7 petals.Firmly pinch the outside edge of each petal to make it thinner. Your fingerprint just adds to the texture of the petal! Roll a petal into a coil as shown for the center of the rose.


Continue to add your petals around the edge, using your finger to lightly press the outside edge of each petal into a gentle curve. Carefully lay the rose down on your worksurface and trim the back edge to remove excess clay and create a flat surface to attach the flowers to the vase.Set aside and make as many more as you like!


Now I decided to get a little creative! I made 6 of the daisy type petals and placed them around a small thin circle of clay. Add a small ball of clay to the center to cover any spaces left. Use the smallest Style n’ Detail tool to texture the ball to mimic the center of a flower.


Roll out a small piece of the conditioned clay on the widest setting and use the smallest and next largest circle cutter to cut out a ring of clay. Gently lift your flower with the Super Slicer and position it over the ring so that the center of the flower is in the center of the ring. Press the flower gently down. The ring will add a curve to the petals.


If you haven’t already, paint the vase with the chalk paint. It may take several coats! Once the paint is thoroughly dry. Add the snake of clay to the front of the vase, coiling the ends. Add your flowers, using the glue to put them permanently in place once you are satisfied with the design.
Make as many flowers and leaves as you wish! I also rolled out a long thin snake of clay to use as a branch type structure that would help me flow my design. You can use small dots of Bake n' Bond to help keep your flowers anchored in your arraignment. Bake the vase according to the directions in step 1
