

Original Sculpey® Granite Office Supply Holder
Original Sculpey® Granite Office Supply Holder
Designed by Phoebe Doehring
Read More
Read Less
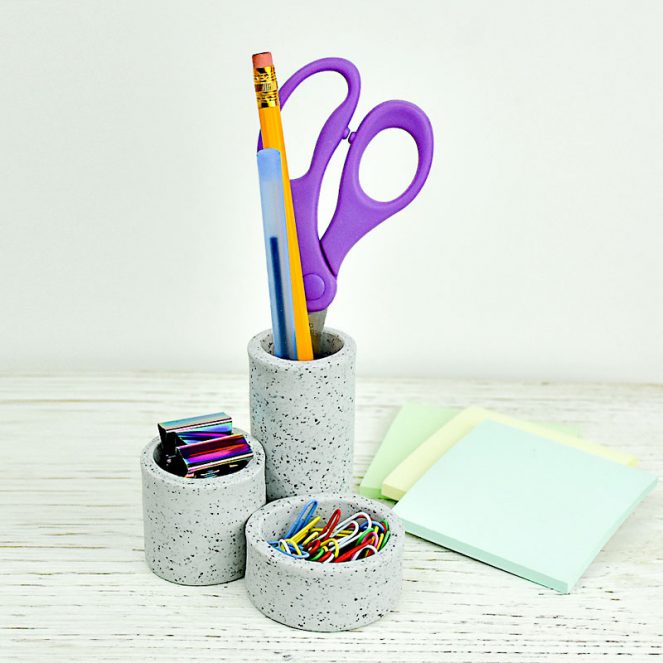
Make a stylish and functional piece to help you organize your home or office.
TIME TO COMPLETE: 30 minutes plus baking time
ADDITIONAL SUPPLIES
Make a stylish and functional piece to help you organize your home or office.
TIME TO COMPLETE:
30 minutes plus baking time
Project Instructions
- Getting Started:
Start with clean hands, unwrap and knead clay until soft and smooth, or condition by running clay though a Pasta Machine. We recommend using a designated machine for clay purposes only. When working with multiple colors, clean hands with soap and water or baby wipes (we have found that baby wipes work best) before switching colors. Shape clay, pressing pieces firmly together. Wash hands after use.
- Baking:
Roll a ball of Granite clay approximately 2 to 3” in diameter. Flatten slightly and shape into a rough rectangle. Use your acrylic roller and roll out a slap of clay that is ¼” thick. Cut a sheet of clay that is roughly 4” long and 3 ½” wide. Roll this sheet into a tube/cylinder shape that is 4” tall pressing the ends together. Use your fingers to smooth and marry the seams together both inside and out.


Roll a quarter sized ball of Granite clay into a sheet approximately 1/8” thick. Use your 1 ½” circle cutter and cut out a circle shape. Attach this to the base of your tube and smooth all exterior seams. You may have to stretch and pull your circle a little bit so it fits well on the bottom. Set this cylinder aside.


Roll another ball of Granite clay that is approximately 2 to 3” in diameter. Using your roller roll this into a sheet of clay that is 1/4” thick. Cut out a sheet of clay that is 5” long and 2 1/4” deep. Roll this into a tube shape as you did before and smooth the seams inside and out.


Roll a ball of Granite clay into a sheet that is approximately 1/8” thick. Use your 1 3/4 “ circle cutter and cut out a circle shape. Once again press this onto the base of your tube shape stretching it a bit if need be. Smooth all exterior seams. Set aside

Repeat the same process for the last tube/cylinder shape. This time cut a sheet that is 6” long by 1” deep. Roll into a tube shape. Smooth seams.

Roll another 1/8” sheet of clay. Use your 2” circle cutter and cut out the base for this last one. Stretch and attach at the bottom. Smooth exterior seams.

Arrange the pencil holder with the tallest tube in the back, second tallest slightly to the left and the shallow tube in the front. Before pressing the tubes together use some Oven Bake Clay Adhesive wherever you are going to press pieces together so they will hold better. Once you have applied the Oven Bake Clay Adhesive press the tubes together firmly.

Bake according to package directions. Allow to cool completely. Sand your piece with 400 grit Wet/Dry sand paper if desired. (optional)