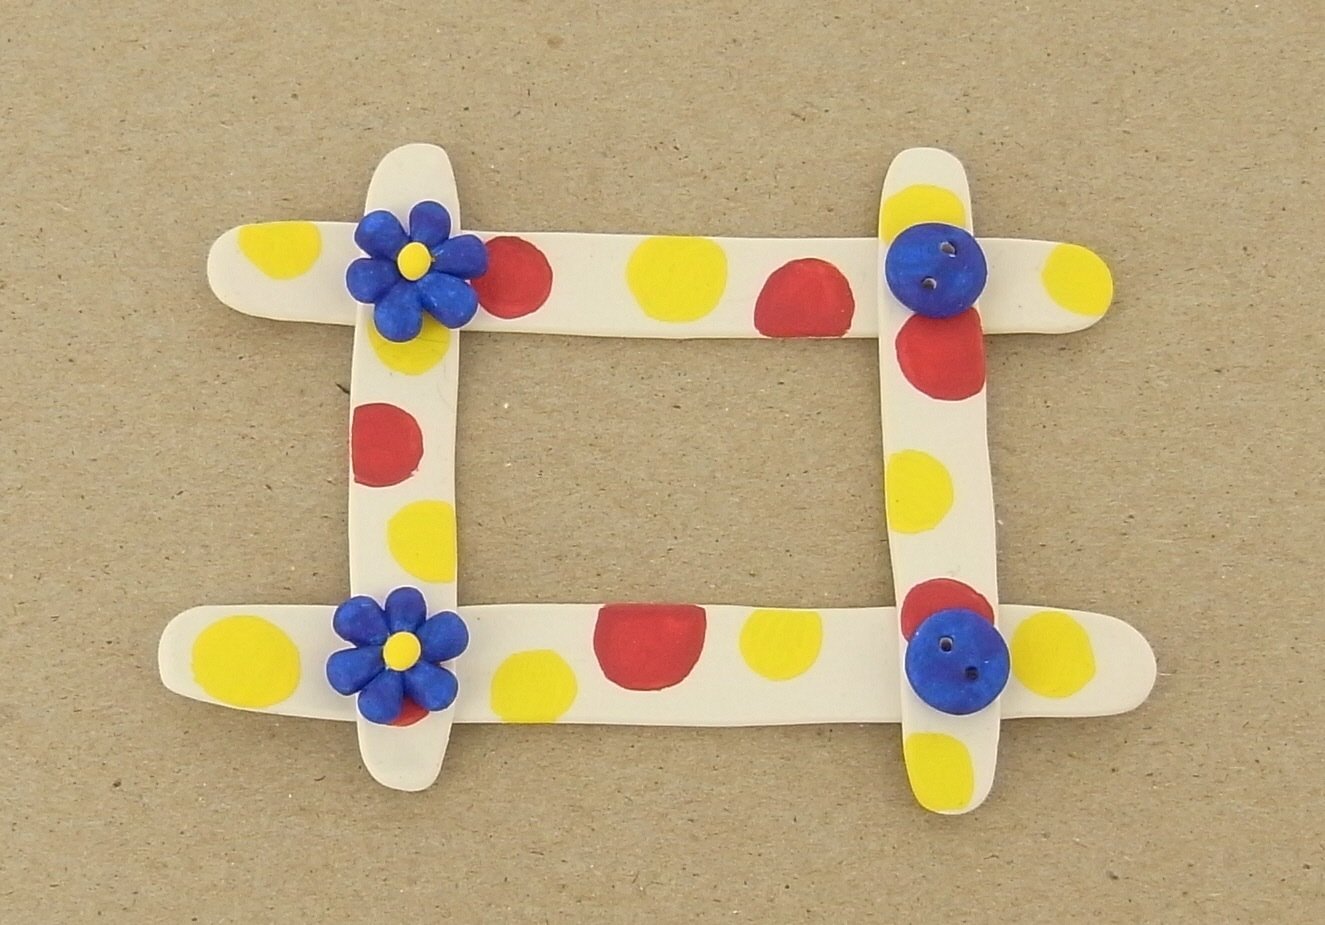
Original Sculpey Frame
Original Sculpey Frame
Read More
Are you a newbie to clay? This is a great project for any beginner and also can be taught to children.
Read Less
ADDITIONAL SUPPLIES
Acryllic paints: you can choose your own. We used red, blue and yellow.|Acryllic paints: you can choose your own. We used red, blue and yellow.

Project Instructions
Getting Started
Polymer clay may stain. CLAY MAY DAMAGE UNPROTECTED FURNITURE OR FINISHED SURFACES. DO NOT USE polymer clay on unprotected surfaces. We recommend working on the Sculpey clay mat, wax paper, metal baking sheet, or disposable foil. Start with clean hands and work surface area. Knead clay until soft and smooth. For best results, clean your hands in between colors. Shape clay, pressing pieces together firmly. Bake on oven-proof glass or metal surface at 275°F (130 °C) for 15 minutes per ¼" (6 mm) thickness. For best baking results, use an oven thermometer. DO NOT USE MICROWAVE OVEN. DO NOT EXCEED THE ABOVE TEMPERATURE OR RECOMMENDED BAKING TIME. Wash hands after use. Baking should be completed by an adult. Begin by preheating oven to 275 °F (130 °C). Test temperature with oven thermometer for perfectly cured clay. For best results, condition all clay by running it through the Clay Conditioning Machine for several passes on the widest setting. Fold the clay in half after each pass and insert the fold side into the rollers first.
Polymer clay may stain. CLAY MAY DAMAGE UNPROTECTED FURNITURE OR FINISHED SURFACES. DO NOT USE polymer clay on unprotected surfaces. We recommend working on the Sculpey clay mat, wax paper, metal baking sheet, or disposable foil. Start with clean hands and work surface area. Knead clay until soft and smooth. For best results, clean your hands in between colors. Shape clay, pressing pieces together firmly. Bake on oven-proof glass or metal surface at 275°F (130 °C) for 15 minutes per ¼" (6 mm) thickness. For best baking results, use an oven thermometer. DO NOT USE MICROWAVE OVEN. DO NOT EXCEED THE ABOVE TEMPERATURE OR RECOMMENDED BAKING TIME. Wash hands after use. Baking should be completed by an adult. Begin by preheating oven to 275 °F (130 °C). Test temperature with oven thermometer for perfectly cured clay. For best results, condition all clay by running it through the Clay Conditioning Machine for several passes on the widest setting. Fold the clay in half after each pass and insert the fold side into the rollers first.
All measurements are taken from 1 oz of clay.
White: Take ½ and cut into half. Make two balls. Take ¼ of one of them and add to the other. Make two balls and divide each into half, to have four parts. Shape into four logs and roll out to have two 1 ½ inch and two 2 inch strips of clay. Take 1/64 and shape into two round discs for the buttons. Press holes into them. Take 1/32 and make two very small balls for the center of the flower and twelve drop shapes for the flowers.
White: Take ½ and cut into half. Make two balls. Take ¼ of one of them and add to the other. Make two balls and divide each into half, to have four parts. Shape into four logs and roll out to have two 1 ½ inch and two 2 inch strips of clay. Take 1/64 and shape into two round discs for the buttons. Press holes into them. Take 1/32 and make two very small balls for the center of the flower and twelve drop shapes for the flowers.


Assemble: Lay shorter strips over the longer ones. Assemble flowers, by pressing six drops together and adding one ball to the middle. Bake all according to manufacturers' directions, paint and glue the buttons and flowers to the frame.

